Exploring Marine Science and Aquaculture
 The Exploring Marine Science and Aquaculture toolkit, developed in partnership with Maine EPSCoR, is based on the National Science Foundation supported SEANET (Sustainable Ecological Aquaculture Network) program. The activities are designed for youth ages 5-8. The 12 activities are intended to be an introduction to marine science and the concept of aquaculture. Activities include basic concepts such as animal structure and how that affects movement, and food chains/food webs. NGSS standards are included for each activity.
Are you interested in learning more about what the University of Maine and UMaine system campuses offer?
The University of Maine offers over 100 academic majors! To learn more either:
Visit UMaine’s Find a Major.
Explore our other campuses here.
If you need help connecting to UMaine or one of the other UMaine System campuses, contact us by email or call (207) 581-3877 and ask for Laura, Greg, or Sarah!
- Curriculum Activities
- Activity 1: Creature Feature
- Activity 2: Sea Animal Movement
- Activity 3: Living vs. Nonliving
- Activity 4: Ocean Zones
- Activity 5: Maine Tide Pools
- Activity 6: Crab Soccer
- Activity 7: Fish Printing
- Activity 8: Food Chains
- Activity 9: Sharks and Minnows
- Activity 10: Fish on a Farm
- Activity 11: Animal Scat
- Activity 12: Parasite Web of Life
Video: Farming the Sea
Curriculum Activities
Activity 1: Creature Feature
Learning Targets:
- Become familiar with common marine organisms
- Practice using observation skills
Essential Questions:
- What are some animals that live in the sea?
- What do animals need to survive in the ocean?
Enduring Understandings:
- Animals that live in the sea include fish, lobster, turtles, whales, and others.
- Ocean animals have different features than animals on land.
NGSS Standards:
- LS4.D Biodiversity: There are many different kinds of living things in any area, and they exist in different places on land and in water.
- LS3.A Organisms have characteristics that can be similar or different.
- LS3.B Individuals of the same kind are recognizable as similar but can also vary in ways.
- Practices: Analyzing and Interpreting Data — record observations and share with others 8. Obtaining, Evaluating, and Communicating Information — careful descriptions of observations
- Concepts: Structure and Function
Background for Facilitator:
This activity serves as an introduction to some basic marine life, especially for youth who have never visited the ocean or who have not yet been introduced to the organisms that live in the marine environment. A key is included for your reference.
Vocabulary List:
- Adaptation: a change in a plant or animal that makes it better able to live in a particular place or situation.
- Marine: of or relating to the sea or the plants and animals that live in the sea.
Materials:
- whiteboard or newsprint
- ocean life objects
- ocean life photos
- colored pencils
- scrap paper
- ocean life sorting sheet
Methods:
Engage
- Begin by accessing the youth’s prior knowledge:
- Has anyone visited the ocean before?
- What was it like?
- What type of plants or animals did you notice at the shore? In the water?
- Brainstorm initial thoughts and ideas by making a KWL Chart (What we Know, What we Wonder about, What we Learned).
Explore
- Place youth in cooperative learning groups of 3-4. Explain that they will be meeting some creatures from the ocean during this activity!
- Distribute the ocean objects and photos to each group.
- Prompt the groups to use their hand lens to observe each creature and then draw at least one creature (including all of its features) on a piece of paper.
- Ask the youth: “Can you name this creature? If not, try to give it a name based on its characteristics (i.e. pinchy, slimy, etc).”
Explain
- When everyone is finished drawing, bring the group back together for a discussion.
- Have each artist share their creature with the group. Encourage the youth to discuss what letter the creature’s name begins with (i.e. Crab begins with “C”)
- What are the features of your creature?
- What do you think they are used for? (what is their function?)
- Help the youth identify the creatures and where in the ocean we might find them.
Elaborate
- Divide the youth into cooperative learning groups of at least 6 participants. Make sure they bring their creatures with them.
- Encourage youth to work as a group to sort the creatures using the Ocean Life Sorting Sheet.
- Work together to sort your ocean animals into 2 groups.
- Be ready to explain how you sorted them.
- Bring the group back together and have the youth share the reasons why they sorted the photos and objects the way they did.
Evaluate
- Facilitate a discussion about these activities:
- Has anyone ever seen any of these creatures in real life?
- Do any of these creatures remind you of another animal? Or movie character?
- Which was your favorite creature and why?
- Why do you think animals in the ocean look different from animals on land?
- What do animals need to survive in the ocean?
Extension Ideas:
- Play a game called “Which of These Things is Not Like the Others”? This is similar to the card sort, but the facilitator can build in additional levels of deeper thinking. For example, ask the youth “Which of these things is not like the others?” and give them photos of a lobster, crab, and fish. The answer is fish because lobsters and crabs have legs, but fish do not. The youth can even come up with their own sets to challenge each other.
- Practice writing skills by asking youth to write a description of what their creature looks like. This activity could turn into a class book.
Additional Resources:
- About Habitats: Oceans by Cathryn Sill (NSTA outstanding science book for 2013).
- Pratt, K.J. 1994. A Swim Through the Sea. Nevada City, CA: Dawn Publications.
- Pulley Sayre, A. and J. 2006. One is a Snail, Ten is a Crab: A counting Feet Book. Cambridge, MA: Candlewick Press.
- Slideshare of above: One Is a Snail, Ten Is a Crab: A Counting by Feet Book Online (SlideShare website)
- Ocean Counting by Janet Lawler for early primary; NSTA outstanding trade book 2014.
Activity 2: Sea Animal Movement
Learning Targets:
- Model sea animals through body movement.
- Describe how sea animals move and brainstorm why an animal moves the way that it does.
Essential Questions:
- How do land animals move as compared to sea animals? Why?
- What adaptations do sea creatures have that allow them to move in the ocean?
Enduring Understandings:
- Land and sea animals move differently because of the environment they live in.
- Sea creatures have parts like fins and tails, tentacles with suction cups, claws, multiple legs.
NGSS Standards:
- LS1.A Structure and Function All organisms have external parts. Animals use their body parts to move from place to place.
- LS4.C Adaptation to a water environment has influenced the way sea creatures move.
- Concepts: Structure and Function Creature movement depends on body structures.
Background for Facilitator:
Animals living in the sea move in very different ways than animals on land or in the air. The ocean environment provides a unique set of demands on these creatures, and they have developed different adaptations in order to survive. This activity introduces youth to some of the sea animals and their movements by utilizing gross motor skills through a stretching activity.
Vocabulary List:
- Adaptation: a change in a plant or animal that makes it better able to live in a particular place or situation.
Materials:
- Sea Movement cards
- colored pencils, crayons
- scrap paper/newsprint
Methods:
Engage
- Introduce the activity, and access the youth’s prior knowledge:
- How many different ways can we move our bodies? (Give all of the participants an opportunity to demonstrate how our bodies can move.)
- What about animals? Can animals move their bodies in the same ways that we can move ours? Why can’t they?
- Can we move our bodies like animals move their bodies? Is this true for all animals?
- How do you know?
- Today, we are going to explore some of the ways that sea animals’ bodies are shaped and how they move through an activity involving movement and stretching.
Explore
- Begin by asking all of the youth to spread out to find their personal space. A good way to do this is to hold hands, standing in a circle, let go, and take three giant steps backward.
- Next, tell them that you are going to use flashcards to show them the movements. Flip the top card off the deck, show it to your audience, and then model the move for them.
- While the card is being shown, ask questions and encourage youth to make observations about how the animals move and characteristics that the animals have that we don’t.
- Each move should be demonstrated for approximately 10 seconds.
- If you have a participant who is physically unable to do the moves, assign a buddy who will demonstrate for them. The person not doing the pose can try to guess which animal is being modeled, similar to charades. Behavioral expectations/rules:
- Please stay in your own space while we are doing this activity.
- Some of these poses are challenging, so it is okay if we don’t all get them right the first time.
Explain
- Facilitate a discussion about the movements:
- Which animal was most challenging to model? Why?
- Which animal was the easiest to model? Why?
- Why do you think sea animals move differently than land animals? (because they live in the ocean)
- We have arms and legs. What do sea creatures have? How do these adaptations work better in the ocean?
- We have arms and hands. What do crabs have? How do these adaptations work?
Elaborate
- After they have done all of the moves on the cards, ask the youth what their favorites are and repeat them. They can do a “fist to 5” to indicate their favorite (the number 1 (one) being least favorite, the number 5 (five) being the most favorite), as you review the cards.
- When completed, they should discuss how it felt to move their body like sea creatures. For those who were unable to participate in the movements, they can describe what it looked like when others were moving their bodies.
- Are any of these features unique to the animals living in water?
Evaluate
- Ask the youth to return to their seats/desk.
- Distribute colored pencils and scrap paper while you prompt the youth to think of an imaginary sea creature superhero.
- Imagine a sea creature that magically becomes a superhero.
- Draw a picture of what this superhero looks like, and be prepared to tell us about all of its body features and how it moves.
- Ask for a few volunteers to describe their superhero while they show their drawing.
- Next, ask them to think more deeply about their superhero:
- Pretend that your superhero is called upon to help save the day but on land instead of the sea!
- How will your superhero get from place to place on dry land?
- What special things might your superhero need to survive on land?
- Direct younger participants to continue to draw a picture as they think about the scenario. Older youth can write stories about their creations (for example, a giant octopus uses its suction cups on its legs to attach from one city building to another).
- If youth are creating stories, be sure to emphasize the differences between fiction and nonfiction, and the role of science in both.
- As time allows, ask the youth to share their creations with the rest of the group.
Extension Ideas:
- These stretches can also be used as a great start to any of the lessons in this toolkit.
- Discuss Life Cycle Adaptations: A frog starts as a tadpole in water. What does it need to move in water? What change does a tadpole make to become a frog? How is it now adapted to move on land?
- For older youth: There is a fish called the mudskipper that has an amazing adaptation; the ability to walk on land by wiggling and using its strong pectoral fins. Watch this National Geographic video (2:06 minutes).
Activity 3: Living vs. Nonliving
Learning Targets:
- Identify living and nonliving things.
Essential Questions:
- What is an environment?
- What is a habitat?
- What is in a habitat?
- What makes something a living thing?
Enduring Understandings:
- Your environment is everything that is all around you.
- A habitat is your home in that environment.
- There are living and nonliving things in a habitat.
- A living thing eats, breathes, grows, moves on its own, reproduces, excretes wastes.
NGSS Standards:
- LS2.A Organisms interact with living and nonliving environment.
- Practices: 4. Analyze and interpret data about observable attributes; 7. Engage in an argument from evidence to determine living versus non-living.
Background for Facilitator:
An ecosystem is a relationship of the community (all of the living things in an area) with its physical environment (all of the nonliving things in an area).
Vocabulary List:
- Living: an organism that is alive, exhibiting characteristics such as movement, reproduction, sensitivity, growth, respiration, excretion, and feeding.
- Nonliving: something that is not alive.
- Reproduction: the process that produces babies, young animals, or new plants.
- Sensitivity: the capacity of an organism to respond to stimulation.
- Respiration: the act or process of breathing.
- Excretion: the act or process of passing waste from the body.
Materials:
- Living vs. Nonliving cards
- Newsprint or whiteboard
- Living/Nonliving booklet sheets
- colored pencils
- game board, dice, markers
- Are Trees Alive? By Debbie S. Miller
Methods:
Engage
- Ask youth to tell you about the following objects as you point them out around the room or outside: live plant, artificial plant, plastic insect, real insect.
- Gear the discussion toward what is real or unreal, and living or nonliving.
- How can you tell if something is living or nonliving?
- This is brainstorming, there are no right or wrong answers.
- Tell them they will do an activity to find the differences between living and nonliving things.
Explain/Explore
- Hand out one “Living vs. Nonliving” card to each participant, explaining that we are going to play a sorting game to help us pick out the living and nonliving things.
- If you have more participants than cards, group them in teams and distribute a similar number of cards to each group.
- We are going to sort our pictures into three groups.
- The three groups are LIVING, NONLIVING, and NOT SURE.
- Prompt each participant who thinks their card is “LIVING” to say what their picture is, show it to everyone else, and ask why they chose to put it in the “living” category. Resist the urge to correct any misconceptions at this point, let them explain their ideas first!
- Repeat step 6 for youth who think their cards are “NONLIVING” and “NOT SURE.”
- Begin a discussion about the differences between the things in the three categories, and revisit their initial thoughts about how to tell if something is living or nonliving.
- Make a list on a whiteboard or newsprint with all of the things the youth think the “LIVING” things have in common.
Elaborate
- Now, choose an object that everyone can agree is LIVING (like a puppy). Go through the list and cross off anything that isn’t true for a puppy, and put a checkmark next to everything that is.
- Choose another living thing, but this time choose something that will cross off some more misconceptions.
- Keep going through all of the cards (even the “nonliving” and “not sure” cards, sorting them as you go) until you have a list of what they think all the living things have in common.
- NOTE: the youth may want to cross off some things that aren’t obvious to them at this stage. For example, if the list has “it can move” and the object is a tree, you might have to briefly discuss how plants can move and breathe. To elaborate on this, read and discuss Are Trees Alive? by Debbie S. Miller.
- The youth may not think of all of the things that make something “living.” At the end, you can fill in the gaps and ask them if they think all of their “living” cards have these characteristics:
- Movement
- Reproduction
- Sensitivity
- Growth
- Respiration
- Excretion
- Feeding
Evaluate
- For younger youth, play Living & Nonliving Things 2013 (YouTube) for fun and to reinforce engagement (or view video, below, following #19).
- Facilitate a discussion about the activity:
- Did any of the cards surprise you?
- Why is it important that we know what things are living and nonliving?
- Distribute the blank “It is Living” and “It is Nonliving” booklets to each participant, along with colored pencils.
- Direct the youth to think about an ocean habitat when drawing in the booklets.
- Walk around to assist any participant who needs help, and encourage youth to work together in small groups.
Video: Living & Nonliving Things 2013
https://youtu.be/Z_aAkuK_8nQ
Extension Ideas:
- Go outside with journals (cardboard makes for a great writing surface) and list the objects they see. When back inside, construct a T chart from their observations and encourage the youth to identify the living and nonliving things.
- Play “Is It Living or Nonliving?” A game board is included.
Activity 4: Ocean Zones
Learning Targets:
- Become familiar with some common ocean organisms.
- Describe the different zones of the ocean and the organisms that live there.
- Understand that the ocean is not all the same; there are distinct areas of ocean with different environmental conditions.
- Understand that organisms have adaptations, which allow them to live and survive in their habitat.
Essential Questions:
- What are the three ocean zones?
- Which sea creatures live in each zone? Why?
- Why do creatures sometimes move between zones?
Enduring Understandings:
- The three ocean zones are Sunlit, Twilight, and Dark.
- The creatures found in each zone are adapted to live there.
- Sometimes, creatures travel between zones to find food, a mate, or to escape a predator.
NGSS Standards:
- LS4.D Biodiversity — There are different kinds of living things in any area.
- LS2.A Interdependent Relationships in Ecosystems — Animals depend on their surroundings to get what they need, including food, water, shelter, and a favorable temperature.
- LS4.C Adaptation: Living things can survive only where their needs are met.
- Practices: 2. Developing Models; 6. Constructing Explanations
- Concepts: Scale, Proportion, Quantity
Background for Facilitator:
There are many different habitats in Maine’s marine environment, ranging from the rocky coast to the open ocean. Each habitat is home to a variety of organisms that have adapted to survive the specific conditions they face in their particular habitat, or “zone.”
Vocabulary List:
- Zones: an area that is different from other areas in a particular way.
- Habitat: the place or type of place where a plant or animal naturally or normally lives or grows.
- Camouflage: something (such as color or shape) that protects an animal from attack by making the animal difficult to see in the area around it.
Materials:
- world globe
- Ocean Zone posters
- Ocean Animals coloring pages, one zone per group
- traffic light cups
- Sentence Starter sheet
- Ocean Zone Matching page
- newsprint or Whiteboard
Methods:
Engage
- Begin by explaining that the ocean is a very, very large part of the earth.
- Poll the youth for their thoughts on how big the ocean is:
- Do you think there is more land or ocean on the planet?
- Demonstrate that there is more ocean than land by tossing the globe ball to a participant and having them say whether their right-hand pointer finger is on land or water.
- When you catch the ball from me, be sure to tell everyone whether your right-hand pointer finger lands on WATER or LAND.
- Everyone hold up their pointer finger now to show me you know which finger it is.
- Then, gently toss the ball to someone else who hasn’t had it yet. They will tell us whether their right hand is on WATER or LAND.
- We will keep track of each toss using tally marks.
- While the youth are tossing the ball, tally the WATER and LAND on a visible graph on the newsprint or whiteboard.
Explore
- Ask students to recall some of the marine life they met in the previous activity:
- Where do some of those creatures live on the globe?
- Do they all live in exactly the same place? Why or why not?
- Tell the youth that they will be playing a game that introduces them to the different areas of the ocean where marine life lives.
- These areas are called “zones.”
- Begin to build a Word Wall with the youth where you put new vocabulary as they learn it. For example zones (sunlit, twilight, dark zone), habitat, adaptation, etc.
- Place the youth in three cooperative learning groups:
- Group 1: Sunlit Zone approximately six youth
- Group 2: Twilight Zone approximately three youth
- Group 3: Dark Zone group approximately two youth
- Introduce the three ocean zones by reading the descriptions on the “Ocean Zone Posters” and showing them to the youth.
- Distribute the “Ocean Animals and their Zones” coloring book, assigning one zone to each group (Sunlit, Twilight, Dark), and one sea creature to each participant. Tell the youth they will learn about the creatures in their zone and then introduce the characters to the entire group.
Explain
- Distribute red and green traffic light cups to each group.
- Place the red traffic light cup on your table if you have come to a stop because you need some help or you don’t understand.
- Place the green traffic light cup on your table if everything is going well in your group.
- Note: these cups can be used for this purpose in any of the activities in this toolkit.
- Encourage youth to discuss each creature within their groups, addressing any needs from the traffic light cups.
- Allow time for them to color their animals. To ensure that they understand the different creatures in their zone, walk around to each group and help them read the sentences aloud.
- When the youth are finished coloring, staple the characters from each zone together and direct the group review their own book.
Elaborate
- Bring everyone together for presentations about their ocean zone.
- Each group will now explain the characters in their zone so that the other groups can meet the sea creatures that live there.
- For younger youth, give each a sentence starter sheet for each zone. They can select their favorite and draw a picture of it.
- Facilitate a discussion about the ocean zones:
- Which zone had the most creatures? Why?
- The sunlit zone is where most sea creatures are found, because that is where the sun shines.
- Do you think there are some creatures that can travel between zones? Why would they want to travel between these zones?
- The zones are fluid; creatures can travel between them. Sometimes they travel for food, camouflage, to find a mate or many other reasons.
- Which zone had the most creatures? Why?
Evaluate
- Distribute an Ocean Zone matching page to each group.
- Direct the youth to work together to match the creature with the ocean zone where it lives.
- Alternatively, a whiteboard or bulletin board can be used as a way to evaluate the entire group at one time instead of in smaller learning groups.
Extension Ideas:
- Older youth can write a story about the creatures in their zone, and add their stories to the coloring book.
- To create a visual representation of the ocean zones, represent the Ocean Zones in a Bottle:
- Fill half of a clear bottle with water. Add blue coloring. Fill remainder of the bottle with cooking oil. Tightly cover the bottle and shake. Three layers will appear with color lightest on top (representing more sunlight) to darkest on the bottom.
Additional Resources:
Berger, M. Life in the Sea. 1994. New York: Newbridge Educational Publishing. Full-color photographs, captions, and text describe the types of life that can be found at different levels of the sea, from seahorses near the top to giant clams at the bottom.
Activity 5: Maine Tide Pools
Learning Targets:
- Become familiar with the tidal pool zone and organisms that live there.
Essential Questions:
- What is a tidal pool?
- What types of plants and animals live there?
Enduring Understandings:
- A tidal pool is water left behind in rocks at low tide.
- Some plants in the tidal pool might be seaweed. Some animals might be starfish, periwinkles, crabs, small fish, sea urchins.
NGSS Standards:
- LS4.D Biodiversity: There are different kinds of living things in any area.
- Practices: 2. Developing models: what is a tidal pool zone? And what lives there?
Background for Facilitator:
Ocean tides rise and fall. When the tide retreats, seawater trapped in depressions in the rocks forms tide pools. These shallow pools are often teeming with different animals and plants, which must adapt to environmental extremes to survive. For example, you might see starfish, anemones, urchins, barnacles, crabs, kelp and other seaweeds in a tide pool.
Vocabulary List:
- Tide Pools: Tide pools, or rock pools, are rocky pools on the seashore that are filled with seawater.
Materials:
- Can you guess my name? clue cards
- blue paper plates
- colored pencils
- glue sticks
- sand
- whiteboard or newsprint
- Tide Pool Matching page
- internet connection
Methods:
Engage
- Play this catchy song, Tide Pool Sing Along (YouTube) as the youth enter the room. The song is only 35 seconds, so play it on repeat and try to get the youth to join in.
- Follow up with another song, The Tide Pool Song with Hand Dances (YouTube) by Birdsong and the Eco-Wonders that includes hand movements (4:24 minutes):
- Now let’s hear a song with hand movements!
- Everyone follow along!
- Access the youth’s prior knowledge about tide pools.
- Has anyone been to the beach when the tide is high? What about when the tide is low? How is it different at high tide and low tide? (Explain that tides are high and low every six hours).
- In places where there are rocks (like the coast of Maine), the ocean water covers them at high tide and leaves some water in rocky holes when it goes back at low tide. These areas with water are called “tidal pools” and many creatures live there.
- Next, play the video, Tide Pool Ocean Adventure Children or Kids Activity | Cullen’s Abc’s (YouTube) (2:39 minutes).
- Let’s take a trip with a scientist to a real tide pool.
- Ask participants to work with a partner for the next challenge. Give each pair three minutes to name some things that they might find in a tidal pool.
- When time is up, ask youth to name some of their creatures and create a “What We See in a Tide Pool” list on the whiteboard/newsprint as they name the creatures.
Explore
- For younger youth: PBS has an interactive site, Exploring Tidepools adapted from the National Park Service where participants are able to identify things found in a tidal pool.
- For older youth: Read the book “Ocean Soup: Tide-Pool Poems” by Stephen R. Swinburne with illustrations by Mary Peterson. It is also available as a read-aloud video, Sea Poems (YouTube) by Mrs. Cutillo (10:56 minutes).
- After interacting with the website, and/or reading the poems, correct or add to the “What We See in a Tidal Pool” list.
Explain
- Tell the youth that they will now play a game called “Can You Guess My Name”? Note: you can set this up so the youth are playing in pairs, larger groups, or on their own.
- I will read and act out the clues on the card, and your job is to try to guess my name.
- For use with older youth, an alternative version of this game could be played: Give participants the name of a creature, and direct them to come up with their own set of clues for others to then guess. Verbal clues may be accompanied by body movements.
Elaborate
- Distribute blue paper plates and colored pencils to each participant.
- Now you are ready to make your own tidal pool!
- This blue paper plate represents your tide pool. It is the water caught in the rocks when the tide goes out.
- Direct the youth to draw and color the creatures found in the tide pool.
- While they are drawing, walk around and apply glue around the rim of the plate and cover with beach sand.
- Continue playing the tide pool songs while they are drawing for continued engagement and fun.
- Allow time for each participant to share his or her tide pool community with others.
Evaluate
- Take a simulated field trip to a tidal pool at low tide by showing this video, Documentary: National Geographic Student Explorations-Tide Pools and Inter-Tidal Zones (YouTube) of a young man leading a trip to a tidal pool in Maine (5:50 minutes).
- Distribute the Tide Pool matching page, where they must match photos of tide pool creatures with the correct name.
Extension Ideas:
- Culminate this activity with a field trip to a tide pool at low tide.
Additional Resources:
- Between the Tides by Fran Hodgins
- At Home in the Tide Pool by Alexandra Wright
- In One Tidepool — Crabs, Snails, and Salty Tails by Anthony D. Frederick
- One Small Place by the Sea by Barbara Brenner
Activity 6: Crab Soccer
Learning Targets:
- Use gross motor skills in a version of soccer.
- Compare the physical structure of crabs to human structure through pictures, writing, and dictation.
- Describe the challenges associated with moving like a crab
Essential Questions:
- How do human and crab legs compare?
- How do the legs of humans and crabs cause them to walk in a different way?
Enduring Understandings:
- Humans have two legs that bend at the knee toward the front.
- Crabs have joints on 6 legs that bend outward. Their legs are on the sides.
- Crabs move sideways. Humans move forward, backward, and sideways (some crabs with large bodies can move forward).
NGSS Standards:
- LS1.A Structure and Function: All organisms have external parts. Different animals use body parts in different ways to move.
- Practices: 2. Develop Models: simulate crab’s movement using own body; 6. Construct Explanations: for the difference between crab and human movement
- Concepts: 6. Structure and Function: difference in construction and placement of legs in crabs and humans
Background for Facilitator:
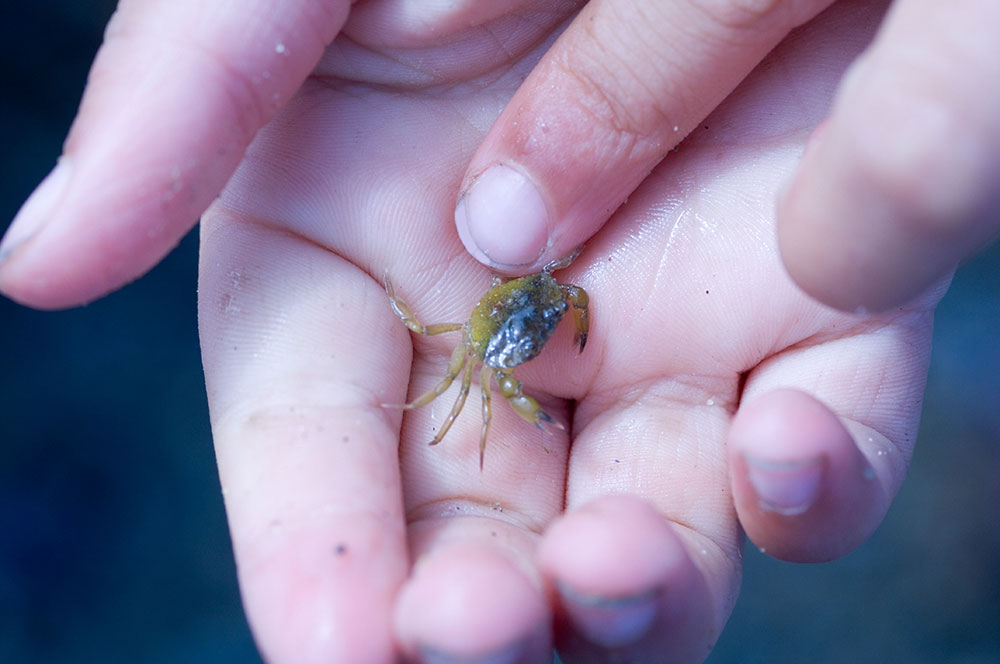
Crabs are an important species on the rocky intertidal coast of Maine. Researchers are studying the invasive green crab species and its effect on the marine ecosystem. Crabs are marine animals that must move on land and in the water, and they have special qualities that allow them to do that. Plants and animals develop special qualities that allow them to live in their specific habitat.
Quick Crab Facts
- Crabs are crustaceans.
- Crabs live along coastlines in cracks and under plants in tide pools, or in burrows in the sand.
- A crab’s shell protects it from attackers.
- A crab has two claws for holding and tearing food and for fighting. If a crab’s claw breaks off, a new one grows back!
- When a crab grows too big for its shell, the shell splits and the crab climbs out of it. The crab then grows a new shell.
- A crab’s shell can match the color of the rocks, plants, or sand where it lives.
- A crab moves quickly, moving sideways on its eight back legs.
- Our knees bend forward and that allows us to take steps forward whereas crabs’ legs are on the side and their knees bend outwards, so they can only move sideways.
Vocabulary List:
- Crustacean (crust-ae-shun): a type of animal (such as a crab or lobster) that has several pairs of legs and a body made up of sections that are covered in a hard outer shell.
Materials:
- one kickball
- four cones (or equivalent “goal” indicator”)
- scrap paper
- colored pencils/markers
- crab pictures
- two large hula hoops
- hula hoop Venn Diagram labels (humans, crabs, and blank)
- dry erase markers
Methods:
Engage
- Access the youth’s prior knowledge; how many of you have ever seen a crab? What does it look like? How does it move? Can you make your body move like a crab? (Pictures of different crabs included).
- Explain that they will be playing a version of soccer, but they will only be allowed to move like a crab.
- Demonstrate the “crab walk” by sitting on the ground with your legs extended out in front of you. Place your hands by your side with your fingers pointed toward your feet. Lift your body up into the air. Please note: modification may be needed if there is a participant who has trouble balancing or moving in this position, but a form of “crabwalk” is intentional for the purpose of this activity and discussion. A physically handicapped participant could act as referee and/or scorekeeper.
Explore
- Introduce the game rules:
- In crab soccer, we will have two teams. Each team will have one goalie that will try to keep the ball from going in between the orange cones.
- The two teams will be facing each other during the game.
- There are two very important rules: 1) we need to be careful where we are kicking, and 2) we need to move like a crab the entire time.
- Each time the beach ball goes between the two cones, the team that kicked it will get one point for scoring a goal.
- When a goal has been scored, we will start a new round.
- Behavioral expectations/rules are:
- Please stay moving like a crab for the entire game.
- Please be careful where you are kicking, so that we can all stay safe, and have fun.
- Please pass the ball to your peers so that everybody gets a turn.
- An adult facilitator should throw the ball into the middle of the play area to start each round.
- After each round or every 5 minutes, substitute the goalies so everyone gets a turn to kick the ball.
Explain
- After about 15-25 minutes (depending on the youth), have everybody sit in a circle in the play area for a group discussion.
- Direct the youth to do a “Think/Pair/Share” to think about why crabs move the way they do. First, have them think quietly to themselves about the questions. Some example questions may be (you can assign different questions to different pairs):
- How did we have to change our bodies to move like a crab?
- Why are crabs better at moving this way than we are?
- Why do crabs need to be able to move the way that they do?
- What can our bodies do better than crab walking? How do you know?
- What features do crabs have?
- Why do they have these features?
- What other animals have similar features? Why?
- Where do crabs live?
- Do you think that the place that an animal lives, and the features or characteristics the animal has, go together? Why or why not?
- What would have made playing this game easier?
- Then, direct them to turn the person sitting next to them to discuss their ideas about the questions above.
- After the youth discuss or draw out their ideas, encourage them to share a picture or explanation of the questions they talked about (drawings may be more appropriate for younger youth).
Evaluate
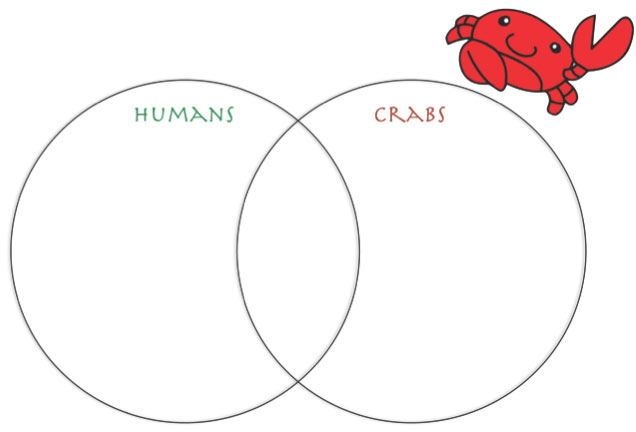
- Set up a Hula Hoop Venn Diagram with two (2) large hula-hoops.
- Tell the youth that one hula-hoop represents HUMAN movement, the other hoops represent CRAB movement, and the center represents the movement that humans and crabs have in common.
- Prompt youth to think about the ways humans and crabs move and write these on the labels as you hear them from the youth. Example questions are:
- Can humans and crabs move? (yes, they both move)
- How many legs do they have? (humans, two; crabs, eight for moving)
- Where are the legs? (humans, front; crabs, side)
- How do they move? (humans, front, back, sideways; crabs, side only)
- Direct the youth to decide where in the hula-hoops you should put the label.
- Encourage youth to come up with other similarities and differences to add to the hula-hoop Venn diagram (below).
Additional Resources:
- Online Letter C Crab Alphabet Online Jigsaw Puzzle (First School website) that allows youth to move crab pieces on his or her own.
Activity 7: Fish Printing
Learning Targets:
- Understand that each living thing has a unique set of characteristics and can be identified by their characteristics.
- Begin to identify fish features and characteristics, and their purpose and function.
Essential Questions:
- What are some characteristics of fish?
- Why do fish have gills?
- How does the shape of a fish help it?
- How do the fins and tail help a fish?
- What is a dichotomous key?
Enduring Understandings:
- Fish have gills, fins, tails, different shapes and sizes, different jaws and mouths (some even have teeth)!
- Gills take oxygen from the water.
- A fish may be streamlined for speed or flat for hiding in the sand.
- Fins and tails help fish move in water, control speed and direction.
- A dichotomous key is a way to identify something using steps that ask 2 questions at each step until the final choice gives an answer.
NGSS Standards:
- LS1.A Structure and Function: all organisms have external parts with different functions.
- LS1.D Information Processing: body parts convey different kinds of information needed for survival.
- Practices: 4 Analyzing and Interpreting data.
- Concepts: 2 Cause and Effect; 6 Structure and Function
Background for Facilitator:
All species have identifying characteristics and features. We can investigate these features to learn more about each species. Fish characteristics include gills, fins, tails, ability to be camouflaged, size, jaws, teeth. Fish can be identified through asking a series of yes or no questions, with a tool called a dichotomous key. After each question, many species are eliminated, which narrows down the possibilities until the species is identified.
Vocabulary List:
- Dichotomous Key: A key for the identification of organisms based on a series of choices between alternative characters.
- Characteristics: A special quality or trait that makes a person, thing, or group different from others.
Materials:
- paint
- roller
- plates
- fish replicas: trout, salmon, flounder, largemouth bass
- magnifying glasses
- markers/colored pencils
- paper
- paper towels
- newspaper
- dichotomous key
- imaginary fish sorting cards
- fish one and two
Methods:
Engage
- Introduce the activity by telling the youth that they will be learning about the characteristics and features of fish.
- We are going to practice identifying characteristics by playing a game.
- Tell the youth that you are going to randomly choose one person and the class will have to figure out who it is by asking yes or no questions.
- Quietly select someone without saying who it is, and then tell everyone to stand up.
- Encourage youth to raise their hand if they have a question that might help discover the person who was chosen.
- For example, a question might be “Does the person have black hair?”.
- If you answer “Yes”, then anyone who doesn’t have black hair will sit down.
- Since you answered “Yes, the person has black hair”, then anyone with black hair should remain standing.
- Once someone has been eliminated, they should remain seated until the end of the round, but they can still raise their hand to ask questions.
- The last person standing should be the one you chose in the beginning.
- Repeat as many times as necessary for the youth to gain sufficient practice, choosing different participants each time.
Explain
- Explain to youth that this is an example of how scientists use characteristics of plants and animals to help identify their names and tell them apart from each other.
- Ask youth to brainstorm some characteristics of fish that may be helpful in identifying them. Older youth can make a list.
- How can we tell fish apart?
- What are some characteristics that fish have?
- Are there any fish that have unique characteristics?
- What characteristics do some fish share?
- Show this video, FISH | Animals for children. Kids videos. Kindergarten | Preschool learning (YouTube) for an introduction to fish characteristics (2:54 length).
- Emphasize the following in the video: gills, fins, tails, colors, size, teeth, fish that take shelter or not, fish that move in schools or solo.
- Tell youth that they will be observing some of these characteristics through fish printing using a fish model, paint, and a roller tool.
- Model for the youth how to use the fish model and the amount of paint that should be used for printing (it only requires a light coating of paint; using too much paint will result in a poor print).
- Place youth in cooperative learning groups of 2-3.
- Each group should get one print, one roller, and paint. Once at their table, each participant should print the fish at least once.
- Once the youth have printed their fish, they should use their magnifying glass to make observations about the fish.
- They should focus on the characteristics of the fish (scales, fins, shape, tails, gills, mouth).
- Tell them to make a lot of observations because they will be using their observations to help them identify what kind of fish they printed.
- Meet as a whole group to make comparisons between the characteristics of each fish.
- What are characteristic they all have in common?
- What characteristics are different?
Explore
- Engage the youth in a discussion about fish:
- What makes a fish a fish? (It has gills which take oxygen from the water)
- Why do fish need fins? (It helps them move and balance in the water)
- What do you think the tail helps a fish to do? (Helps them control their speed and direction like a boat’s rudder)
- Why is the fish shape important? (Some fish, like tuna, are streamlined for speed; others have a flat body to blend into a sandy ocean bottom, like a flounder)
- Why do fish move differently than we do? (Moving through the water requires different characteristics than moving through the air. Water is thicker than air).
- Why is it important to be able to identify fish? (Fish have different purposes for humans; some we eat, some are used as bait, some are pets, some need to be protected because they are overfished and their numbers go down).
Elaborate
- Tell youth that scientists have a method for identifying fish: they use a tool called a Dichotomous Key.
- Challenge the youth to say this word:
- Say hippopotamus, rhymes with dichotomous.
- Repeat after me: Hippopotamus-Dichotomous ; Hippopotamus-Dichotomous
- Explain the word to the youth while showing the key:
- The word “dichotomous” means to split into 2 parts.
- At each step in this key, 2 choices are given.
- Each answer leads to another question, and ends with the name of the fish!
- Show this video, Dichotomous Key (YouTube) about dichotomous keys (2:38 length).
- For younger youth: distribute the dichotomous key for fish and direct youth to work in groups to match the fish with the statement in the key.
- For older youth: use the imaginary fish sort cards to look at the differences between their characteristics.
Evaluate
- Ask youth to share their Point of Most Significance (POM).
- What do you remember most about fish?
- Ask youth for their Muddiest Point.
- What do you need or want to know more about fish?
Extension Ideas:
- For older youth: Make a dichotomous key of their own, using the Fish 1 and 2 cards. The number of fish used can be tailored to the ability of the group.
- Use fish replicas and fabric paint on t-shirts or another keepsake that the youth can take home with them.
Activity 8: Food Chains
Learning Targets:
- Become familiar with ocean food chains.
- Understand that food chains begin with plants and end with a large predator.
- Predict the consequences if connections are broken in food chains.
Essential Questions:
- What is a food chain?
- What is at the beginning of a food chain?
- What is at the top of a food chain?
- What happens if a chain is broken?
Enduring Understandings:
- A food chain shows what eats what.
- Plants are at the beginning of a food chain because they get their energy from the sun.
- An animal without a predator is at the top of a food chain.
- If a part of the chain is broken, the predator must find a new food or die. The whole chain may not survive.
NGSS Standards:
- LS1.C Energy Flow in Ecosystems
- LS2.B Matter and Energy Transfer in Ecosystems
- LS2.C Ecosystem Dynamics
- Practices: 6. Constructing Explanations
- Concepts: 2. Cause and Effect; 4. Systems and System Models; 5. Energy and Matter: flows, cycles, and conservation
Background for Facilitator:
Every organism needs energy to live; plants get their energy through the process of photosynthesis, while animals get energy from the food they eat. Food chains show how energy flows from one organism to another. Some animals eat plants for energy, some eat other animals, but the chains always begin with plant life and end with animal life. This activity introduces the concept of food chains and introduces youth to some of the predator-prey relationships in the marine environment.
Vocabulary List:
- Food chain: a hierarchical series of organisms each dependent on the next as a source of food.
- Predator: an animal that lives by killing and eating other animals
- Prey: an animal that is hunted and killed by another for food
- Phytoplankton: Plankton consisting of microscopic plants. Phytoplankton forms the beginning of the food chain for aquatic animals.
- Zooplankton: plankton consisting of small animals and the immature stages of larger animals.
Materials:
- newsprint
- glue sticks or tape
- food chain pictures (blank for youth to color)
- food chain pictures (laminated for visuals)
- colored paper strips for making food “chains”
- color-coded food chain necklaces:
- red: kelp – periwinkle – sea bass – otter
- orange: rockweed – limpet – crab – seagull
- yellow: kelp – sea urchin – lobster – human
- green: sea lettuce – sand hopper – salmon – shark
- blue: sea lettuce – periwinkle – hermit crab – octopus – shark
- purple: plankton – sand hopper – cod fish – seal
Methods:
Engage
- Access the youth’s prior knowledge by showing or drawing a picture of a small fish being eaten by big fish, being eaten by biggest fish.
- Can anyone tell me what is happening here?
- Let the youth discuss their thoughts with each other before introducing the word food chain.
- Today we will learn about food chains, or who eats what?
- Begin by showing the 22-minute video: “Magic School Bus Gets Eaten (SchoolTube). Summary: Two students must find the connection between scum on a shoe and a tuna fish sandwich. So they go to the beach where they observe a food chain: seaweed is eaten by sea urchins, which are then eaten by otters. Miss Frizzle takes the class under the ocean, where the discovery of a food chain solves the mystery: The sea scum is phytoplankton (tiny photosynthetic organisms), which are eaten by zooplankton (small drifting animals), which are eaten by anchovies (small fish), which are eaten by tuna fish (bigger fish), which are eaten by humans (the top of the chain; largest predator).
Explain
- Facilitate a discussion about the video while creating a KWL chart with the youth.
- Where are plants on the food chain?
- Food chains usually begin with plants, which get their energy from the sun.
- What is a predator? What is a prey?
- There are predators in the food chain. Predators eat prey.
- What size are the creatures near the bottom of the food chain? What size are the creatures near the top of the food chain?
- Food chains usually start with small creatures and get larger as you go up the food chain.
- Do the animals on the top of the food chain have predators?
- The top of a food chain is an animal that doesn’t have a natural predator (like humans or sharks)
- Where are plants on the food chain?
Explore
- Distribute the blank food chain pictures and colored pencils.
- Allow the youth to color the pictures of phytoplankton, zooplankton, small fish, tuna, and shark. Reinforce the names phytoplankton and zooplankton while walking around to the youth while they color.
- Direct youth to put the pictures in the correct order of the food chain they learned about in the video.
- Instruct them to make paper chains to connect the organisms in their food chain:
- Glue or tape the ends of one strip of paper together to make the first link in the chain.
- Take the next paper strip and loop it through the first chain before gluing the ends together.
- Keep doing this until you have 10 links in your chain.
- Help the youth glue or tape their colored pictures along the chain in the correct order, and encourage them to share with one another. This is particularly helpful with younger participants as a visual representation of food chains; for older youth, the facilitator may opt to skip this step and proceed to the next step.
Elaborate
- Explain to the youth that they will be playing an ocean food chain game.
- Before beginning the game, we should review the plants and animals in the game.
- Review the creatures of the food chain by showing the laminated food chain pictures:
- Plankton: Tiny ocean plants that make their own food using energy from the sun.
- Seaweed: Larger ocean plants that make their own food using energy from the sun.
- Limpets: Live in a shell, has a sharp tongue for eating seaweed.
- Periwinkles: Live in a shell, has a sharp tongue for eating seaweed.
- Crabs and Lobsters: Have claws for crushing.
- (Review others as needed).
- Pass out one creature card to each participant. The number of teams will depend on the number of youth.
- red: kelp – periwinkle – sea bass – otter
- orange: rockweed – limpet – crab – seagull
- yellow: kelp – sea urchin – lobster – human
- green: sea lettuce – sand hopper – salmon – shark
- blue: sea lettuce – periwinkle – hermit crab – octopus – shark
- purple: plankton – sand hopper – cod fish – seal
- Direct the youth to walk around the room to find their partners with a matching color card.
- Once they discover their teammates, they must work with each other to figure out the order of the chain.
- When they determine the correct order, they should link arms to form the food chain to indicate that they are ready.
Evaluate
- When all of the food chains are ready, ask the youth to share the name of their creatures and what order they are in the chain. Once they have presented, they should unlink their arms and hold hands to form a large circle with the whole group.
- Once the entire group is in a circle, ask them to release hands and do the following:
- This circle represents the entire ocean, and you are the creatures within it.
- Raise your hand if you are the human in this circle.
- Let’s figure out all of the creatures that humans eat. Raise your hand if you think a human would eat you.
- Prompt the youth to announce their creature. If the rest of the group agrees that a human would eat it, then that creature can take a seat.
- Proceed until all of the creatures that humans eat are sitting (for example lobsters, codfish, sea bass, crab, salmon, seaweed, etc.)
- Look at all of the things a human can eat! This means that a predator on top of the food chain can have more than one prey.
- With the help of the youth, begin to fill out the “What We Learned” column of the chart. Start by adding that a predator can have more than one prey.
- What other things do you know now?
- Next, prompt the youth to think a little more deeply about food chains:
- Suppose the human eats all of the salmon in the sea…
- What will happen?
- The sharks won’t have any salmon to eat. The shark must find other things to eat or it will die.
- What happens when a link in the food chain is broken? (Use the paper food chains for a visual if necessary).
- When one part of a food chain is removed, the rest of the chain may not survive. (Having the groups link arms again and asking the creature in the middle to leave the chain can also demonstrate this).Continue to add to the “What We Learned” column of the chart as the youth discuss their ideas.
Additional Resources:
- Horseshoe Crabs and Shorebirds: The Story of a Food Web by Victoria Crenson (grades 2-5)
Activity 9: Sharks and Minnows
Learning Targets:
- Use gross motor skills to play the game, Sharks and Minnows.
- Describe how the population of minnows keeps getting smaller, while the population of sharks keeps growing.
- Discuss what the minnows and sharks need to survive, and describe why fish travel in schools.
Essential Questions:
- What is an ecosystem?
- What are predators? Prey?
- What do predatory sharks need to survive?
- What do prey minnows do to survive?
- What happens as the number of predators increases?
Enduring Understandings:
- An ecosystem is a web of animals and plants within an environment.
- Predators are animals that eat other organisms. Prey are organisms that are eaten.
- Minnows can survive by schooling.
- As predators increase, prey decrease.
NGSS Standards:
- LS2.D Social Interactions and Group Behavior
- LS4.C Adaptation
- Practices: 1. Asking questions; 6. Constructing Explanations
- Concepts: 2. Cause and Effect
Background for Facilitator:
All of the organisms in an ecosystem are connected. The success or decline of one species will have an impact on the population of another species that is connected to it. The most obvious example of this connection is a predator-prey relationship, such as sharks and minnows. Animals display a variety of behaviors during predator-prey relationships. These behaviors are adaptations needed to survive.
Vocabulary List:
- Predator: an animal that lives by killing and eating other animals.
- Prey: an animal that is hunted and killed by another for food.
- School: a large number of fish or aquatic animals of one kind, swimming together.
- Shark: a large usually gray saltwater fish that has sharp teeth and a skeleton of cartilage.
- Minnow: a very small fish that is often used as bait to catch larger fish.
Materials:
- four cones (or equivalent “goal” indicator”)
Methods:
Engage
- Access the youth’s prior knowledge: Ask them to brainstorm the things that they need to survive.
- What are the things you need to survive?
- Are some things more important than others?
- Do all animals need the same things to survive? Why or why not?
- How do you know?
Explain
- Introduce the activity by explaining that ocean animals are all connected to each other in an ecosystem. If one group of animals keeps growing and growing, they will need a food source to sustain themselves. Their survival depends on the availability of food. We are going to demonstrate this idea by playing the game “Sharks and Minnows”.
- Let the youth brainstorm but make sure they understand that sharks eat minnows before starting the game.
- What is a shark? What is a minnow?
- Explain the game rules:
- To start the game, everybody will line up on one side of the field/gym/area behind the cones.
- I will choose one shark to come to the middle of the field/gym.
- The shark is very hungry! Everybody else will be minnows. Sharks love to eat minnows.
- When everybody is ready, the shark will say, “Fishy, fishy, come cross our ocean.” When the shark says this, the minnows will all try to run to the other side of the gym/field, behind the cones without getting tagged by the shark.
- If you get tagged by a shark, then you become a shark and will stand in the middle on the next round.
- Once everybody has crossed the ocean, the sharks will say again, “Fishy, fishy, come cross our ocean” and the minnows will run back across the gym/field.
- The game continues until there are only 2 minnows left.
- The last minnows left will start the next round as sharks.
- Behavioral expectations/rules:
- No running, only “swimming”, everyone’s two feet (prey and predator) must stand on the ground at all times. Walking fast is permitted.
- Please be honest, if you have been tagged, please take your place as a shark.
- Please be careful when tagging somebody, only use one hand to tag.
- No pushing.
- Ask the youth if they have any questions about the rules.
- Play a practice round to ensure that the players understand the game rules.
- After youth have played (teachers and adults should play, too!) several rounds, sit in a circle to cool down and have a discussion.
Explore
- Engage the youth in a discussion about the following:
- What did the sharks need to survive? What did the minnows do to survive?
- What other things they might need to survive, that weren’t part of this game?
- What did you notice about the number of sharks after each round? How about the minnows?
- Did the game get easier or harder after each round? Why do you think this?
- Why do you think fish travel in large numbers (schools)? Does it help them to stay safe? How do you know?
Elaborate
- Elaborate on these ideas by playing a variation of the Sharks and Minnows game.
- Explain the game rules:
- The object of this next game is for each player (the minnows) to cross the ocean to the other side, pick up a food card, and return back to the side of the ocean where you started.
- But, there is a predator shark out there, lurking, trying to tag (eat) its prey: the minnows!
- The hula hoops represent shelter areas where fish like to hide: plants, rocks, docks, underwater debris.
- You can stop in one of these shelter areas to escape a predator on your journey to get food. You are not allowed to stay there for more than 5 seconds. Only 2 minnows can fit in a sheltered area at one time.
- The predator shark is not allowed to “babysit” the shelter areas.
- Players will continue to play until the food is gone. If a minnow goes out of bounds, runs, or is tagged, then that player is out and must sit on the side.
- Behavioral expectations/rules:
- No running, only “swimming”, everyone’s two feet (prey and predator) must stand on the ground at all times. Walking fast is permitted.
- Please be honest, if you have been tagged, please step to the sideline.
- Please be careful when tagging somebody, only use one hand to tag.
- No pushing.
- Ask for one volunteer to be the predator shark. (Disabled students could act as monitors/referees).
Evaluate
- After each round of the game, ask the youth to raise their hands to indicate who collected one piece of food, two pieces, three pieces, etc.
- After several rounds of play, sit in a circle to cool down and have a discussion.
- Did the hula hoop shelter areas help you escape the shark?
- Why do you think only two minnows could fit in a shelter at one time?
- What happened to the minnow who couldn’t fit in the shelter when they tried?
- Was it easier to stay alive swimming in a school or by yourself?
- We learned that schooling and moving fast can help minnows escape prey; Can you think of any other adaptations that might help minnows escape prey?
- The second game added hiding, what is important when you hide? (That you blend in, not stick out. This is called camouflage).
- What helped the shark as a predator? How is the shark able to eat minnows? (Sharks move fast, they are bigger than minnows, they have sharp teeth).
Additional Resources:
- The Three Little Fish and the Big Bad Shark by Will Grace and Ken Geist; available on audiobook, The Three Little Fish and the Big Bad Shark (Audiobook) (YouTube).
Activity 10: Fish on a Farm
Learning Targets:
- Understand that fish are not only caught in the wild but can be raised on farms as well.
- There are limited numbers of wild fish in the entire ocean, but a fish farm can raise many fish in more easily accessible areas.
Essential Questions:
- What is aquaculture?
- Why are fish farms important?
Enduring Understandings:
- Fish and Shellfish are farmed in the ocean. This is called aquaculture.
- We are able to raise more fish on farms than we can catch in the wild.
- We farm fish and shellfish in order to feed people.
NGSS Standards:
- ESS3.A Natural Resources
- ETS1.B Design
- Practices: 6. Communicate
- Concepts: 4. System models
Background for Facilitator:
Aquaculture is the farming of aquatic organisms such as fish, crustaceans, mollusks, and aquatic plants. It is different than commercial fishing, which is the harvesting of wild fish. In aquaculture, conditions are manipulated to cultivate a certain species, typically for human consumption or for use in other products. Aquaculture has been expanding in Maine to create more jobs, resources, and economic stimulation.
Aquaculture is important because it can help feed many people, prevent natural populations from extinction, provide important ingredients for products that people use every day, and can provide jobs for people who like to work on the water, with sea creatures, or marine plants.
Watch this video, Introduction to Aquaculture (YouTube) for an introduction to aquaculture (18:40 minutes).
Vocabulary List:
- Aquaculture: Aquaculture, also known as aquafarming, is the farming of aquatic organisms such as fish, crustaceans, mollusks, and aquatic plants.
Materials:
- paper or newsprint
- fish puzzle pieces (head, body, and tailpieces)
- markers/colored pencils
Methods:
Engage
- Access the groups’ prior knowledge by recalling some information from the fish printing activity.
- Today you are going to create a fish, but first, we need to remember things that make a fish a fish.
- What are the characteristics of fish?
- Gills, fins, tail, shape, size, color, mouth, jaw
- What are some things that help fish from getting eaten? Or that help them find food to eat?
- Speed, camouflage, size, type of mouth, schooling
- Explain to youth that they will use what they learned to design their own species.
- It’s time to build your own fish!
- You may choose pieces from these puzzles to put together a whole fish.
- You must have a head, body, and tail.
- Separate the fish puzzle pieces into three piles; head, body, and tail. Youth must pick one piece from each pile (i.e. they cannot build a fish with two heads, for example).
- Let the youth build their own fish based on the puzzle pieces they like best. Encourage them to make observations about the different characteristics among the puzzle pieces.
Explain
- Once they have created a fish, ask them to sit in a circle to hear the “story” of their fish. (Younger youth can enjoy hearing their “fish story” while older youth could journal about the characteristics and story of their fish).
- Ask each participant to hold up their fish while you tell their story depending on what puzzle pieces they selected:
- Mouth:
- Large strong upper jaw: grabs prey below
- Large strong lower jaw: grabs prey above
- Suckermouth: eats plants
- Teeth: crunches coral or other hard prey
- Body:
- Torpedo shape: fast moving
- Light belly/dark top: predators have trouble seeing this fish from above or below (camouflage)
- Stripes: hides in plants
- Spotted: hides in rocks on the bottom
- Tail:
- Forked tail: short bursts of speed
- Rounded tail: slow, but maneuvers well
- Moon-shaped (crescent): speed over long distances (lunate)
- Squared corners: slow, but powerful (truncate)
- Mouth:
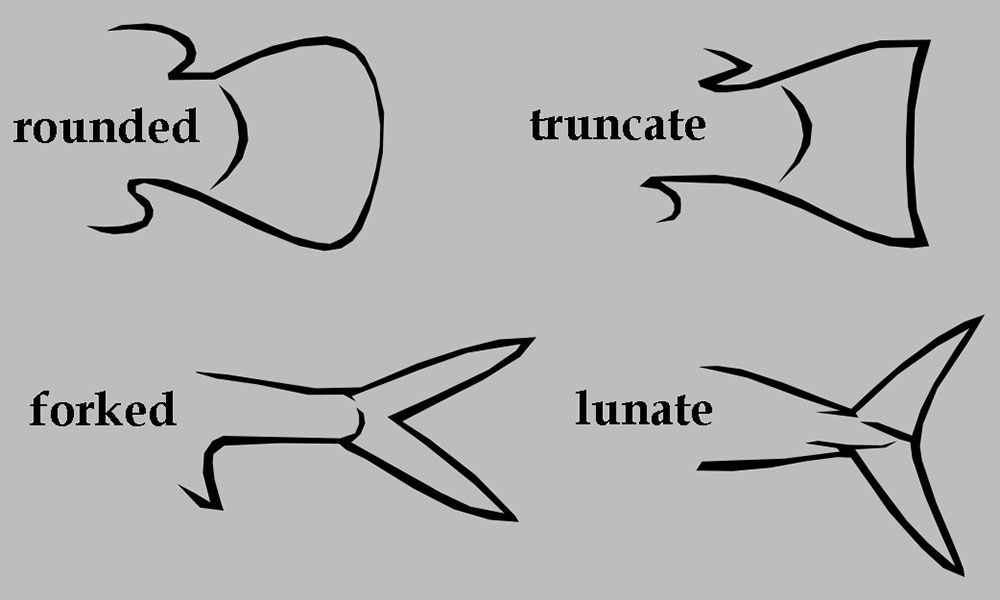
Source: Kid’s Corner, Fish & Life Cycles page (USDA Forest Service website)
Elaborate
- Prompt the youth to begin thinking deeper about the fish they have created.
- Now that you have created your own fish, where will it live?
- What if you grew this fish on a farm?
- Some youth may think this is a silly question, so assure them that there is such a thing as a fish farm!
- Introduce the word aquaculture: the farming of fish and other marine life.
- Who wants to see a fish farm?
- Show the video, Fish on a Farm (Ocean Today website) (2:35 minutes), for an introduction to aquaculture.
- Facilitate a discussion about the need for aquaculture:
- Why do you think we need fish farms?
- Do you eat fish? Even if you do not eat fish, lots of other people in the world do.
- What about your dog or cat? Did you know there is often fish in pet food?
- Demonstrate the need for fish farms by using the fish they created with the puzzle pieces:
- Let’s try an experiment.
- Pretend that the whole room is the ocean, and the fish you created can swim all around the whole ocean.
- Encourage the youth to “swim” around the room with their fish, and spread out across the whole ocean. Allow them to interact with one another for a few minutes before gaining their attention again.
- What are some things you notice about this ocean?
- Are the fish close together or far apart?
- Do you think it would be easy or hard for someone to catch a fish in this ocean?
- Explain that they will now demonstrate a fish farm in the ocean.
- Now all of the fish move onto the fish farm in the center of the room.
- Remember the fish you saw in the video on the farm? The farm in our ocean is similar.
Evaluate
- Facilitate a discussion about ocean activity:
- What are some things you notice about how the fish on the farm are different from the fish in the wild?
- What are some reasons why humans would choose to farm fish instead of catching them in the wild?
- Do you think anything else could be farmed in the ocean?
Additional Resources:
- Aqua Kids Sustainable Seafood, Part 1 (YouTube) (5:32 minutes)
- Aqua Kids Sustainable Seafood, Part 2 (YouTube) (3:37 minutes)
Activity 11: Animal Scat
Learning Targets:
- Understand that the scat of animals contains clues as to what the animal ate.
- Understand that we classify animals as carnivores, herbivores, and omnivores depending on what they eat.
- Describe how seeds are spread through the digestive system of animals.
- Develop an understanding of how animal feces can spread things to its environment (Note: this is a preparatory activity to lay the foundation for the next activity involving the spread of disease through seagull excrement).
Essential Questions:
- What information can you get by examining animal scat?
- What are Carnivores? Herbivores? Omnivores?
- What might happen to seeds in animal scat?
Enduring Understandings:
- Animal scat shows what an animal eats.
- Carnivores eat meat. Herbivores eat plants. Omnivores eat both animals and plants.
- The seeds might germinate in the soil and grow into new plants.
NGSS Standards:
- LS1.C Organization for Matter and Energy Flow in Organisms
- LS2.A Interdependent Relationships in Ecosystems
- Practices: 4 Analyzing and Interpreting Data; 6 Construct Explanations; 7 Engage in Argument from Evidence
Background for Facilitator:
Carnivores eat meat. Herbivores eat plants. Omnivores eat meat and plants. Animal scat is distinct depending on what animals eat. Animals and what they eat can be determined by examining their scat. Scat is a natural byproduct of eating, enriches the soil, and aids in the growth of new plants.
Vocabulary List:
- Animal scat: an animal’s fecal droppings
- Herbivore: an animal that eats only plants
- Carnivore: an animal that eats only meat (including insects)
- Omnivore: an animal that eats both plants and other animals
Materials:
- foam plates
- magnifying glasses
- paper
- pencils/markers
- sandwich bags
- Can you guess the diet? playing cards
Methods:
Engage
- Begin by passing around the plastic scat samples.
- Can anyone guess what this is? (Yes, it’s fake poop, but we call it scat).
- Scat is the normal end product of eating, and we can learn a lot about what animals eat by looking at it.
- But we do NOT handle real scat. Scientists would use a stick or gloves to observe scat. Some things in scat can make you ill.
- Make this warning clear: Real scat should NEVER be handled because it can be deadly to humans. AVOID IT!
- So why do scientists even observe scat at all? Because they can identify the animal from its scat and they can identify what the animal ate.
- You get a chance now to make some fake scat and be a scat scientist.
Explore
- Place youth into cooperative learning groups of three or four.
- Distribute one Scat Observation Book to each group, along with the scat identification chart.
- This book contains recipes for making the scat of several different animals.
- Follow the recipe to create the scat; trying to guess which animal the scat belongs to based on what it eats.
- Use the identification chart to shape your scat in the shape similar to the animal you think it is.
- Use the magnifying glasses to get a closer look at your scat. This is how scientists look at scat to determine what the animal has been eating.
Explain
- Meet as a whole group to share results. Youth may now identify their animal as herbivore (plant eaters), carnivores (meat eaters), or omnivores (plant and meat eaters).
- Which animals ate only plants? These are called HERBIVORES because they are plant eaters.
- Which animals ate only meat? These are called CARNIVORES because they are plant eaters.
- Which animals ate both plants and meat? These are called OMNIVORES because they eat both plants and meat.
- Add these words to a word wall, or to the whiteboard/newsprint so the youth can practice reading and writing these words.
- Encourage them to be diligent scientists and record notes in their observation books based on this new information. They should write the name of the animal, and what type of eater it is (herbivore, carnivore, or omnivore), next to the recipes in their books.
Elaborate
- Facilitate a discussion about the scat samples they have created.
- What do you think happens to the seeds that end up in animal scat?
- Do animals depend on plants, or do plants depend on animals? Or both? Why or why not?
- What other things besides seeds do you think could be transported in animal scat?
Evaluate
- Review their understanding of herbivore, carnivore, and omnivore by playing the game, “Can you guess the diet?”
- We will play a game called “Can you guess the diet?” where you will have to guess whether or not the animal is an herbivore, carnivore, or omnivore.
- Show the photo of the animal to the youth as you read the “recipe” for its scat on the back of the “Can you guess the diet?” card.
Additional Resources:
- Proceed with Activity 12: Parasite Web of Life, to draw connections to animal scat in the marine environment.
Activity 12: Parasite Web of Life
Note:
This activity may not be appropriate for all audiences or ages. The intent of this activity is to educate youth about the parasite-ecosystem relationship on the coast of Maine, not to encourage against eating seafood or interacting with the marine environment. All seafood is tested before it goes to market for human consumption. Please use your discretion when choosing to facilitate this activity with youth to prevent any misconception. We recommend preceding “Parasite Web of Life” with the “Animal Scat” activity for appropriate context.
Learning Targets:
- Understand that animals in a food web are connected.
- Understand that sometimes parasites can live in animal feces and be spread to other animals in the ecosystem.
- Understand that parasites use their host to continue to spread.
- Describe how the P. botulus parasite spreads.
Essential Questions:
- What is a parasite?
- What is an animal called which carries a parasite?
- What does a parasite get from the animal it lives in?
- What is one way a parasite is spread?
- How is the parasite of the green crab spread?
Enduring Understandings:
- A parasite is a small animal that lives inside other animals.
- A host is an animal that carries a parasite.
- The parasite gets food and protection from the host that it lives in.
- A parasite can be spread through the feces of an animal.
- The parasite is spread when a herring gull eats an infected green crab and then excretes into the water. The parasite in the waste goes into the water and can spread to more green crabs.
NGSS Standards:
- LS2.A Interdependent Relationships in Ecosystems. Organisms are related to food webs.
- LS2.B Matter and Energy Move Through an Ecosystem.
- Practices: Constructing Explanations.
- Concepts: Stability and Change.
Background for Facilitator:
Researchers have recently discovered a parasite named Profilicollis botulus, which clings onto the green crab similar to how a leech clings onto its host. The parasite is spread when a herring gull eats a green crab that is infected and then excretes the parasite into the water. Once excreted into the water, the parasite can leech onto more green crabs.
Researchers are currently investigating what happens to the green crab when it becomes infected with the parasite, and how it may be affecting other species in the ecosystem as well. Since the green crab is an invasive species eating shellfish, some fishermen have started using green crabs as lobster bait. It is thought that the parasite can also be transferred to lobsters. It does not affect humans who eat the lobster or the taste of it, but it does make the lobster more susceptible to predators.
Vocabulary List:
- Parasite: An organism that lives in or on a host organism and gets food and protection from the host organism.
- Host: A living animal or plant on or in which a parasite lives.
Materials:
- Crabs (Bullfrog Books: Life Under the Sea) by Cari Meister
- organism signs (green crab, infected green crab, herring gull)
- UV light
- UV spray
Methods:
Engage
- Tell the youth that they are going to learn about green crabs and how they interact with other animals in the Maine coast ecosystem.
- Read the book Crabby by Cari Meister aloud to the youth, which is a photo-illustrated book for early readers that tell the story of a crab looking for food and fighting to defend its territory.
- Follow up the reading with a few short videos that show how crabs eat.
- How Crabs Feed (YouTube) (1:22 minutes)
- Blue Crab vs. Clam (National Geographic website) (1:13 minutes)
- As the youth are watching the videos, point out how the crab moves its mouth to filter water along with its food.
- Ask the youth to recall some information from the Food Chain activity:
- Who remembers what animals eat crabs? (Lots of things, but we’re going to focus on seagulls for today’s activity).
- Show the pictures of the Herring Gull and the Green Crab to be sure everyone knows what these animals look like.
- We are going to play a game that involves these two animals, Herring Gulls (a type of seagull) and Green Crabs.
Explain
- Distribute the organism signs to the participants. Ask for one volunteer to be a sick crab, and one volunteer to be a healthy gull. The remaining youth will all be healthy green crabs.
- How do you think the Herring Gull and the Green Crab will interact with each other?
- How are the crab and gull connected? (The Herring Gull is the predator of the green crab)
- Using the UV light spray, spray the hands of the participant who volunteered to be the sick green crab while explaining that the spray represents a parasite that is making the crab sick.
- Who knows what a parasite is?
- In this case, the parasite is causing the crab to be sick.
- The parasite has infected the green crab with a sickness.
- The green crab is known as the “host” of the parasite.
- Have the youth line up while you check their hands under the UV light spray.
- Make sure everyone gets to see that the hands of the infected green crab are different (the specks that can be seen will represent the infection from the parasite). And at this point, only one crab has the parasite.
- Explain that a hungry seagull decides to come along and eat the infected green crab. Show this by asking the seagull to shake hands with the infected crab.
- Demonstrate that the seagull that ate the crab is now infected with the parasite by shining the UV light on its hands.
- What do you see on the seagull’s hands?
- What does this mean? (That the seagull is carrying the parasite)
- Now the seagull is also the “host” of the parasite.
- Explain to the youth that the seagull will digest the crab and then, just as all animals do, it will get rid of wastes from its meal (draw comparisons to what they learned in the Animal Scat activity about spreading seeds, etc.).
- The parasite travels through the seagull’s digestive system and exits as the bird flies over the ocean dropping its waste into the ocean.
- The crabs that come into contact with the infected seagull droppings will become infected with the parasite as well! (Remind the youth this is an example of why they should never touch the scat or droppings of animals).
Explore
- Direct all of the healthy green crabs disperse around the room.
- Spray five scat cards with the UV spray and have the infected seagull “fly” around the room and hand out the droppings cards to five random crabs. The hands of the healthy crabs will now show up with specks under the UV light.
- Once more, inspect the hands of all the youth under the UV light; anyone with specks on their hands is now considered infected with the parasite.
- Keep repeating the cycle until all the crabs in your “ecosystem” are infected.
Elaborate
- Review the terms parasite and host, and facilitate a discussion about the activity:
- How did the parasite spread in our ecosystem?
- Why did it spread so quickly?
- What happened when the parasite entered the ecosystem for the first time?
- What happened to all of the green crabs?
- Do you think that the parasite harms its host?
- What other animals might be part of this food chain? Do you think they might be affected? How would the parasite spread to them? (example: lobsters eat green crabs)
- Do you think it’s important for scientists to learn more about this parasite that infects green crabs? Why or why not?
Evaluate
- Distribute scrap paper and colored pencils to the participants.
- Younger participants should draw pictures to illustrate the parasite web of life that they demonstrated in this activity. Be sure that they include other aspects of the marine environment in their drawings, instead of simply the crabs and seagulls. Optional: include sentence starter sheets to help them.
- Are there other parts of the marine environment that you think the parasite might affect? Include those ideas in your drawing.
- Older participants should create a comic strip about the parasite web of life. The comic strip should include drawings and text that tells a story about how the parasite moves within the marine environment. Encourage them to include the lobster in their stories.
- How does the parasite first show up in the marine environment?
- What was the environment like before the parasite arrived? What is it like afterward?
- Tell the story from the perspective of the parasite, and/or the perspective of the marine ecosystem.
- What does this web of life look like from the point of view of the parasite?
- What does it look like from the point of view of a crab, seagull, or lobster?
Extension Ideas:
Play the game again, but add other players such as lobsters and humans: Fishermen have begun using green crabs as bait for lobsters since they are so abundant because they are an invasive species that survives well in Maine. There is some evidence that the lobsters have been infected with the parasite, but researchers report that it does not affect humans who eat lobster or the taste of the lobster.
![]()
![]() This activity is supported by National Science Foundation award #1355457 to Maine EPSCoR at the University of Maine.
This activity is supported by National Science Foundation award #1355457 to Maine EPSCoR at the University of Maine.