Maine Home Garden News — June 2018
- June Is the Month to . . .
- The Scoop on Neonicotinoids
- Minimizing Disease Pressure
- Miniature Rose Plants — Divas Need Not Apply
- Volunteer Spotlight: Forest Hills Gardens in Jackman
- Food & Nutrition: Ways to Use Less Sugar in Homemade Jams and Jellies
June Is the Month to . . .
By Kathy Hopkins, Extension Educator, University of Maine Cooperative Extension Somerset County
- Are you getting a late start? There is still time to plant this summer. Read seed packets to determine number of days to harvest and plant accordingly. Short-season vegetables include radishes, summer squash, green beans, and cucumbers. Consider starting additional fall harvest plantings in mid to late July. Read more about planting in the fall.
- Be aware of ticks and do daily tick checks after being outside! To learn more about ticks in Maine and how to identify them, see the UMaine Extension Tick ID Lab.
- Will we have a dry summer? Get ready for possible irrigation of your garden. For more information on home garden irrigation, see UMaine Extension Bulletin #2160, Trickle Irrigation: Using and Conserving Water in the Home Garden.
- Evaluate your landscape. What plants are thriving? What plants are struggling? Why? What issues or problems need to be addressed? Reach out to your local UMaine Extension county office for help troubleshooting landscape problems.
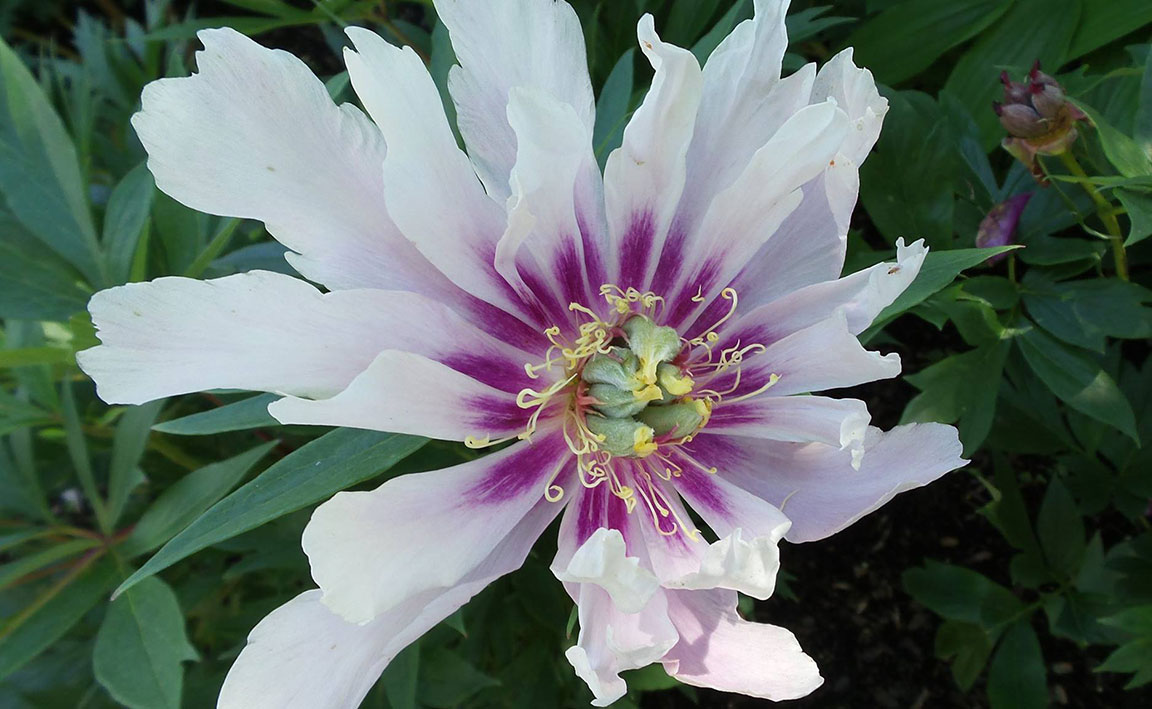
- Stake peonies to support heavy blossom set. See the Kansas State publication, Peonies in the Garden (PDF) for information on peony care.
- Prune herbaceous (non-woody) plants to improve flower set and encourage a more sturdy growth habit. Learn more.
- If wildlife was a problem for your garden in the past, consider protecting your plants with fencing or repellents. Watch for possible wildlife damage to your gardens and landscape. Determine the identity of the culprits, learn their behavior, make a list of strategies to prevent damage, and create and follow a suitable plan to address the problem. For fencing information, see Fencing Systems.
- Be observant about possible pest pressure in your gardens with weekly walk-abouts. Look for leaf, stem, or blossom damage as well as general growth. Check the undersides of leaves for egg masses and identify the pest(s) before deciding on control measures. Also, look for beneficial insects that might be doing some pest control for you. If you don’t know what the pest is, bring a sample of the insect, diseased leaves or damaged leaves into your local UMaine Extension county office for identification or check out UMaine Extension’s Pest Photo Gallery.
- Control garden weeds. Early and regular efforts make a big difference. Tilling, hand pulling, clipping, and mulching are sound weed control strategies.
- Learn about the weeds that are troubling your plantings. See the Weed Science Society of America website for information on agronomic, turf, garden and noxious weeds. For garden weeds, see Rutger’s weed gallery.
- Keep an eye on the rainfall amounts. Remember most crops do best with 1 to 1.5 inches of rain per week. A rain gauge is a very inexpensive, yet very valuable, addition to any landscape.
- Annual flowers will benefit from split applications of fertilizer during the summer. Don’t over fertilize. Dead-heading the spent flowers will maintain their flowering habit longer during the season.
The Scoop on Neonicotinoids
By Ann Marie Bartoo, Master Gardener Volunteer. Reviewed by Dr. Francis Drummond, University of Maine Cooperative Extension Entomologist, and Kate Garland, Horticultural Professional, University of Maine Cooperative Extension Penobscot County
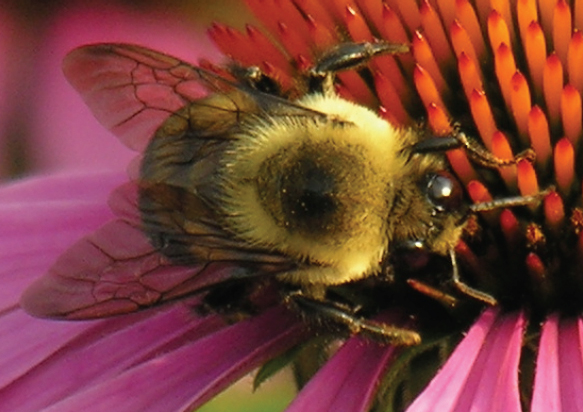
Imagine for a few moments that you are a mature bumblebee. Your daily work throughout the growing season involves pollinating flowers, fruit trees, and vegetables. One afternoon, however, you and several of your sisters have trouble finding your way back to your colony. Despite your confusion, you are able to function and keep working as best you can. You are a bee that has been exposed to a group of insecticides called neonicotinoids. As your exposure to neonicotinoids increases, your nervous system starts malfunctioning and not sending messages to the muscles, you become disoriented and paralyzed. Death can sometimes be immediate if exposure is high.
Among the pesticides that are known to impact pollinators — including bees — are neonicotinoids or “neonics,” seven types of insecticides that can negatively impact pollinator nervous systems, rate of infection by pathogens, production of new queens, egg laying in queens, and potentially leading to pollinator mortality. Neonics, used largely by food producers across the globe to effectively eliminate unwanted insect pests, vary in their toxicity and susceptibility varies between bee species. An increasing number of studies have shown that pollinator populations have been seriously impacted by neonics along with an array of other insecticides, even fungicides and herbicides, ultimately creating concern for the future of the food web. In 2013, The Center for Food Safety published a report1 discussing the scientific literature, regulatory developments, and a variety of efforts being undertaken at that time to alert the public about the possible short- and long-term implications this lethal group of chemicals may have on pollinators.
Where might home gardeners come into contact with neonics? If you purchase vegetable flats and perennials from “big box” stores, such as Home Depot or Lowe’s, you may be inadvertently bringing neonics into your garden. A collaborative study conducted in 2014 by Friends of the Earth and the Pesticide Research Institute revealed that a sampling of plants from Lowe’s, Home Depot and Walmart in 18 cities in the US and Canada were tested for pesticides. It turned out that 51% of the plant samples contained high levels of neonicotinoid pesticides — enough to harm or possibly kill bees.2
Since that time, however, some progress has been made. Under pressure by environmental groups and citizen activists, several big box stores have agreed to discontinue their relationship with growers who treat plants and/or seeds with neonics. Home Depot now provides labels on its greenhouse ornamentals, indicating if a plant has been treated with neonicotinoid family of pesticides. In May of 2016, they posted a news release on their website that stated they will be “phasing out the use of neonics on our plants by the end of 2018.”3 Lowe’s made a similar announcement in April of 2015, stating they would phase out neonics on their products and plants by the spring of 2019.4 To further support the movement, the Saving America’s Pollinators Act was reintroduced in June of 2017, and efforts are being made to urge support by the House or Senate.5
But meanwhile, what can home gardeners do to provide a safe environment for pollinators? Below are simple how-to’s for home gardeners, including:
- Shop where you can confidently know that plants are neonic-free;
- Carefully read labels on plants and garden/lawn treatments, looking for the following toxic pesticides: imidacloprid, acetamiprid, dinotefuran, clothianidin or thiamethoxam. The Bayer Corporation and Scotts Company are two large brand name producers of neonics;
- To be a vocal activist, let all plant retailers know you want them to choose suppliers who do not use neonics on seeds or as topical treatment of seedlings and other plants;
- Grow your own vegetables and perennials from seed, using untreated seed and substrates;
- Eliminate pesticide use in your home gardens and lawns;
- Look for sources to help you to move toward an organic approach to gardening;
- Provide shelter, water, and a wide array of pesticide-free food sources from flowering plants for pollinators (learn more);
- Encourage neighbors to follow suit; and
- Contact your local State representatives, letting them know you support legislature to ban neonics.
While researchers are still in the process of digging deeper into the larger impacts of neonics, home gardeners should have confidence that they can take action to provide safe havens for our beloved pollinators.
Learn more: How to Create a Bee-Friendly Landscape.
[1] http://www.centerforfoodsafety.org/files/pollinatorreport_final_19155.pdf
[2] https://foe.org/news/2014-06-new-tests-find-bee-killing-pesticides-in-51-percent-of-bee-friendly-plants/
[3] https://corporate.homedepot.com/newsroom/how-home-depot-addresses-neonicotinoid-concerns
[4] https://www.huffingtonpost.com/2015/04/09/lowes-pesticides-bees_n_7035208.html
[5] https://4us.com/Bills/Details/h-r-3040_congress115
Minimizing Disease Pressure
By Alicyn Smart, D.P.M., Assistant Extension Professor and Plant Pathologist, University of Maine Cooperative Extension
One of the biggest fears of avid gardeners is that their beloved plants will get a disease, and for good reason — plant diseases are the cause of about 14% of all annual crop losses, translating to about $220 billion in crop loss worldwide and an additional loss of 6-12% after harvest. With all the time and effort you put into gardening, it’s important to take steps to limit the amount of disease your plants could potentially encounter. Here are some simple suggestions that can make a big impact.
Start by purchasing seeds and plants from reputable sources that you can trust will sell healthy plant material. This can sometimes be difficult to determine if this is the first time buying seeds or plants, but I suggest talking to gardening friends who have purchased these things before and ask them if their plants were healthy or, in the case of seeds, if the germination rate was high. Take the time to look the plant over when you buy it, don’t just focus on the color of the flower, but make sure it’s not root bound, there is no discoloration on the leaves, there are no broken limbs and the plant’s overall health is good. Avoid “rescuing” questionable, enticingly low-cost, plants that are bound for the trash or compost pile.
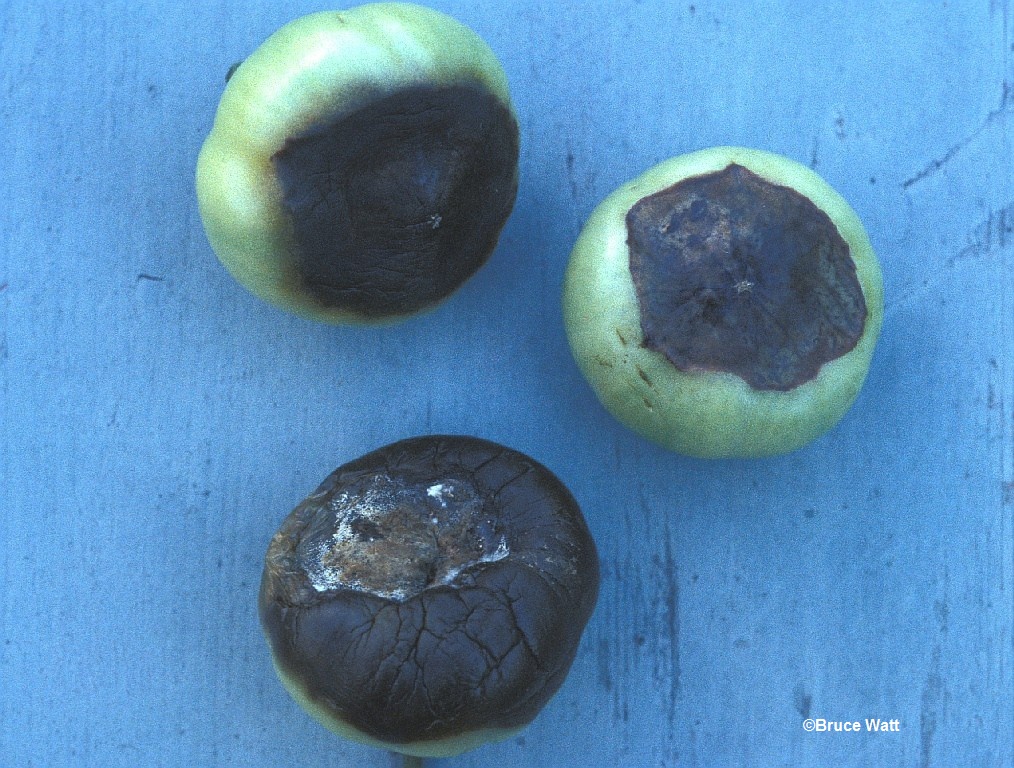
Select plants and seeds that have the most disease resistance. For example, if you know you had an issue with a disease on your tomatoes last year, reach out to your local Extension office to determine the likely pathogen, then select tomatoes that are resistant to the culprit. This will greatly reduce your chances of having plants impacted by the pathogen this year even though the disease might be present in your garden. If you plan to save your seed, only save the seed from the plants that performed well and did not show any signs of disease. Seeds can sometimes be the source for some diseases.
Keep it clean! Good sanitation is an essential step to avoiding diseases in the first place. Clean re-used pots planned for starting seedlings and container gardens by brushing off all the soil and then soaking in a 10% bleach solution or other approved sanitizer for the time indicated on the label. If the label does not state a specific soaking time, then plan for at least ten minutes. Rinse sterilized containers with water so that the sanitizer does not cause plant toxicity issues. Similarly, a cleaning solution should be used to clean tools and garden structures, such as trellises or stakes, potentially exposed to diseased plant tissue. Certain garden infrastructure that cannot be sanitized (ex: burlap), that may have been exposed to diseased plants, should be replaced to limit the chance of introducing the disease to healthy plants. Equipment like a rototiller should be rinsed down with water if moved from one area to the next since one area might have a soil pathogen and the other may not. Additionally, make sure last year’s garden remnants have been cleaned up and diseased and damaged woody stems are removed as soon as they are noticed. Leaving diseased tissue in place is a great way to overwinter pathogens so, in spring, they have the opportunity to re-infect your garden.
Practice proper planting methods. When sowing seeds, moisten the media first before filling the trays. This will help reduce compaction, which can cause poor germination and developmental delays. Compaction can also occur if you stack the trays, so carry each one separately. Follow the instructions on the seed packet to determine proper planting depth. See Bulletin #2751, Starting Seeds at Home for more information on seed starting. Planting depth is also an important factor when installing perennials, shrubs and trees — not too shallow, not too deep, but just right! Learn more about selecting, planting, and caring for woody plants.
Select the right plants for the location. Sun exposure and drainage are two key site factors to assess. If you happen to have a low-light, poorly drained site, you’ll want to carefully choose plants that are well adapted to those challenges. Installing plants not adapted to the site conditions may result in plants not thriving and being more susceptible to pathogens. See links below to listings of plants for challenging sits. With most vegetables, especially any plants that are grown for their fruit, a site with at least 8 hours of sunlight and good drainage is essential. Learn how to assess the drainage of your soil (PDF). Sites prone to water accumulation can harbor water mold pathogens that cause root diseases.
Rotate crops based on plant families. Closely related plants are often are susceptible to the same insect and pathogen pressures. By grouping individuals from the same families together within the garden and then planting those groupings in different locations from year to year, you’re helping to avoid build up of disease and insect populations. Even if you didn’t see the disease, it may have been present and can eventually accumulate in that site if plants in the same family are planted in the same spot annually.
Increase air circulation within the plant canopy and water wisely. Good air circulation will dry leaves that are prone to get foliar diseases when water is present. Simply keeping up with weeds can help improve airflow around lower growing plants. Proper pruning of dead limbs on shrubs and trees will also increase air circulation. Overhead irrigation can promote foliar diseases since the water is landing on the leaves rather than the soil. If possible, make sure to water the soil directly and limit splashing of the water from the soil and bouncing onto the lower leaves. Mulches, such as straw and shredded leaves can make a good barrier between the soil and foliage to reduce soil-borne pathogens from moving onto the plant. Also, make sure to not over water. If your irrigation turns on at a scheduled time, consider adding a rain sensor that will override the timer if there has been sufficient precipitation.
Finally, make sure plants have access to healthy soils. Nutrient levels, pH, and organic matter content are all factors that can be assessed by a standard soil test and the report offers gardeners important “next steps” to create the conditions for optimal plant health. A healthy plant is a more resilient in the face of disease pressures.
Healthy plants growing in the appropriate site and cultivated using proper sanitation practices have the best shot at staying vigorous and productive for the duration of the growing season. However, if you find yourself in a situation where you think you might have a disease in your garden, you can submit a sample to the UMaine Extension Plant Disease Diagnostic Laboratory where we can help you identify the problem and give you management recommendations. Here’s how to send a plant sample:
- Carefully examine all plant parts and determine those parts which you believe to be diseased (remember that diseased roots can cause wilted leaves).
- Ideally the whole plant should be sent when possible (small plants or seedlings). Place the root ball in a plastic bag and tie it so the soil doesn’t contaminate the foliage. Wrap the plant in a dry paper towel or newspaper place in a sealed plastic bag and ship the sample as soon as possible.
- If the plant is too large to make the above possible:
- Place fresh leaves in a zip-lock plastic bag with a dry paper towel. Include healthy and diseased leaves.
- Wrap cut stems in a dry paper towel and place in a zip-lock plastic bag.
- Shake roots free of soil, wrap in a barely damp towel and place in plastic bag.
- Many woody samples may simply be placed in a plastic bag.
Samples should be packaged and sent as quickly as possible. If the sample cannot be sent the same day, it should be kept refrigerated.
Ideally, samples would be hand-carried to the lab. When sending samples through the mail try to mail early in the week so samples will not sit over the weekend.
Remember that sample quality is important! How to send a plant sample.
Further reading:
- Plants for Very Dry Soil and Full Sun
- Plants for Very Wet Soil and Full Sun
- Plants for Very Dry Soil and Shade
- Plants for Very Wet Soil and Shade
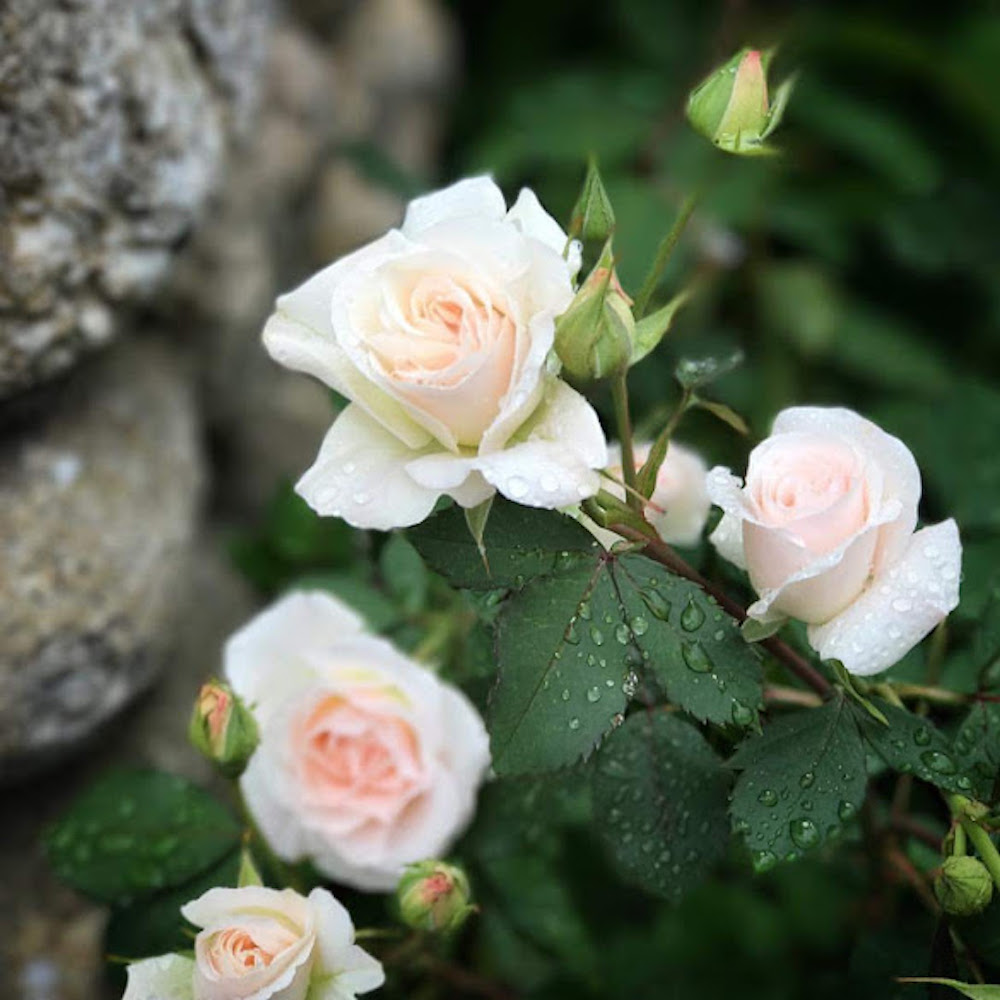
Miniature Rose Plants — Divas Need Not Apply
By Lynne M. Holand, Community Education Assistant, University of Maine Cooperative Extension Androscoggin and Sagadahoc Counties
The miniature rose plant is often overlooked as an option for in the outdoor garden. They tend to be sold in 4” or 6” pots in the florist and grocery store during holidays in the winter and spring when the idea of planting outside is a distant memory. Though the colors are varied and the plants attractive for a while, they often wither and die in the home; one bloom and done. Anyone could be forgiven for thinking this is a petulant, hard to care for plant; a tiny diva of the rose world. Nothing could be further from the truth.
According to the University of Illinois Extension “Our Rose Garden” website all the miniature roses descended from a single dwarf “china rose.” China roses have been recorded as early as the 10th century and hybridized over the last millennium. One such hybrid, called “Rouletti” was discovered in Switzerland in the 1920s. There is an account of its discovery that appears to be part fact and part Victorian legend that makes for a good read. You can find at the Paul Barden Roses website. Breeding of miniature roses became popular after World War II. There was a breeder in Massachusetts and several in Ontario Canada as well as California and Colorado. That speaks to the hardiness of this type of rose. Later, in California, Ralph Moore, the “Father of Miniature Roses,” took breeding to new levels developing over 300 named varieties in the last quarter of the 20th century. Mr. Moore was certainly the champion of this tiny rose princess.
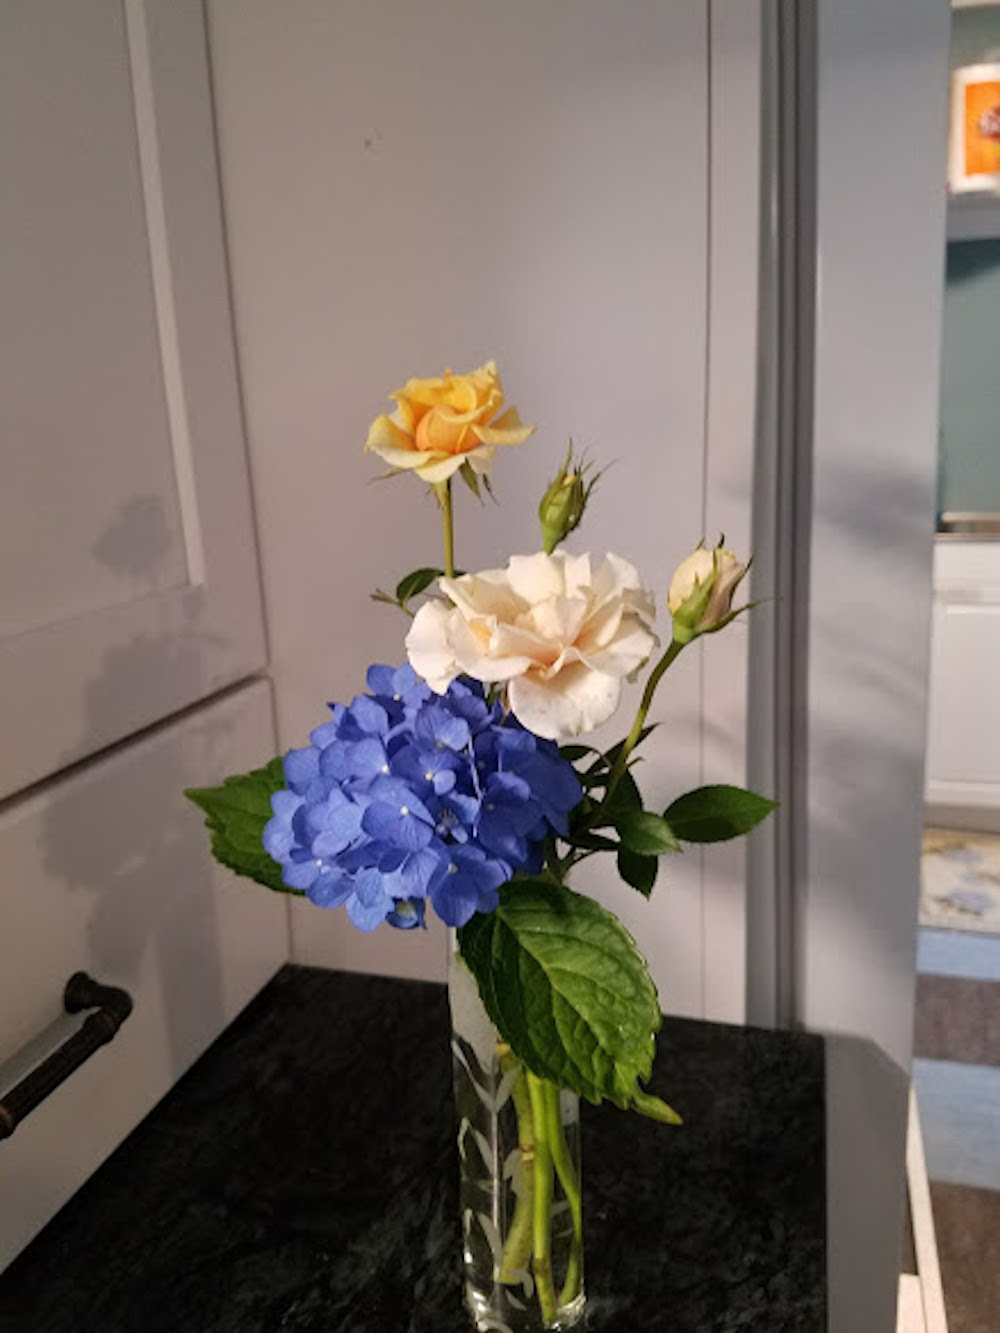
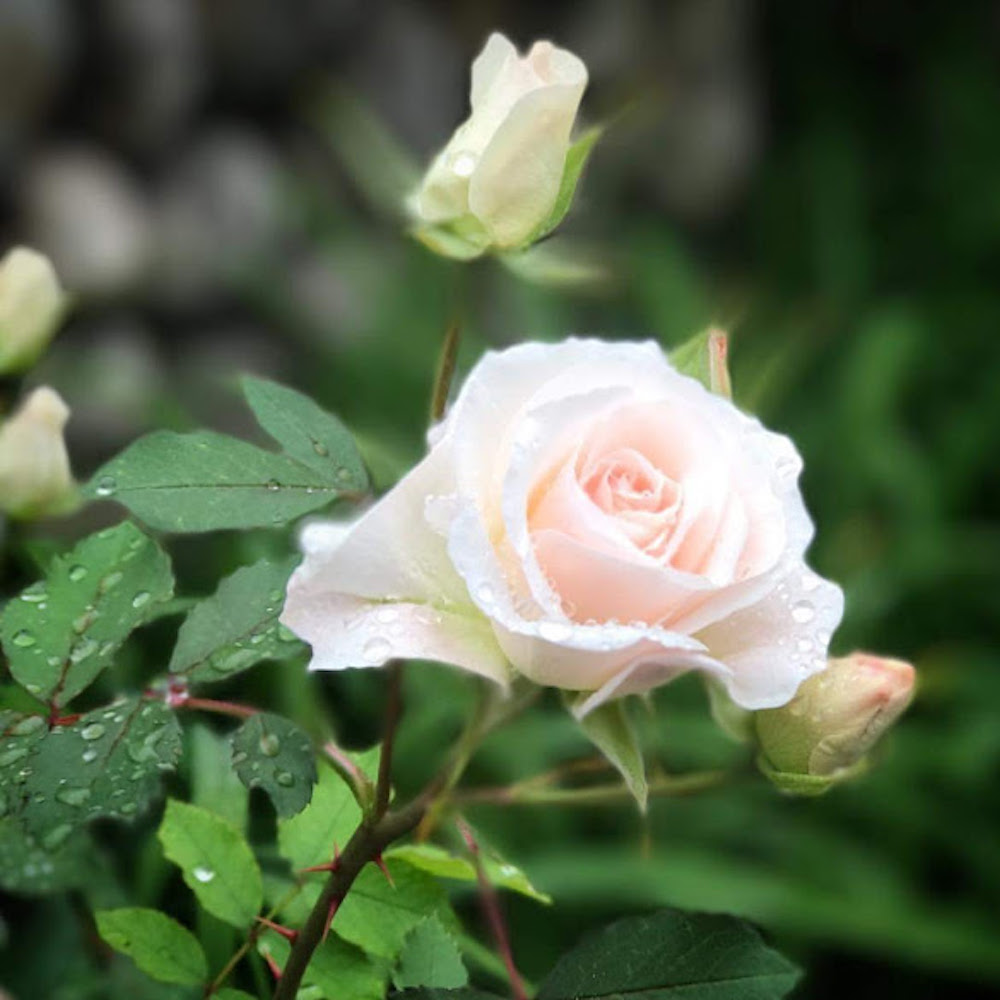
A big part of the appeal of mini rose plants is that these roses work well in containers as well as gardens. Miniature roses come in many forms and can range in height from a few inches to up to 18”. They generally are prolific and nearly constant bloomers; though most of the varieties have very little scent. There is a rainbow of colors that have been developed as well as two-tone flowers on some varieties. The flower size is generally about the size of a penny when first opened and a quarter opened up fully. Some varieties are like a tea rose, holding their bud shape while others open fully like an old-fashioned heirloom rose showing their centers. Almost all varieties have a low petal count. Do not expect a firm, dense rose except at early bud stage.
The care of miniature roses is the perhaps the best thing about them, especially in the garden. They are relatively care free — thriving in at least six hours of direct sunlight and well-drained soil, as do most perennials. They are not especially heavy feeders so fertilize as you would any garden perennial. As stated before, they are very cold hardy so you will see buds quite late into the season. Do not deadhead after mid-September to avoid encouraging new growth late in the season. They require little, if any, pruning and the first or last bloom of the season can be left to grow tall for a perfect bud vase specimen. Unlike many tea or floribunda roses, these do not need any special sprays or fertilization. But, as with any garden plant, good air circulation and regular monitoring will go a long way towards eliminating pests and diseases. If you do end up with a mini rose off season, the University of Iowa has instructions for keeping the plant happy until you can get it into the ground.
What a rare gem; a plant will tolerate the indoors for short periods of time and then make the transition to the garden easily. A rose plant that blooms all summer with tiny perfect roses that is not the first victim of black rot or Japanese beetles. An outdoor rose that doesn’t mind being in a container and also thrives in a border or a secret garden. The miniature rose is a great addition to any garden and certainly not a diva. All pictures courtesy of the author and her garden.
Volunteer Spotlight: Forest Hills Gardens in Jackman
By Kathy Hopkins, Extension Educator, University of Maine Cooperative Extension Somerset County
Joe Bergeron and Danielle Hale are Master Gardener Volunteers from Jackman who have made a huge difference in their community. Their mission is simple: to share their passion for sustainable gardening and food sourcing in order to create sustainable, healthy eating options in their community. They have tirelessly developed and implemented a community-wide project through their local school, Forest Hills Consolidated School. Their hard work, commitment, and ability to develop collaborative efforts with the Jackman business community, the school’s teachers, kitchen, phys-ed, and after school staff has led to the development of a school-wide sustainable agriculture group and helped create a healthier environment in both the school and the community of Jackman.
Joe, known as “Farmer Joe,” teaches students to grow fresh vegetables and herbs, both inside the school and outside in greenhouses, year-round. Farmer Joe also works with 177 students in three grade level classrooms weekly, designs a holistic and integrated curriculum, helping students learn to grow food, research various plants and feel, smell and taste the results. He introduces students to healthy food through cooking demonstrations in the classroom and explores the cultural and geographic origins of the food they grow. They grow over 18 varieties of microgreens, kale, beets, and a variety of other familiar and less well-known vegetables, which they consume in school meals. Excess produce is shared with seniors in the community and with food pantries. Farmer Joe and Danielle together contribute over 450 hours of volunteer time annually to this project.
The Forest Hills food service program benefits from Farmer Joe and Danielle’s help. The food budget costs are defrayed with the harvest of potatoes, onions, tomatoes, herbs, fresh greens, and other foods raised. Head cook, Laura Hall, is able to offer healthier, fresher options for school meals. Their gardening efforts have resulted in over $2,000 worth of food donated from their gardens to the school lunch program. It also allows the students to see the full cycle of growing, harvesting, preparing, and eating the results of their labors. Students are empowered by learning life skills such as farming, gardening, and cooking through this project.
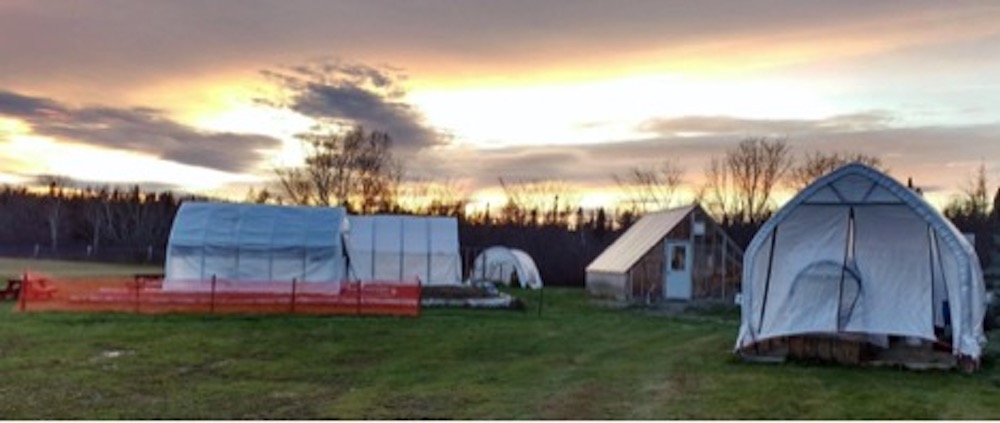
The school gardens, now known as Forest Hills Gardens have expanded from classroom containers to a 20’ x 24’ hard-sided, wheelchair accessible greenhouse/outdoor classroom, six functioning greenhouses, four currently planted with different crops, and underground water lines to all greenhouses. The actual garden size has increased to over 2,000 square feet with the help of a variety of organizations and businesses that recognize that the seeds of success are being planted in the Moose River Valley. They are also conducting Leek Moth research with the University of Maine Cooperative Extension, having discovered with Dave Fuller that they have the first detected population of Leek Moths in the state. They are working with librarian, Linda McBriety, to build a more current gardening and agricultural section available to students. They have been involved in a variety of programs that further their sustainability goals: Move More Kids, 5210, and Let’s Go. They have received five awards from Somerset Public Health for their sustainability efforts conducted on behalf of their community. They have also reached out to the Madison Food Cupboard and provided design and building assistance with the garden that supports the Madison Food Cupboard.
Their projects can be followed on Facebook.
Food & Nutrition: Ways to Use Less Sugar in Homemade Jams and Jellies
By Kate McCarty, Food Preservation Professional, University of Maine Cooperative Extension Cumberland County
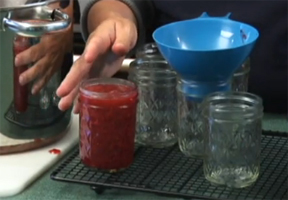 June is strawberry season in Maine, and many home gardeners may want to preserve their strawberry harvest into jams and jellies. If you are looking to use less sugar in your homemade jams and jellies, there are several pectins that allow you to use less or even no sugar. Pectin is the substance in jam and jelly that makes it set and gives it its gel-like texture. It is available in liquid and powdered form, and people use it to ensure a proper set and to reduce the amount of sugar needed. Using a low or no sugar needed pectin is the only way to make a jam or jelly using less sugar. Do not attempt to reduce the sugar in a classic or traditional jam or jelly recipe, as you run the risk of it not setting.
Low or no sugar pectins are available wherever canning supplies are sold, namely hardware stores, grocery stores, and big box stores. The most common brands are Sure Jell and Ball, while Pomona’s Pectin, another low or no sugar needed pectin, can be found at natural food stores. Each pectin varies in its formulation, so follow the recipes that come included in the pectin package. Sure Jell and Ball’s less or no sugar needed pectins each contain instructions for making jam and jelly using less sugar or a sugar substitute like Splenda.
Pomona’s Pectin is a low methoxyl pectin, which means it relies on calcium to gel instead of sugar. The powdered calcium comes with the pectin powder, and before you start jamming, you’ll need to mix the calcium powder into some water (instructions are included in the pectin package). This calcium water is added to the fruit mixture during the jam making process, providing enough calcium for the pectin to gel the jam. Any type of sweetener can be used with Pomona’s Pectin, from sugar to Splenda and natural sweeteners like maple syrup and honey.
Jams and jellies can be frozen or processed in a boiling water bath for long-term storage. Low sugar jams and jellies, once opened, need to be refrigerated and eaten within two weeks. These low sugar versions will spoil faster than full sugar version, so be sure to enjoy your homemade strawberry jam promptly after opening.
For more information on jamming, visit UMaine Extension Bulletin #4268, Strawberries and Bulletin #4039, Let’s Preserve: Jams, Jellies and Spreads or attend a hands-on preserving workshop in your area.
University of Maine Cooperative Extension’s Maine Home Garden News is designed to equip home gardeners with practical, timely information.
Let us know if you would like to be notified when new issues are posted. To receive e-mail notifications fill out our online form.
You may also follow us on Facebook, Twitter, or RSS. New to RSS? Learn more.
For more information or questions, contact Kate Garland at katherine.garland@maine.edu or 1.800.287.1485 (in Maine).
Visit our Archives to see past issues.
Maine Home Garden News was created in response to a continued increase in requests for information on gardening and includes timely and seasonal tips, as well as research-based articles on all aspects of gardening. Articles are written by UMaine Extension specialists, educators, and horticulture professionals, as well as Master Gardener Volunteers from around Maine, with Katherine Garland, UMaine Extension Horticulturalist in Penobscot County, serving as editor.
Information in this publication is provided purely for educational purposes. No responsibility is assumed for any problems associated with the use of products or services mentioned. No endorsement of products or companies is intended, nor is criticism of unnamed products or companies implied.
© 2018
Call 800.287.0274 (in Maine), or 207.581.3188, for information on publications and program offerings from University of Maine Cooperative Extension, or visit extension.umaine.edu.