Maine Home Garden News — September 2018
- September Is the Month to . . .
- Establishing a Wildflower Garden from Seed
- Goldenrods and Asters: Ecologically Functional Perrenials for your Autumn Garden
- Slow Growth Approach and Dedicated Volunteers Produce Big Results at Manchester Elementary School
- Long Thought to Be Extirpated Unicorn Root Found
- Food & Nutrition: Specialty Ingredients Used in Preserving Pickles
September Is the Month to . . .
By Richard Brzozowski, UMaine Extension Food Systems Program Administrator
- Be prepared for possible frosts this month. Pay close attention to the weather forecast via television, radio, smartphone or the web and have an adequate square footage of plastic sheets, lightweight tarps, old bed sheets, or row covers to protect tender crops. Temporarily covering crops can often result in extending your growing season by weeks. Radiational cooling (frost) occurs when temperatures reach near 32ºF on clear, windless nights. Cold air settles in low areas first. Be aware of these “frost pockets” on your property and consider that factor when planning your garden in future years.
- As you remove vegetable plants, consider sowing a winter cover crop of oats. Oats will grow well into the fall until a killing frost and can be purchased from your local farm/feed store as livestock and horse feed. The normal seeding rate is about 1/2 pound of oats per 100 square feet. As September progresses, sow the oats at a heavier rate to make up for a shorter growing period. Doubling or tripling the rate is fine as the month progresses. Improve germination of oat seed by rolling with a simple homemade roller constructed of a large-diameter pvc pipe 2 to 3 feet in length. Once killed off by freezing temperatures, the oats will form a dead, brown mat, which protects the soil through the winter. The mat is easily tilled next spring or gardeners can leave it in place and simply clear a small spot to make holes for seedling transplants and direct seeding trenches.
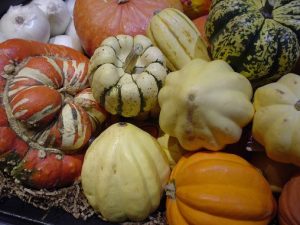 Winter squash can store well for several months when harvested in a timely manner, cured properly, and stored in a dry, cool room. The ground spot (i.e. the spot where the fruit sets on the ground) will develop a deep yellow or deep orange color when the fruit is ready to pick. If you did not grow winter squash, consider purchasing your winter supply from a local farmer. Enjoy Bulletin #4176, Winter Squash and Pumpkins with information about harvesting, storing, and preparing these seasonal favorites.
- Consider planting spring flowering bulbs such as daffodils, tulips, and crocus before the ground freezes. The work you put in now will be greatly appreciated next spring.
- As the lawn mowing season winds to an end, prepare your mower for storage. Use a gas stabilizer in the fuel tank, detach the wire at the spark plug, and scrape the grass from the underside of the mower deck. Now is a good time to also look into finding someone to sharpen mower blades.
- Plant trees and shrubs. The greater rainfall amounts we typically have this time of year can provide a good start for newly installed plants before the ground freezes solid. Local nurseries and garden centers often have great deals on trees and shrubs at the “end of season” to reduce their inventories. Keep in mind that later fall planting times (after mid to late October in most areas in Maine) could be risky because growing conditions may not be favorable for good root development before the ground freezes solid.
- Prepare to grow herbs indoors this winter. Chives, lemon balm, basil, tarragon and oregano all are all relatively easy options for those who are new to windowsill farming.
- If you have a root cellar, clean and prepare it for new roots, tubers, or vegetables. Make sure it is set up for adequate air exchange, darkness, easy access, proper temperature and humidity control, and is rodent proof. If you don’t have a root cellar, use the season ahead to learn how one can be an effective way to store fresh foods at a low cost. For more information, see Root Cellaring.
- Prune dead or dying branches from trees and shrubs on your property. Stay on the ground when pruning. Hire a professional for trees that require pruning if a ladder or greater is needed. Professional arborists have the proper equipment and the know-how.
- Visit your local garden center or nursery. Every season brings new items and new inspiration!
Establishing a Wildflower Garden from Seed
By Kate Garland, Horticultural Professional, UMaine Extension Pensobscot County, and Lynne Holland, Community Education Assistant (Home Horticulture), UMaine Extension Androscoggin and Sagadahoc Counties
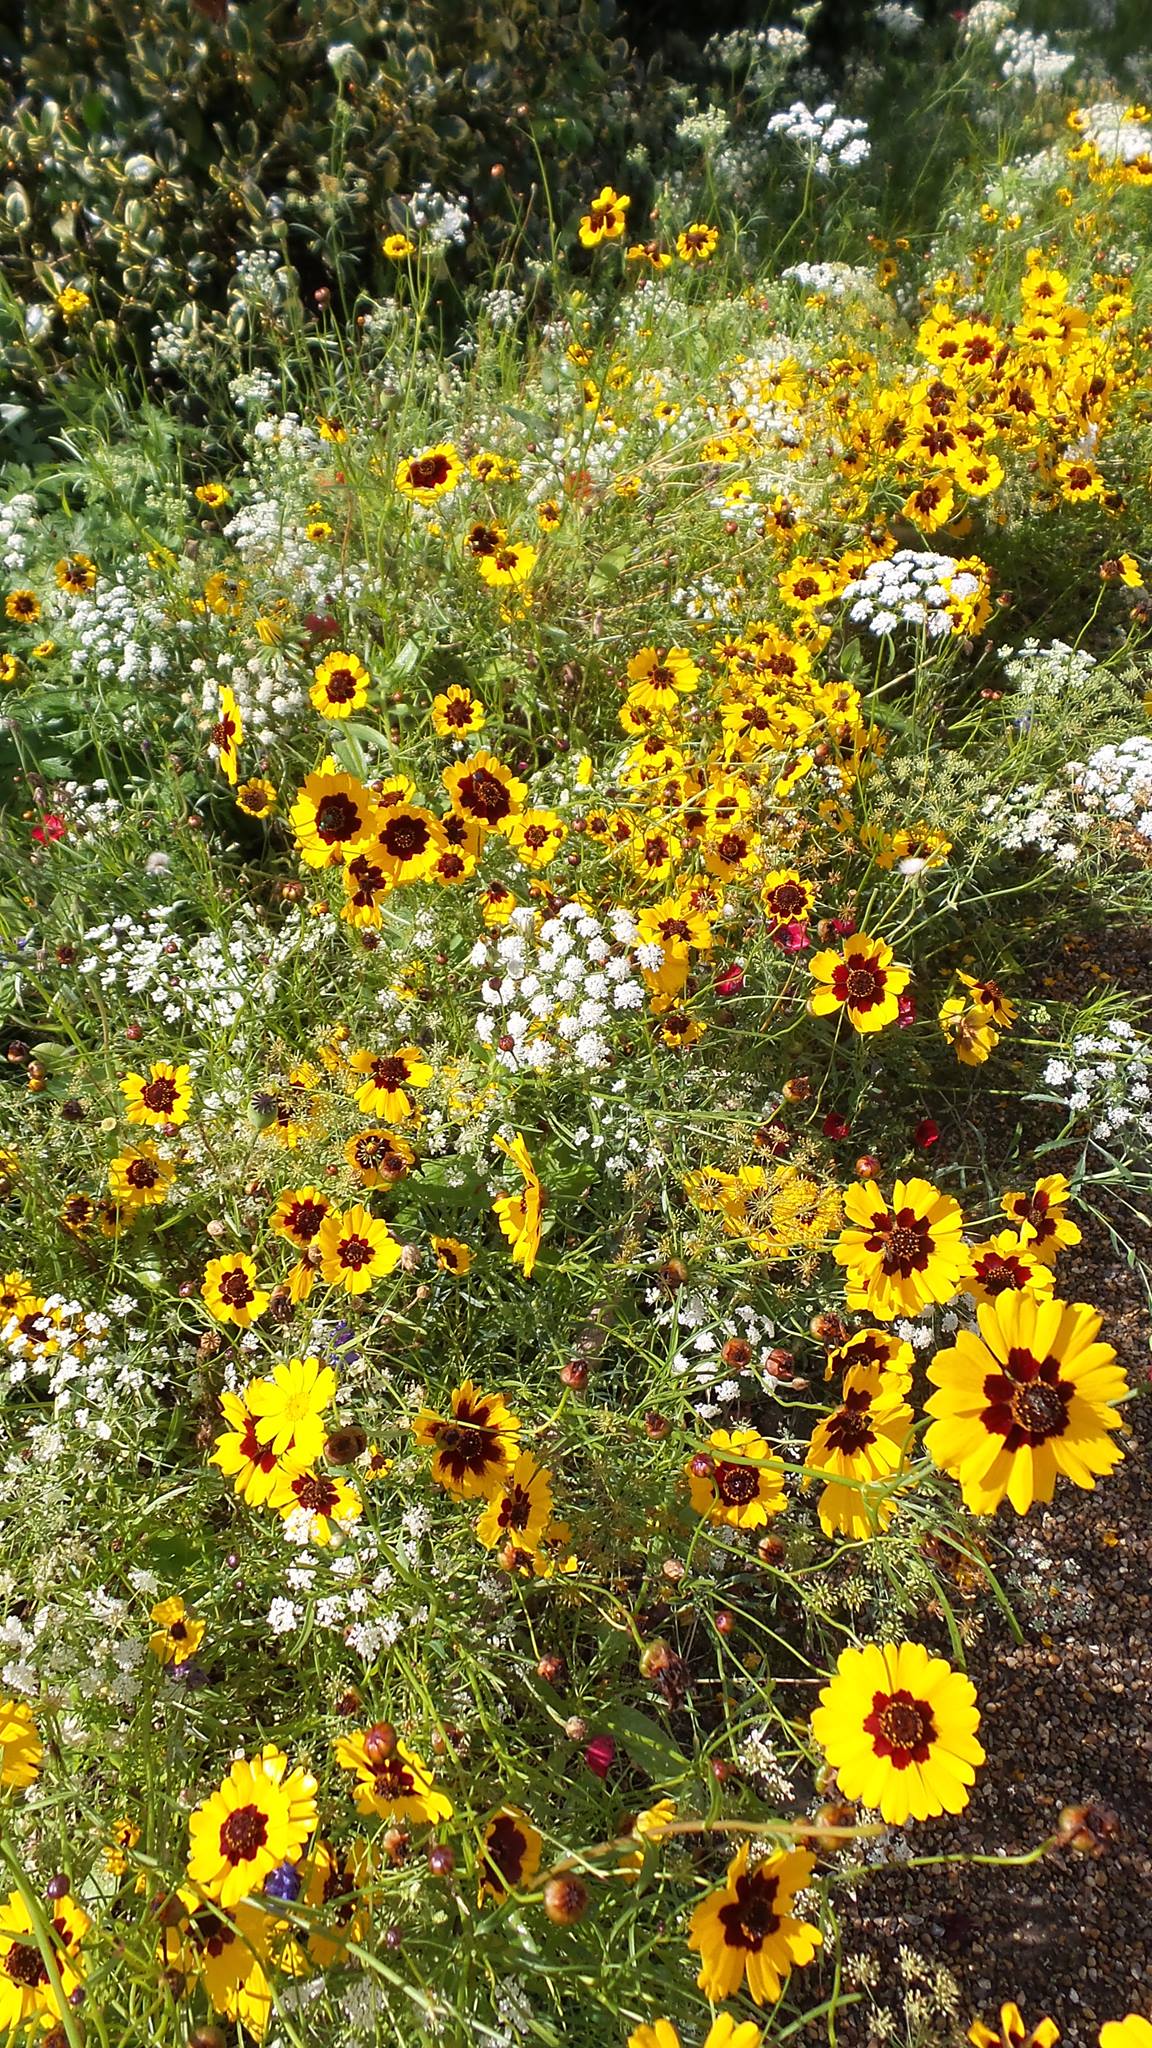 A wildflower garden is a great addition to any landscape. It’s a way for gardeners to enhance habitat for beneficial insects, birds, and other wildlife. Direct seeding can be an economical approach to creating wildflower gardens — especially for large-scale installations. Many people try the “scatter and hope” method where a mix wildflower seeds are simply scattered into an existing garden, lawn, or pasture and the grower hopes for the best. While some plants may get established and thrive, others don’t even have a shot at survival in such a challenging setting. Instead, consider these tips to get the most out of your next attempt at cultivating wildflowers from seed.
Site preparation
The most challenging part associated with direct seeding perennials is establishing a clean seed bed in which to sow. The more you manage unwanted plants (weeds) ahead of time, the more likely you’ll have good establishment of the desirable plants. We recommend a mix of these strategies:
- Mowing very close and covering with a physical barrier, such as cardboard, heavy tarps or plastic for a significant period of time followed by
- repeated cycles of solarization with clear plastic and light cultivation (no more than 6” deep) to deplete the soil seed bank of weeds.
Let’s take a closer look at step 1. Ideally, you’d give yourself nearly an entire season to cover the area you’d like to direct sow with wildflowers, but time is not always on your side. If you don’t want to wait a whole season, simply do the first step of mowing close and covering for as long as possible. Even 3-4 weeks can help kill off many weeds that can outcompete the seeds you’re trying to establish. While it’s tempting to “skim” off the weeds by removing the sod, it’s best to keep it in place to preserve that layer of useful nutrients and organic matter.
The solarization in step 2 creates a mini greenhouse to encourage remaining weed seeds to germinate. Yes, you read correctly. Our soil is full of dormant weed seeds just waiting for the right moment to grow. Therefore, we want to encourage weed seeds at the soil surface to wake up and get out of the way before we plant the area. This step can be done without clear plastic, but the plastic quickens the seed germination process and, in the heat of the summer, can even kill off the newly emerged weed seedlings without the need for cultivation.
Before jumping into the solarization process, send a soil sample to the Maine Soil Testing Service for analysis. Adding nutrients is not typically recommended because most wildflowers do not require a lot of fertility and excess nutrients could encourage weed competition, but we do suggest checking to see if pH needs to be adjusted before sowing. If anything needs to be added to adjust pH, rake it in lightly to avoid bringing up dormant seeds that may lay further down in the soil profile.
Select plants
As with any garden, you’ll want to take the time to select the right plants for the space you’re cultivating. Factors to consider are hardiness zone (for perennial plants), sun exposure, and drainage. When the goal is to enhance insect habitat, it’s also important to consider bloom time and type of food source the flower will provide (nectar or pollen or both). Strive to offer as much diversity as possible in terms of bloom times and food types. Check out the resources listed below for more information on plant selection.
Sow seeds
For many types of wildflowers, fall sowing is a great way to mimic mother nature. A lot of species have a built-in dormancy mechanism that keeps them from germinating until they experience a combination of cold and moisture conditions (i.e. stratification). These environmental triggers help soften the seed coat and allow the baby plant to begin imbibing water. Some plants require a physical weakening of the seed coat through a method of scarification. Seed companies will usually provide information on ideal sowing time and any seed prep required before sowing. For those who plan to collect their own wildflower seed, or are just a bit more excited to learn more about propagating native plants, a favorite resource of mine is Growing and Propagating Wildflowers of the United States and Canada by William Cullina.
Small seeds are easiest to disperse if mixed with some type of “carrier,” such as sand. Once you’ve sown the seed, be sure to mark the area and/or jot down notes about the species and planting dates. Another very important step that’s often skipped is establishing good seed to soil contact. Going over the area with a lawn roller or walking over it with snowshoes (when your neighbors aren’t looking) are good methods for that task.
Maintenance
As with all newly planted seed, it’s essential to water them in and keep the area moist. This typically means you’ll want to apply about 1/2-1” of water a week. Any weeds that emerge should ideally get pulled by hand, but in large spaces that can be unmanageable. Do your best to pull out the competition or knock back any taller weeds with a string trimmer to minimize weed seed rain. You’ll find that some weeds will inevitably be part of the picture and certain plants will thrive better than others in your setting. Have reasonable expectations and enjoy observing the natural shifts that take place.
Wildflowers are a positive addition to any landscape, but keep in mind that the plants are not the only landscape features insects, birds and other wildlife need to survive. Don’t forget to offer accessible water (ex: have small rocks or floating debris for insects to land on in birdbaths) and a variety of coverage and nesting spaces. Also, strive to minimize the use of any chemicals whenever possible (herbicides, insecticides, fungicides) by reaching out to your local UMaine Cooperative Extension county office for tips on how to address specific pests, pathogens, and weeds without the use of pesticides.
Learn more
- How to Create a Bee-Friendly Landscape
- Enhancing Wild Bees for Crop Pollination (PDF)
- Pollinator Plants: Northeast Region (PDF)
Goldenrods and Asters: Ecologically Functional Perennials for Your Autumn Garden
By Marjorie Peronto, Extension Educator, UMaine Extension Hancock County
Fill your garden with ecologically functional perennials and build your garden’s biodiversity. Encourage insects of all types — pollinators, predatory and parasitic insects, and herbivores (caterpillars, aphids, beetles, and others that feed on plant foliage). A garden border that is swarming with insects throughout the season is one that also nourishes birds, rodents, amphibians, and reptiles; i.e., a balanced mini-ecosystem.
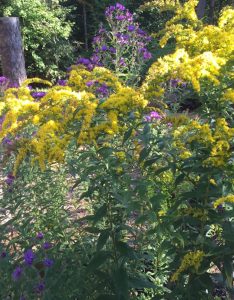
In the late summer and early fall, there are striking combinations of goldenrods and asters blooming in the wild. It is this scene that inspired me to incorporate these native companions into our own garden border, offering an abundance of nectar and protein-rich pollen to the pollinators upon which we depend.
Goldenrods (Solidago spp.)
There are nineteen species of goldenrod that are native to Maine, each unique in size, leaf shape, or the form in which it displays its golden flowers. Although many garden centers are slow to stock native goldenrods, some are willing to obtain them for you if asked. And if you are in the vicinity of Liberty, Maine, check out Julie and Peter Beckford of Rebel Hill Farm, MOFGA certified growers of native perennials who carry a several types of gorgeous field grown goldenrods.
As a side note, goldenrods do not cause hay fever. While goldenrod pollen is too heavy to be carried on the wind, the wind-borne pollen from the tiny green flowers of common ragweed, an inconspicuous plant flowering at the same time as some goldenrods, is the main cause of hay fever.
For a sunny, dry garden, try growing the tall goldenrod, Solidago altissima, a rare species that grows to 7 feet tall, and two shorter species, gray goldenrod, S. nemoralis, and elm-leaved goldenrod, S. ulmifolia, growing to 3 and 4 feet, respectively. All three species flower in August with gray goldenrod and tall goldenrod continuing into September.
For wetter garden sites, use the blue-stemmed goldenrod, S. caesia, which grows 4 feet tall, and smooth goldenrod, S. gigantea, which tops out at 7 feet. Both flower in the fall.
Asters (Symphyotrichum spp.)
Like goldenrods, asters attract a plethora of late season pollinators. Maine native asters range in color from blue, purple, pink to white. New England Aster (Symphyotrichum novae-angliae) is perhaps one of the best-known asters, and with good reason. It is quite a showy plant, sometimes with hundreds of large, colorful deep purple to pink compound flowers on plants growing to 4, 5, or occasionally even 6 feet tall. In the wild it is found in open wooded areas, meadows, prairies, and along streams, but is especially visible along roadsides. It has very wide distribution, found in 42 of the 50 states, and most of Canada. It’s especially common in the Upper Midwest and the New England states. It also has a fairly long blooming season, starting to bloom in early August and lasting until first frost.
Smooth Blue Aster (Symphyotrichum laeve) is a native fall-flowering plant throughout New England. Flowering begins in late September in Zone 5 and lasts 3-4 weeks. It grows 2 to 3 feet tall with a central stem that produces a few flowering side shoots in its upper half. Each flowering stem produces panicles of numerous daisy-like flower heads, each about 1/2 to 1 1/4 inches across. Each head has about 15 to 30 lavender or light blue-violet ray flowers surrounding a disk of yellow flowers. The common name, smooth blue aster, reflects the lack of hairs on the stem and leaves. If you are interested in planting smooth blue aster, look for the cultivar ‘Bluebird’, an improvement over the species.
Other functional fall blooming perennials
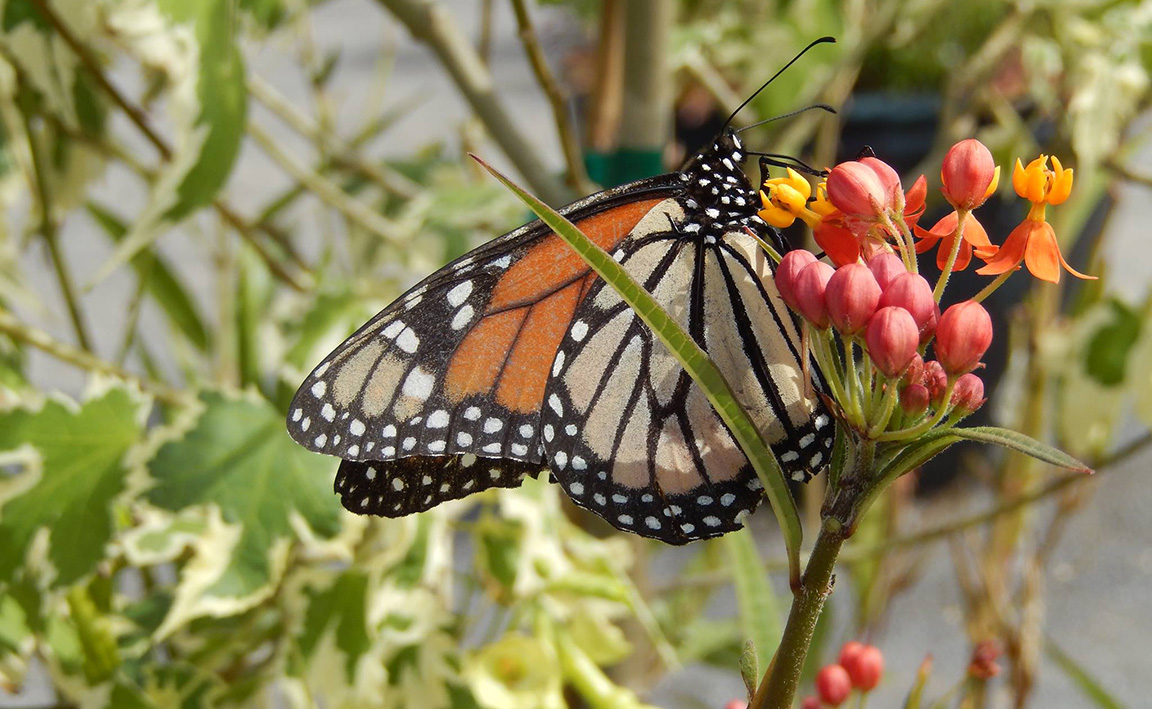
Other native fall blooming perennials to add to your garden insectary include Swamp milkweed (Asclepias incarnata), a magnet for monarch butterflies; Sneezeweed (Helenium autumnale); Joe-Pye weed (Eutrochium purpureum); and if you have the space, Giant Sunflower (Helianthus giganteus), a twelve-foot-tall colonizing plant that draws bees, butterflies, hoverflies, and other pollinators.
(Author’s Note: Parts of this article are excerpted from two books that Reeser Manley and I co-authored: The New England Gardener’s Year, and The Life in Your Garden, published in 2013 and 2017 respectively.)
Slow Growth Approach and Dedicated Volunteers Produce Big Results at Manchester Elementary School
By Kookie McNerney, Home Horticulture Coordinator, UMaine Extension Cumberland County
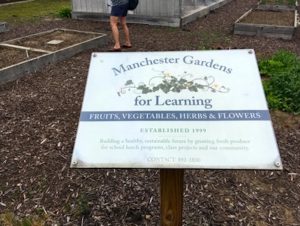 As school gardens go, the one at Manchester Elementary in Windham had a very modest start. After the school building renovation was completed in 1998-99, then school principal Kassy Clements asked Pam Lanz, then school guidance counselor and Master Gardener Volunteer class of 2014, if she would design and plant a garden in front of the school. She accepted the challenge and, with the help of a $300 grant from Wal-Mart, established this lovely flower garden that would set the foundation for the school’s future gardening efforts. Fast forwarding to the 2017/2018 school year: 4-5 classrooms were actively involved in the garden and the entire school benefited from a bountiful 250-lb harvest. This evolution has been a boom to both the school community and the broader community of Windham. Here’s how they got there:
Growing over the years
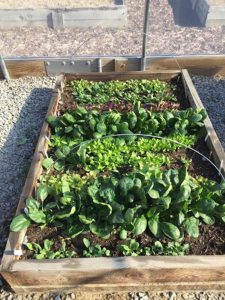
It was 4th/5th grade teacher Jamie Pappalado who first suggested the idea of growing food. Therefore, some of the faculty and staff attended a school gardening workshop during the summer of 2009. The first two raised beds were added in the spring of 2010 and, in 2012, a permaculture group teamed with members of the school community to add a third bed. The growth of the Manchester Learning Gardens continued and now the space consists of seven 4’x10’ raised beds, one 4’x8’ bed, a hoop house with three raised beds for season extension, and a round in-ground bed. Other features include a three-bin compost system, tool shed, picnic bench and, as of this year, a small orchard.
The orchard consists of nine fruit trees (apples and pears) thanks to the support of Richard Hodges of ReTreeUS and some well established grape vines. ReTreeUs donated the trees with the school only needing to commit to providing the space and soil amendments. ReTreeUS is dedicated to promoting an environmentally sustainable, socially just food system through education, practical resources, and mentorship. They plant orchards in schools and provide educational programs that empower people to be healthy environmental stewards.
The gardening year
The children help plant in the spring and harvest early crops. At the end of each school year a plant sale takes place where they sell seedlings and left over packages of seeds and those funds are reinvested in the garden.
During the summer, school staff generally care for the gardens on a rotating basis. Fourth grade teacher Stacey Sanborn sends out a garden schedule reminding people that a green thumb is not necessarily a requirement. When school is not in session, produce is donated to the Windham food pantry, several Manchester School families, and hopefully this year to the Backpack program at Dundee Park, which directly assists the low-income student population in Windham.
When the children return in the fall, many participate in a Harvest Day when they gather tomatoes, cucumbers, peppers, squash, cabbage, carrots, and more. The food goes directly to the cafeteria where the food services manager, with the help of students, turns the produce into nutritional meals. Some of the children’s favorites are coleslaw, curried carrot soup, and carrot muffins. The children also pick flowers to present bouquets to new teachers as a welcome gift.
This series of year-round, hands-on experiences translate into real life skills that can be carried home and into the future. Upon arrival back to school, one young student was very excited to the share the story of how she had helped her mother to plant a vegetable garden for the first time at their home. They had never before grown their own food and the sense of accomplishment was palpable.
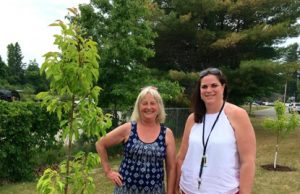
There have been many challenges and successes in the course of these 20 or so years. Despite the challenges, classes on composting, pollination, photosynthesis, and soil health have yielded very meaningful results. With persistence and the dedication of Pam Lanz and Stacey Sanborn, the gardens have taken a very nice slow-growth approach. As Pam says, “I’ve seen firsthand the joy, enthusiasm, curiosity, cooperation, and real involvement by kids when they’re outside working in the gardens and doing hands-on garden related lessons in the classroom. It makes all of the hard work of having and sustaining a school garden, well worth the effort!”
Resources
Long Thought to Be Extirpated Unicorn Root Found
By Maine Department of Agriculture, Conservation & Forestry
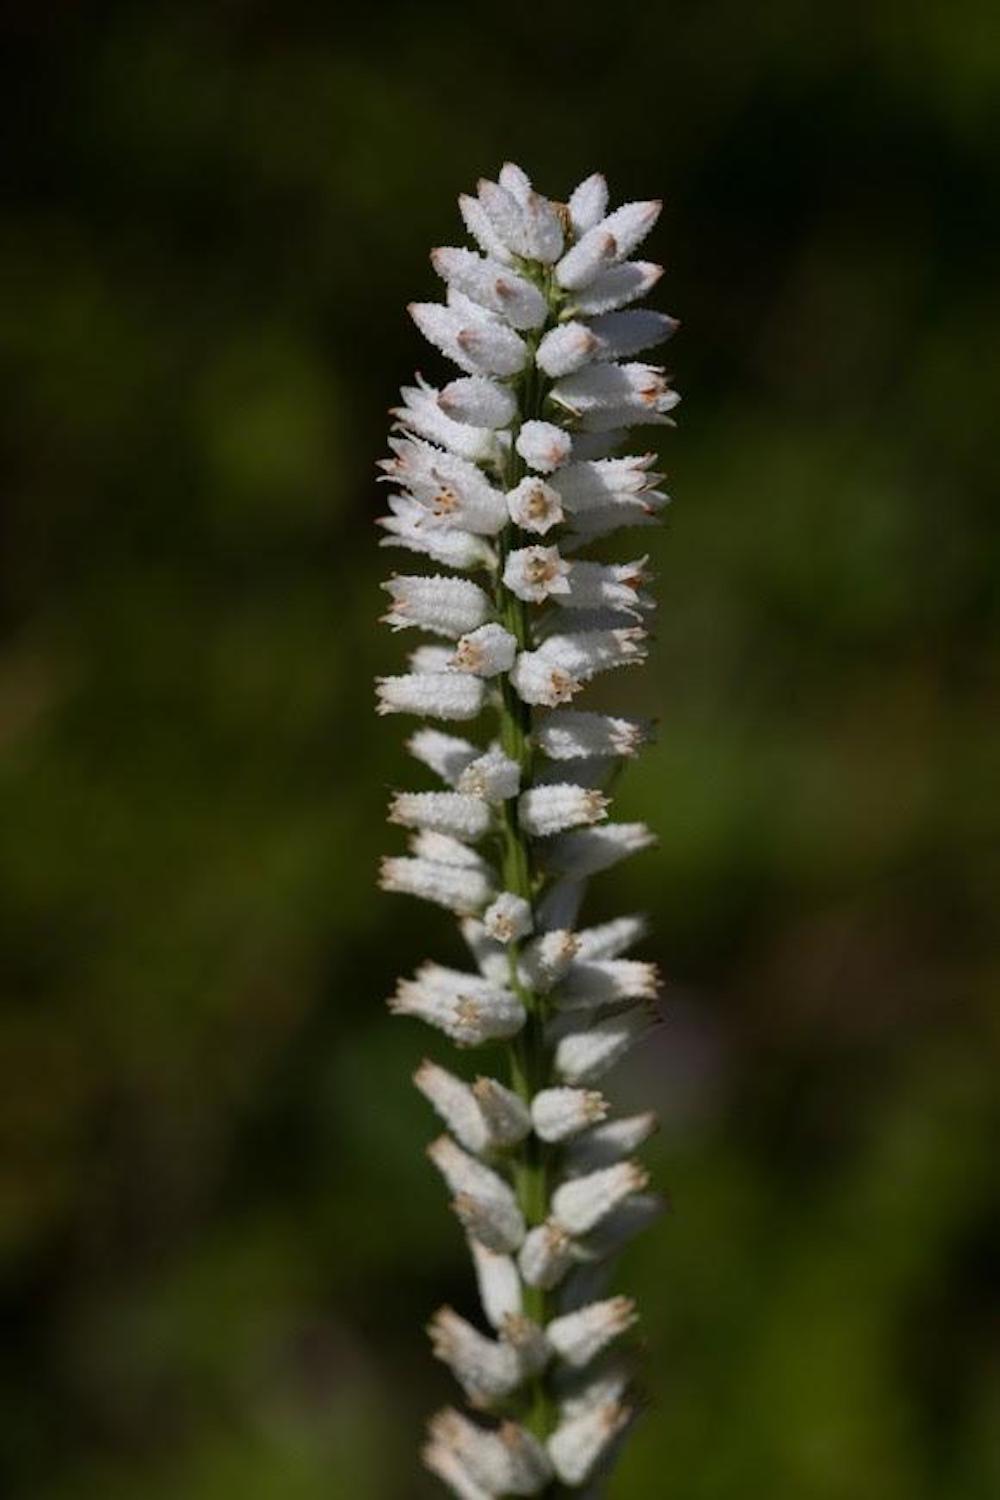
This summer the Maine Natural Areas Program documented the rare Unicorn Root! About 300 flowering stems were found in a damp field on privately held land in Bowdoin. This showy plant has not been seen in Maine in over 130 years and was thought to be extirpated. It is known from only three herbarium specimens, two of which were collected by Maine botanist Kate Furbish (Wells in 1879, Brunswick in 1874), and the third from near Lewiston in 1887.
Unicorn Root, also known as White Colic-root or Colicroot, ranges across most of the eastern United States and Ontario, though it is rare in most of the northeastern states and in Ontario. It grows in open, moist, sandy ground and is typically associated with tallgrass prairie habitats and damp, sandy meadows with little to no topsoil.
Unicorn Root has a basal rosette of lance-shaped leaves, and a single, tall flowering stalk with white flowers that appear in June through August. The scientific name, Aletris farinosa, is in reference to the unusual rough, grainy texture of the flowers. The species name (farinosa) means ‘floury’, and the genus name (Aletris) comes from the Greek word for grinding grain (the Aletris was the servant who ground the grain).
Contact: John Bott, 207.287.3156, john.c.bott@maine.gov
Food & Nutrition: Specialty Ingredients Used in Preserving Pickles
By Kate McCarty, Food Preservation Professional, UMaine Extension Cumberland County
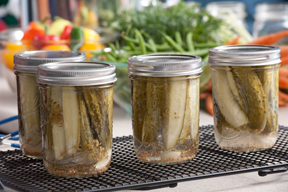 With the harvest season in full swing, September is a great month to pickle your homegrown produce. From pickled beets, carrots, cucumbers, summer squash, and even green tomatoes, the garden is full of great produce for home canned pickles. But the biggest question we get about pickles is how to ensure a high-quality final product. Here’s some tips on the specialty ingredients used in pickling that will ensure you have crunchy, delicious, and safe homemade pickles to enjoy all year long.
Salts
Canning and pickling salt is recommended for use in pickling by the USDA. It’s salt free of additives like iodine and anti-caking agents. This salt will result in a clear brine, free of any cloudiness or sediment, which can be a sign of spoilage. Using other salts may result in pickles that darken or otherwise change colors in an unattractive way. Kosher salt is free of additives and can be used as well, but sea salt is not recommended because of the additional minerals that may affect the appearance of your pickles. In quick pickles, salt is used for flavor, so you may reduce the amount of salt a recipe calls for. But be aware that salt provides the characteristic pickled flavor, so don’t attempt to reduce it too much or your pickles won’t taste right.
Vinegars
Vinegar in quick pickles provides the acidity necessary for the safety of the final product. Don’t reduce the amount of vinegar in a pickling recipe, as that would alter the acidity of the recipe and potentially make it unsafe for canning. Canning recipes call for vinegar of 5% acidity, and you can find that information on the label of the vinegar, usually near the nutrition facts and ingredients. Any kind of vinegar can be used in pickling, just know that using different kinds like apple cider or red wine vinegar will affect the flavor of the product. White vinegar and apple cider vinegar are most common, as they are inexpensive and widely available.
Crisping Agents
Home canners looking to make cucumber pickles are often concerned with the texture of the final product. There are a number of available crisping agents, but the biggest tip for creating crunchy pickles is to use high-quality, fresh pickling cucumbers. Don’t attempt to use overgrown cucumbers, as these have a high water content that results in mushy pickles. Follow any instructions for brining or soaking the cucumbers that the recipe may recommend, as these steps are helping with the crispiness of your pickles.
If you’d like to use a crisping agent, Ball makes a product called Pickle Crisp, a food-grade calcium chloride, that helps to firm up the pectin naturally present in cucumbers. Pickling lime can also help crisp pickles, but the instructions must be followed carefully to ensure safe pickles. Alum is used in fermented pickles only, not quick pickles. But using freshly harvested pickling cucumbers of peak ripeness is the best way to ensure your pickles are enjoyed by all who taste them. Happy pickling!
For more information on pickling, visit UMaine Extension Bulletin #4044, Pickles or attend a hands-on preserving workshop in your area.
University of Maine Cooperative Extension’s Maine Home Garden News is designed to equip home gardeners with practical, timely information.
Let us know if you would like to be notified when new issues are posted. To receive e-mail notifications fill out our online form.
For more information or questions, contact Kate Garland at katherine.garland@maine.edu or 1.800.287.1485 (in Maine).
Visit our Archives to see past issues.
Maine Home Garden News was created in response to a continued increase in requests for information on gardening and includes timely and seasonal tips, as well as research-based articles on all aspects of gardening. Articles are written by UMaine Extension specialists, educators, and horticulture professionals, as well as Master Gardener Volunteers from around Maine, with Katherine Garland, UMaine Extension Horticulturalist in Penobscot County, serving as editor.
Information in this publication is provided purely for educational purposes. No responsibility is assumed for any problems associated with the use of products or services mentioned. No endorsement of products or companies is intended, nor is criticism of unnamed products or companies implied.
© 2018
Call 800.287.0274 (in Maine), or 207.581.3188, for information on publications and program offerings from University of Maine Cooperative Extension, or visit extension.umaine.edu.