How to create a Product (Registration) Page
There are two ways to create a Product (Registration) Page: cloning or creating a new page.
Cloning a Product
When setting up a product similar to one already created, you can clone the product. This comes in handy if you have an event that occurs annually.
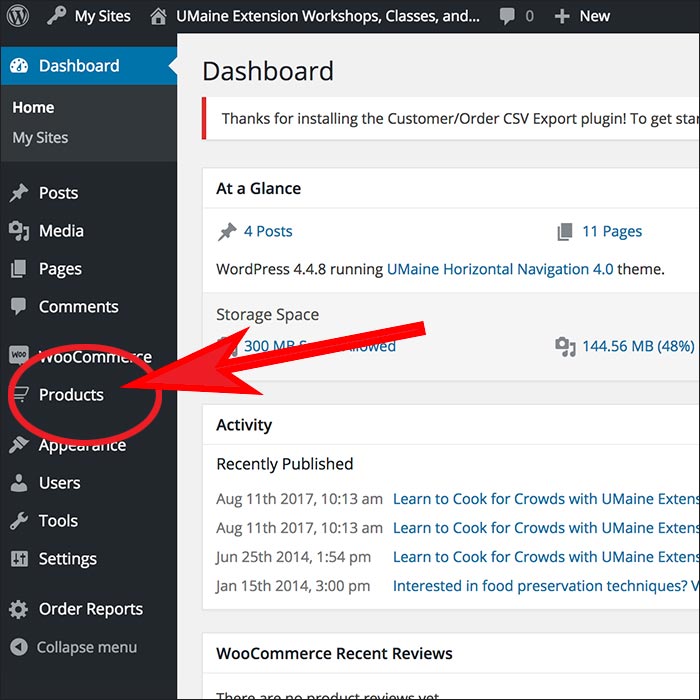
- Click on the Products tab on the Dashboard of the Workshops, Classes and Events site.
The dashboard of the Workshops, Classes and Events website. - Use the Search field (upper right-hand corner of the product list) to find a product, on the list of products, that you would like to clone or duplicate.
- Hover over the product and various editing options should appear, click on Clone. There is also Duplicate option listed which performs the same action as Clone.
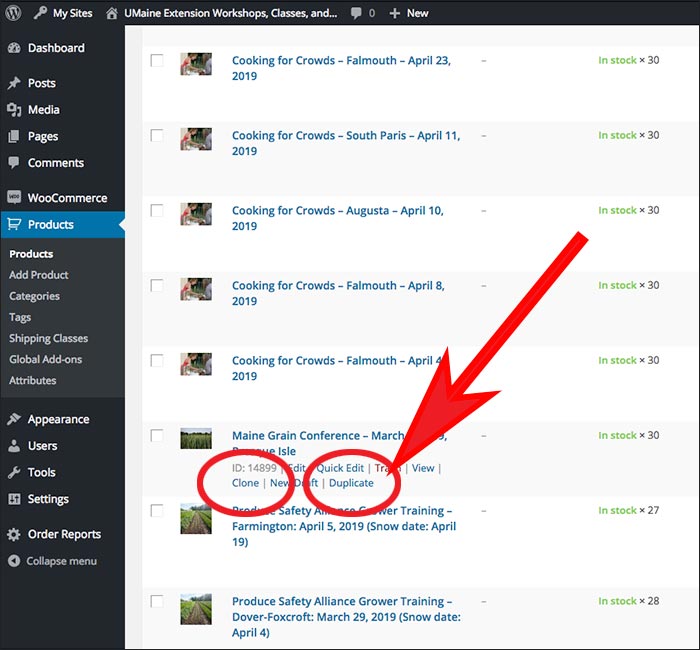
Find the Clone (or Duplicate) button to clone a product. - You will notice the newly cloned product will be at the top of the list in ‘draft’ status. Again hover over cloned product and choose Edit to open it.
- Next, change/update the Product Name and update the Permalink (URL)
- Be sure NOT to use an acronym in the product name or URL
- Shorten the URL as much as possible
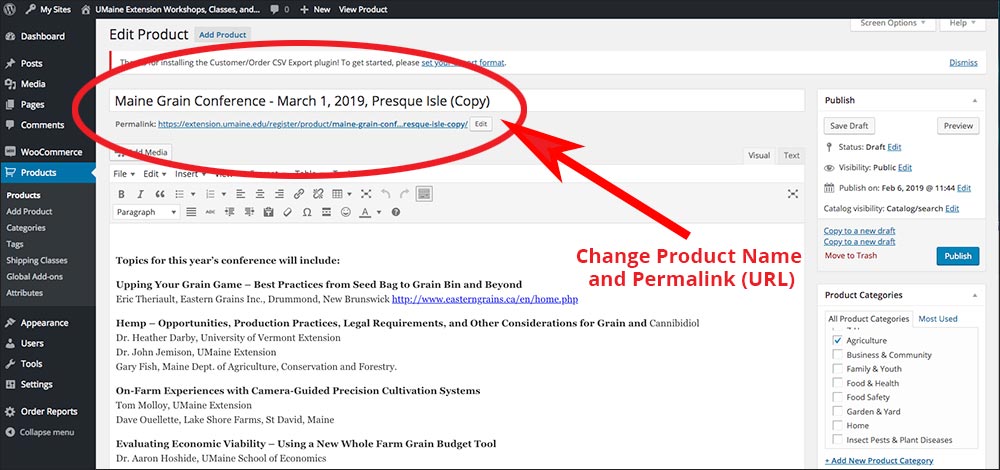
Areas where you change the Product Name and the Permalink (URL).
- Be sure to change the account information, if necessary, along with other details (review the Creating a New Product Page section below) before publishing.
Confirm Default Deposit Account Settings, this NEVER CHANGES.
Creating a New Product Page
- Click on the Products tab on the Dashboard (Figure 1) of the Workshops, Classes and Events site.
The Dashboard of the Workshops, Classes and Events website. - At the top of the Product list page, in the upper left-hand corner is a button that reads Add Product, click that button.
-
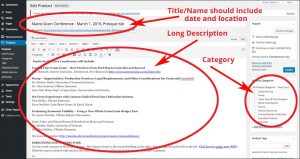
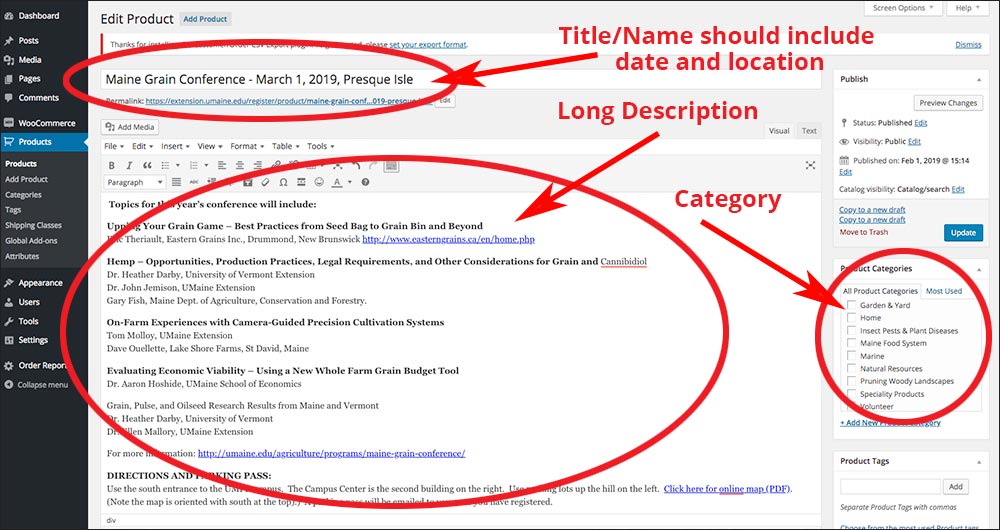
Areas where a title/name, long description and product category may be added. (Click image to enlarge.) Add a Title/Name, should include Date and Location (a permalink/URL will be generated automatically). Visit the Plugged-in website’s Twelve Best Practices for UMaine Extension Web Managers page for tips on how date and location should be displayed.
- Long Description: The visual editor box, for the long description, is located directly below the product title area. This description will display in Program Description tab, at the bottom of the page, on the front-end.
- Product Categories: Helps customers search by certain criteria.
- Product Short Description: The visual editor box, for the short desciption, is located towards the bottom of the editing page. This description will display with the photo thumbnail, at the top of the page, on the front-end.
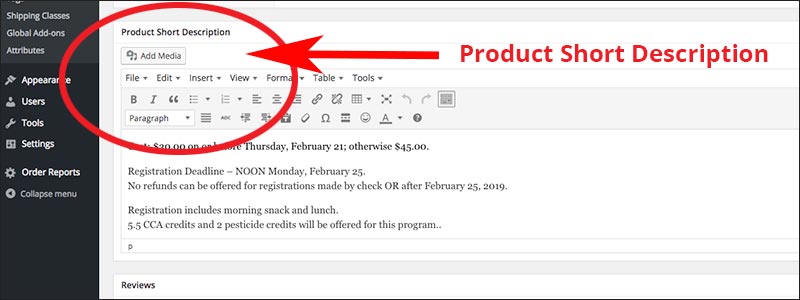
Product Short Description visual editor. - Set Product Image: Located to the lower right side of the visual editor box, beneath the Product Tags box. Once an image has been loaded in the Set Product Image area, the title of the box changes to Product Image and image can be changed by selecting Remove product image link beneath the image.
- Carefully review photo/image requirements (size, optimization, ALT-tag, description) on the Getting Started with CDMS page.

Area to Set Product Image
- Carefully review photo/image requirements (size, optimization, ALT-tag, description) on the Getting Started with CDMS page.
- Monetary Distributions: This the the chartfield where the designated percentage of these funds need to be transferred. (Tab may be collapsed when page is first opened. Click on the upside-down triangle in the upper right-hand corner of the Monetary Distributions box to open for editing.)
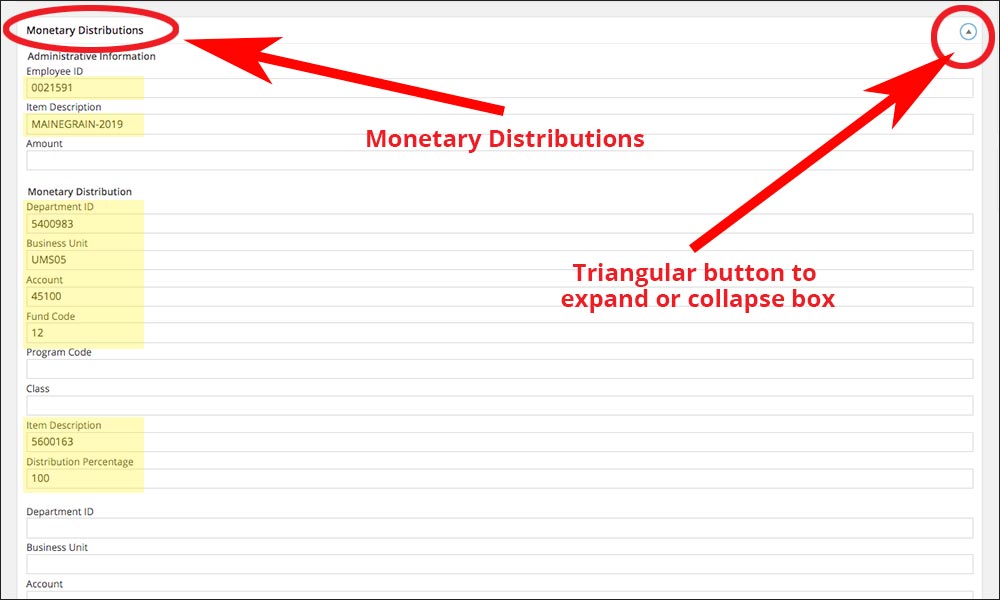
The Monetary Distributions edit box, expanded. Areas with a yellow highlight will need to be completed with numerical codes. (Click image to enlarge.) NEEDS TO HAVE:
- Employee ID: Unique to each event. If the product has been cloned, be sure that this number is changed.
- Item Description: Text, maximum of 30 characters, meaningful description that will be part of the general ledger (GL).
- Department ID: Always the same, ‘5400983’
- Business Unit: ‘UMS05′
- Account: ‘45100′ (workshop/program revenue)
- Fund Code, choose one: program code or project number: Usually ’12’, NEVER ’00’
- Class
- Label for the Project Code is Item Description: ‘5600163’ (project code)
- Distribution Percentage: ‘100’
-
The Monetary Distributions editing box, expanded. Areas in yellow highlight need to be completed. (Click image to enlarge.)
-
- Employee ID: Unique to each event. If the product has been cloned, be sure that this number is changed.
- Deposit Account Chartfield: This is the chartfield that funds will be deposited directly into prior to distribution. A deposit account is also known as a “control account” and allows Extension and the University to account for revenue with less effort.
ALWAYS THE SAME:- Department: 5400101
- Business Unit: UMS05
- Account: 16012
- Fund Code: 00 (Note: Manually enter Fund Code “00”)
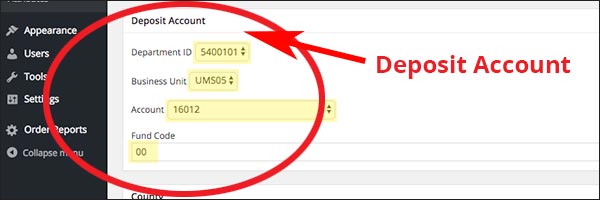
The Deposit Account Chartfield. The fields with yellow highlight, ALWAYS remain the same. (Click image to enlarge.)
- County: Box directly blow the Deposit Account box. Choose county from the pull-down menu.
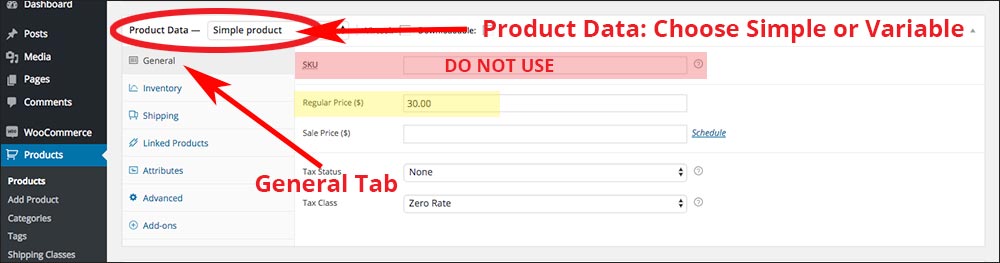
- Product Data
- Choose type of product from pull-down menu: Simple or Variable.
- Simple products are the most commonly used and are straight forward with NO variations. (Go to Step #12)
- Variable products allow you to choose from several variable options from a drop-down menu. For example: different options with different pricing.
Visit the How to create a Variable Product page for full instructions.
- Choose type of product from pull-down menu: Simple or Variable.
- General
- SKU: (DO NOT USE)
- Price: “0” (zero) if Free
The General tab under Product Data. Field with yellow highlight must be completed. (Click image to enlarge.)
- Inventory
- Manage Stock check box and related fields (Stock Qty.; Allow Backorders?; Stock status)
- Sold Individually check box
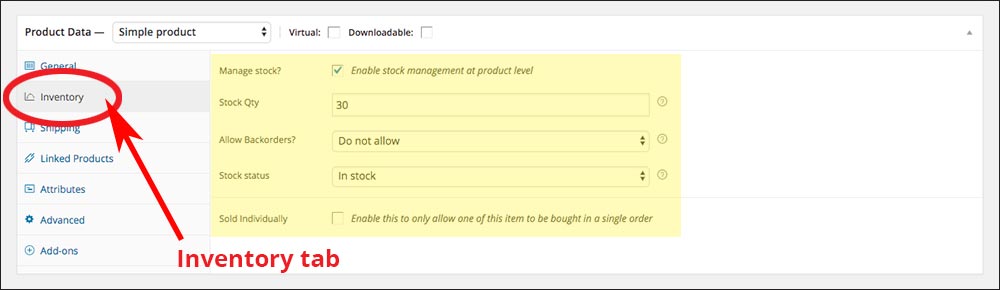
The Inventory tab under Product Data. Check boxes and fields with yellow highlight must be completed. (Click image to enlarge.)
- Attributes
- Custom product attribute or select from drop-down
- Expand/Close to edit attributes (Date, Location, Contact Name, Contact Email, Contact Phone)
- Make sure to SAVE by clicking Save Attributes button.
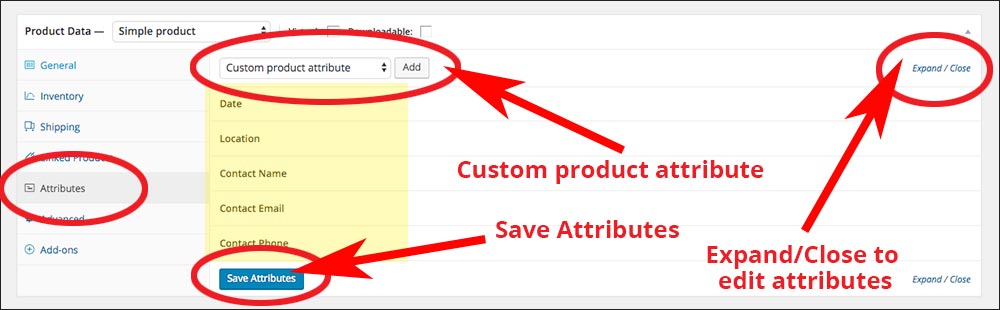
The Attributes tab under Product Data. Fields with yellow highlight must be completed. (Click image to enlarge.)
- Add-ons
- Add New Group
- Select your choices of Label for each group from the pull-down: Checkboxes, Radio Buttons, Custom input (text) and Custom input (text area)
- Expand all to view and further edit each Group: Group Name; Required fields?; Option Label, etc. (Click New Option button to continued adding Option Labels to a group).)
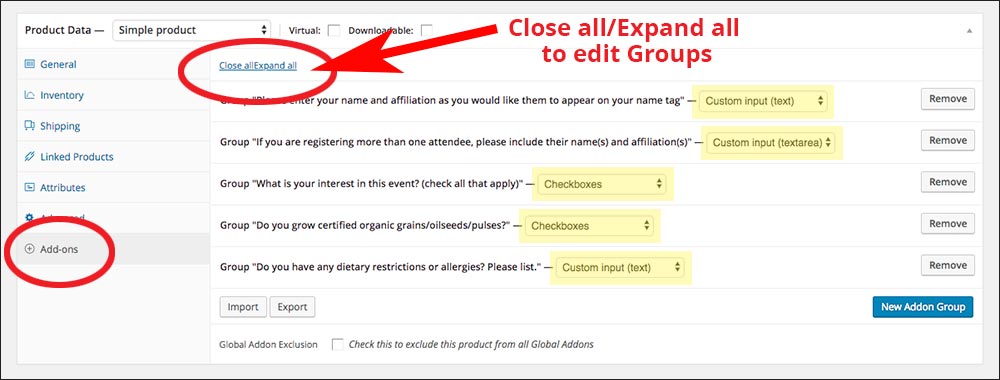
The Add-ons tab under Product Data. Pull-downs with yellow highlight must be completed. (Click image to enlarge.) 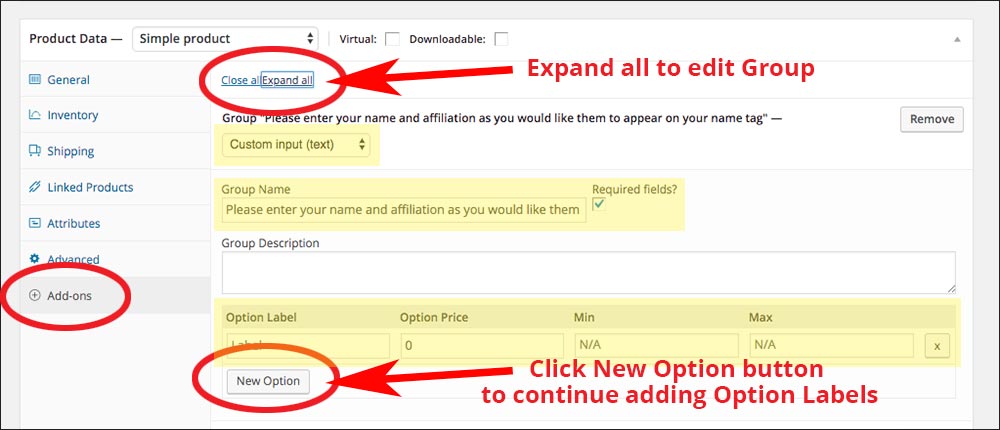
An expanded view of the Add-ons tab under Product Data. Pull-downs and fields with yellow highlight must be completed. (Click image to enlarge.)
- Save Product Page as Draft
- Then Preview page
For additional assistance, advanced CDMS or Excel training or if you have any questions, please email Mary Michaud, mary.j.michaud@maine.edu or call 207.581.2721.