How to create a Variable Product

A variable product allows you to choose from several variable options from a drop-down menu. For example: a common variable product would include different options with different pricing.
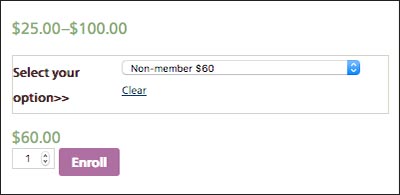
In this particular variable product example, the 2019 Grass Farmers Conference Registration page, other basic informational attributes (Date, Time, Location, Contact Name, Contact Email and Contact Phone) were were added before the variable product was added.
Editing the Attributes Tab
To add the variable product ‘attribute’ after the basic attributes (listed above) of the product have been added:
-
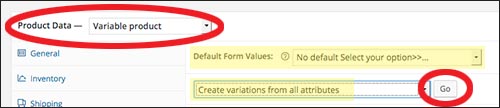
- Select Variable product on the pull-down menu in the Product Data section
- Click on the Attributes tab on the Product Data menu
- Add basic attributes (date, time, location, contact name, contact email and contact phone) by continuing to click on the Add button

- Add the variable product attribute, again by clicking on the Add button
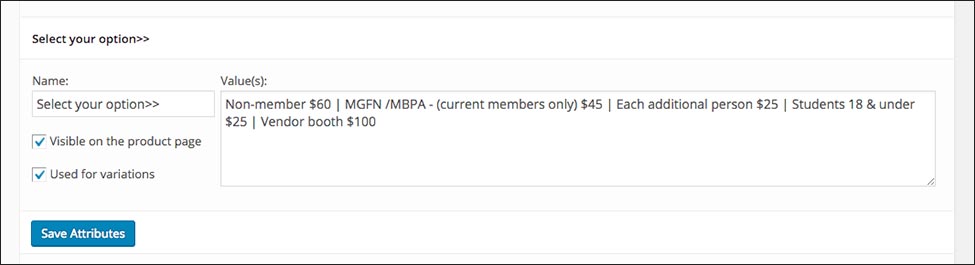
- Name the product: Select Your Options>> (the two carats, ‘arrows’ added by pressing shift+. [period key] on your keyboard).
- Add the Value(s): Type each individual variation and divide each with a pipe (press shift+\ on your keyboard)
The example, here, in the 2019 Grass Farmers Conference Registration: Non-member $60 | MGFN /MBPA – (current members only) $45 | Each additional person $25 | Students 18 & under $25 | Vendor booth $100 - Be sure to check both boxes: Visible on the product page and Used for variations
- Press the blue button, Save Attributes
Editing the Variations Tab
- Next, proceed to the Variations tab on the Product Data menu.
- Be sure to check, at the top, that the default is set to the appropriate wording, generally will be “No default Select Your Option>>”
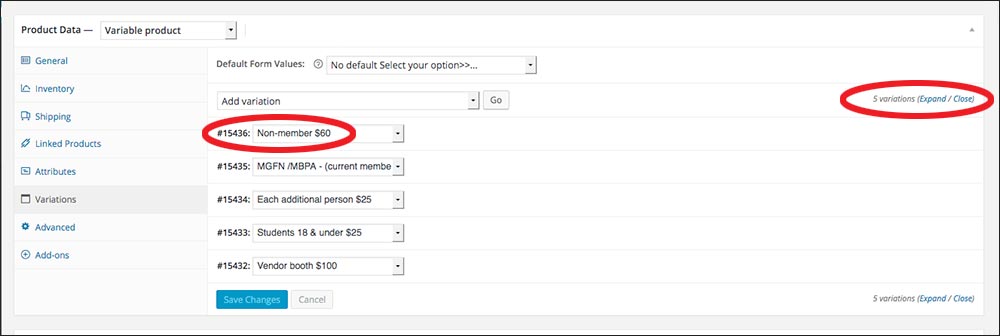
- From the Add Variation drop-down, select Create variations from all attributes, then press the Go button to the right of the drop down menu. This will populate the variation fields with the products being offered, automatically generating a number (example #15436 for ‘Non-member $60’) for each variable.
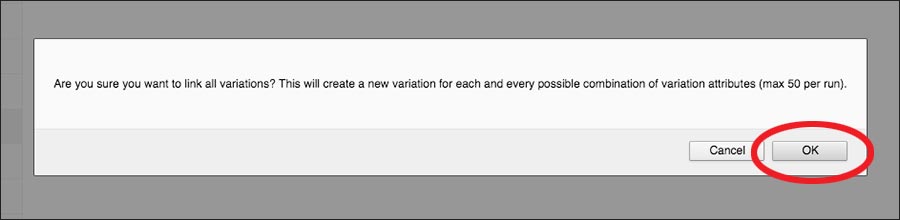
- A message box will pop-up, with the question: Are you sure you want to link all variations? This will create a new variation for each and every possible combination of variation attributes (max 50 per run).‘?, press the OK button.
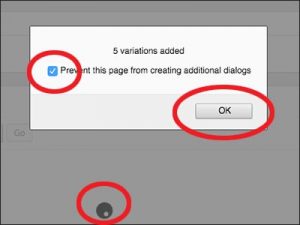
- Another message box will appear that reads (in this example): 5 variations added and a checkbox (check the box) Prevent this page from creating additional dialogs will appear with a spinning wheel, press the OK button.
- Once the process is complete, a list of variations that has been generated will show in an ‘unexpanded’ view. Press the Expand word link in the upper right hand corner to open and edit:
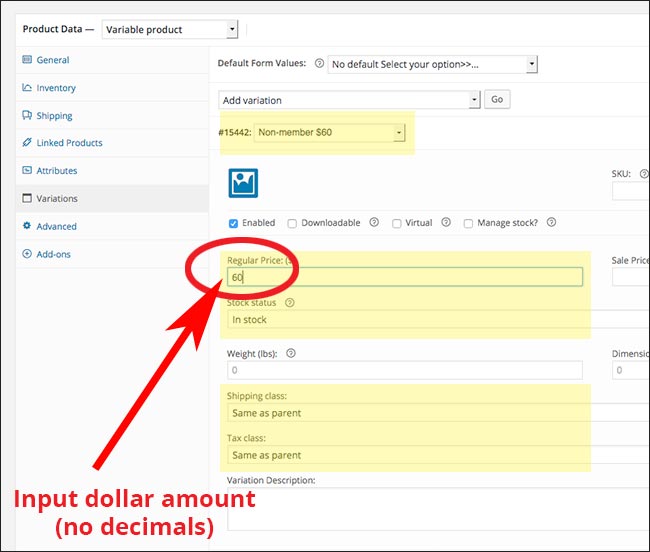
- Open each variable, manually placing a dollar amount (NO decimal necessary) in Regular Price ($) field.
Other required fields to complete for each variable:- Stock Status: In Stock
- Shipping class: Same as parent
- Tax class: Standard
- Continue down list of variables (expanded view) as shown in the preceding step (#7).
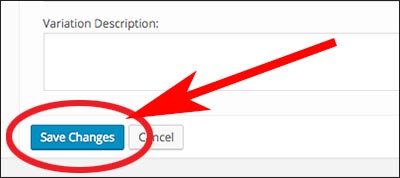
- Press the blue Save Changes button at the bottom of the last variable.
- Press the Save Draft and Preview in the Publish box in the upper right-hand of the page.

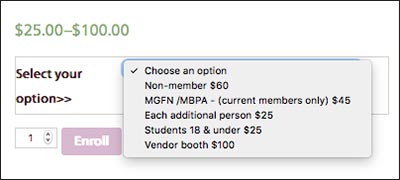
- On the front-end, pull down the product variables to test and ensure that the dollar amount matches the pull-down option dollar amount.

Add-Ons:
If you have having trouble getting your Add-Ons to save, be sure you have a value in the option $. (Can and will usually be $0.00, depending on your product description and needs)
For additional assistance, advanced CDMS or Excel training or if you have any questions, please email Michele Lodgek, michele.lodgek@maine.edu or call 207.581.2721.