Bulletin #1206, Blue Mold of Garlic
Developed by Steven B. Johnson, Extension Crops Specialist, and David Fuller, Extension Professional
For information about UMaine Extension programs and resources, visit extension.umaine.edu.
Find more of our publications and books at extension.umaine.edu/publications/.
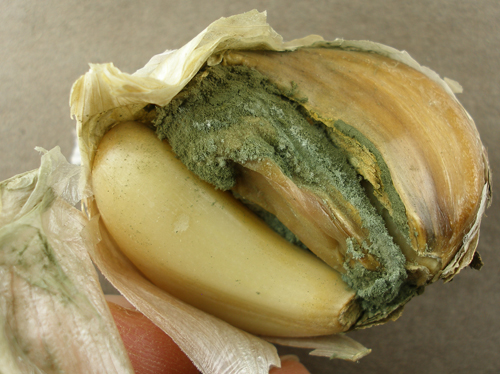
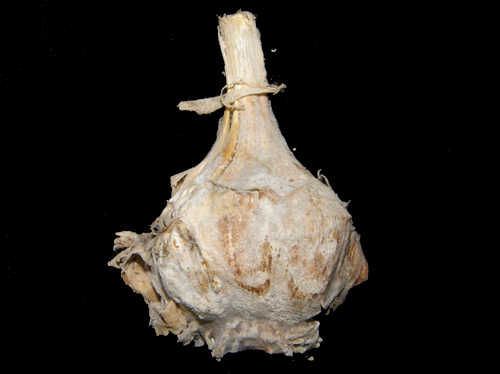
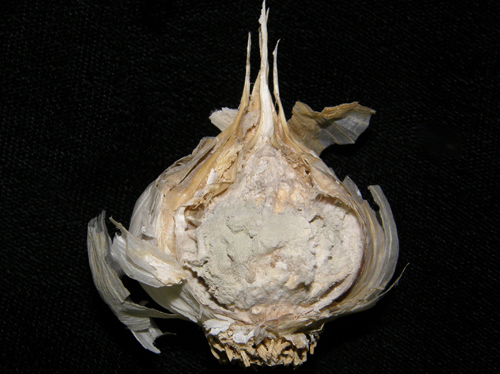
Blue Mold of garlic may be caused by any of several Penicillium species, but most commonly Penicillium hirsutum. While the pathogen can cause poor plant stands in the field, Penicillium decay of stored bulbs is more common and more economically devastating. Advanced stages of bulb and clove rot have a characteristic mass of blue to blue-gray growth.
Biology
Generally, diseased planting stock is the cause for blue mold field problems, as the pathogen does not survive long in soil. Spores from diseased bulbs can spread and contaminate otherwise healthy bulbs and cloves during cracking of bulbs for planting. Any wounds facilitate pathogen spread by providing entry points. The pathogen survives in and on infected cloves.
Symptoms
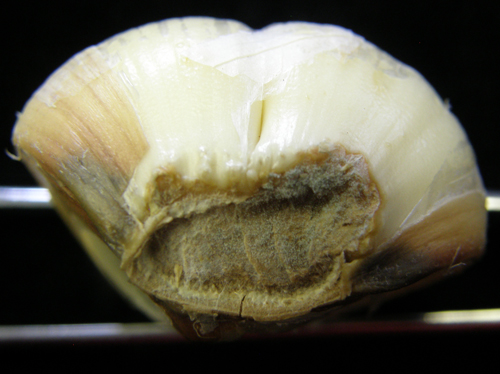
Field symptoms may include yellowed and stunted plants, often associated with a decaying clove. Advanced symptoms appear as masses of blue or blue-gray fungal growth at the base or sides of the bulb.
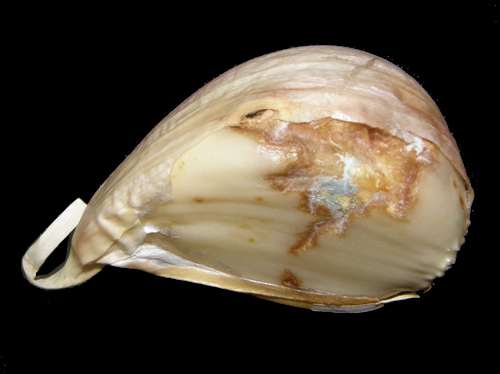
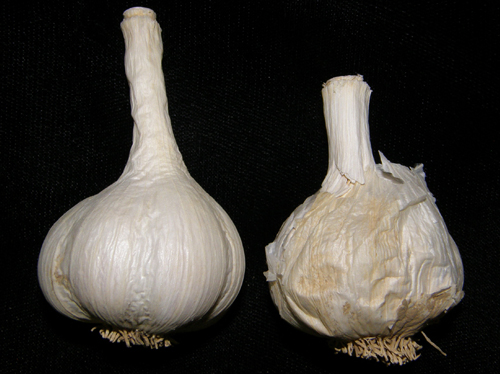
Bulb and clove symptoms may start as soft spots, taking on a water-soaked appearance. Eventually, the clove may totally decay, typically covered with masses of blue or blue-green fungal growth. Frequently secondary invaders will follow the blue mold pathogen into garlic cloves and bulbs. Infected bulbs often have a slack wrapper owing to decay of cloves inside.

Management
The following management steps can reduce or avoid the spread of Penicillium:
- After harvest, avoid trimming the tops too close to cloves. Likewise, avoid trimming the roots too close to the basal plate, as spores can enter wounds.
- Properly cure and dry harvested bulbs — this is critical. Proper drying and curing of injuries will reduce entry points and make conditions unfavorable for the pathogen. Cure harvested garlic in a single layer, in a warm, dry place with good air movement. Drying racks with mesh screen and a fan provide the best conditions. Cure for three to four weeks until well-dried; then move to a storage location.
- Cull out diseased bulbs before cracking and planting, as they are the primary source of inoculum.
- Dispose of infected bulbs off-farm: do not compost them.
- Take care in handling bulbs during cracking in order to avoid bruising or wounding, reducing entry points for the pathogen.
- Plant the cloves as soon as possible after cracking to reduce exposure to the blue mold spores.
- Practice crop rotation, in space as well as time, to effectively reduce the pathogen.
Information in this publication is provided purely for educational purposes. No responsibility is assumed for any problems associated with the use of products or services mentioned. No endorsement of products or companies is intended, nor is criticism of unnamed products or companies implied.
© 2013
Call 800.287.0274 (in Maine), or 207.581.3188, for information on publications and program offerings from University of Maine Cooperative Extension, or visit extension.umaine.edu.
In complying with the letter and spirit of applicable laws and pursuing its own goals of diversity, the University of Maine System does not discriminate on the grounds of race, color, religion, sex, sexual orientation, transgender status, gender, gender identity or expression, ethnicity, national origin, citizenship status, familial status, ancestry, age, disability physical or mental, genetic information, or veterans or military status in employment, education, and all other programs and activities. The University provides reasonable accommodations to qualified individuals with disabilities upon request. The following person has been designated to handle inquiries regarding non-discrimination policies: Director of Institutional Equity and Title IX Services, 5713 Chadbourne Hall, Room 412, University of Maine, Orono, ME 04469-5713, 207.581.1226, TTY 711 (Maine Relay System).


