Bulletin #2077, Potato Facts: Growing Potatoes in the Home Garden

Prepared by Steven B. Johnson, Ph.D., Extension Crops Specialist
For information about UMaine Extension programs and resources, visit extension.umaine.edu.
Find more of our publications and books at extension.umaine.edu/publications/.
Table of Contents:
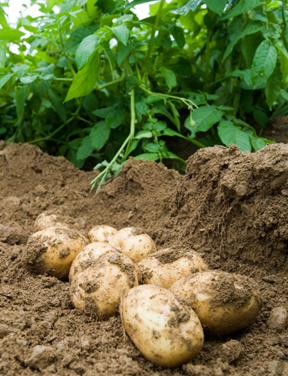
Potatoes and Maine have a long tradition together. Potatoes have always been a popular crop in home gardens, especially since they can be stored for use during the long Maine winter.
Potatoes can be grown in all parts of Maine in home gardens, but they need more attention and care than most vegetables. If you do a good job controlling insects and diseases, you’ll improve potato yields, and also protect Maine’s commercial potato industry.
Soil Types
Potatoes do best in fertile, well-drained soils. However, potatoes will grow in many types of soils. Soils that are poorly drained tend to produce poorly shaped potatoes and tuber rot. Potatoes can be planted earlier on lighter, better-drained soils as these soils dry out and warm up earlier. These soils will produce more uniformly shaped potatoes but have a tendency to dry out if there isn’t a lot of rain. These soils respond well to irrigation.
Soil pH
The measure of soil acidity is the pH. Soils with pH levels at 7.0 are considered “neutral.” Soil with a pH level higher than 7.0 is considered alkaline. Soil with a pH lower than 7.0 is considered acid. Maine has many acid soils.
Potatoes do well across a wide range of pH, but prefer slightly acidic soils; a soil pH of 5.3 to 6.0 is typical for potato production. If your soil is more acidic than this, mixing in wood ash will help raise the pH and make your soil more alkaline. However, higher soil pH levels are more conducive to scab, a potato disease caused by a soil-borne pathogen. If your soil has a higher pH, chose a scab-resistant variety, such as “Russet Burbank.” Fertilizers work better at neutral (7.0) pH than a lower pH.
Lime will also raise the pH of soil. A soil test will tell you how much lime to add. The lime needs to be mixed into the soil. This is best done in the fall, but can also be done in the spring before planting.
Seed
Potatoes are traditionally grown from seed pieces. These are not true “seed,” but pieces of a potato tuber. Do not use potatoes purchased at the grocery store for seed pieces. They are probably treated to not sprout. Buy certified seed from a reputable seed seller. Buying certified seed pieces assures varietal purity and a low level of diseases.
Most gardeners plant the whole seed, tubers that are less than two inches in diameter and planted whole. Don’t use seed smaller that one inch in diameter. If larger seed is used, cut it into smaller pieces.
Potato seed pieces should be blocky, must have at least one “eye,” and should weigh between 1 3/4 ounces and 2 1/4 ounces. The fewer cut surfaces the better. Less energy will be used to heal the cut surfaces, making more energy available for growth. All cut surfaces should be smooth. Any jagged or torn surfaces will invite seed-piece rot. Seed can be freshly cut and planted into soil. If the seed is cut well before planting, store it at 50 to 55 degrees F and over 90 percent humidity. This will help the cut surfaces to heal. The healed seed pieces can then be held at low temperatures until planting.
Store seed at 38 degrees F, and keep cool up to two weeks before planting. Warm the seed pieces to room temperature the last two weeks before planting. This will start the potato sprouting. If seed pieces have sprouts over one inch long, keep them cool until planting time.
“Pipping” or “green sprouting” can be used to encourage early production. Here’s how to do it: Spread seed potatoes out in a single layer in an area exposed to light. This can be done on a floor indoors or out, as long as the temperature doesn’t drop below freezing. The ideal condition to green sprout potatoes is 70 degrees F with high humidity. Even a barn or garage in early spring will work well. Turn the potatoes over to encourage uniform sprouts. Green sprouting will produce short stubby (less than 1 inch) sprouts that emerge quickly and set tubers early.
Fertilization
A soil test will tell you whether to use fertilizer and, if so, how much. If you don’t have a current soil test, you might apply a balanced fertilizer (for instance, 10-10-10) at a rate of about 30 pounds per 1,000 square feet, or about one pound per every 10 feet of row. Potatoes will respond well to high-fertility gardens but can produce lots of leaves and tubers that don’t keep well if plants are over-fertilized. Potatoes grown in gardens with low fertility may need fertilizer.
Ideally, fertilizer should be placed in two “bands,” each band two inches to the side of the planting and one inch below the seed piece. You can put fertilizer in the planting furrow and cover it with an inch of soil before planting the seed piece. Another option is broadcasting the fertilizer and mixing it into the soil. Either way, avoid direct contact with the seed piece. The fertilizer can cause rapid seed piece decay.
Manure is not recommended on potatoes. It tends to encourage scab development. Save the manure for other garden crops.
Planting
As soon as the soil warms up to 50 degrees F, potato seed can be planted. Potatoes planted earlier in colder temperature soils may emerge a little earlier, but if they sit in cold, wet soil they’re susceptible to decay. Seed spacing ranges from eight to 12 inches within the row and 30 to 36 inches between rows. Ten pounds of seed will plant about 50 feet of row at eight-inch spacing and about 80 feet of row at 12-inch spacing. Yields vary, but most gardeners should expect between one and two pounds of potatoes per foot of row.
Make a furrow four to six inches deep, and, after fertilization, place seed in the furrow and cover with two inches of soil. Once the plants are about six inches tall, they should be hilled. Simply form a mound above the potato row. Up to three hillings may be needed to build a potato hill, depending on conditions.
Tilling will help control weeds between the potato rows. But if you’re using a garden tiller, be careful you don’t damage potato roots and stolons.
Pest Control
Late blight and early blight are two potato diseases that are common in home gardens. Of the two, late blight is the real threat. Late blight from an infected garden can spread spores and affect commercial potato production miles away. Home gardeners should protect the growing potato plants with fungicides containing mancozeb, maneb or chlorothalonil. These are available at garden centers and should be applied at seven-day intervals, or as directed on the label. You may wish to consider potato varieties with some late blight resistance, such as “Kennebec.”
Colorado potato beetles and aphids are common potato insect pests. There are insecticide/fungicide combination products that will control both these insects and foliar diseases. There are insecticides and fungicides that are approved for organic production.
Herbicides used in commercial potato production are not recommended for home gardens. Cultivation during hilling controls weeds between the potato rows; hand pulling can eliminate the remaining weeds. Early weed control is essential for good potato yields.
Harvest and Storage
Potatoes are traditionally harvested at the end of the growing season. Temperatures have dropped, and there has frequently been a frost. If the tops have not died, pull them off or cut them off at least seven days before harvest. Use a tool that can lift the potatoes out of the soil without damaging them. Handle potatoes like eggs — potatoes will bruise. Get the harvested potatoes out of the light to avoid greening. Select only intact and healthy potatoes for long-term storage.
Avoid storing diseased or damaged potatoes. Store the harvested potatoes in a cool, moist, dark environment. Ideal storage conditions would be 38 degrees F with 95 percent humidity. As this is not always available, a cool damp basement usual does fairly well, as long as the floor isn’t prone to wetness.
Varieties
| Variety | Flesh Color | Skin Color | Season | Use | ||||||||
|---|---|---|---|---|---|---|---|---|---|---|---|---|
| White | Purple | Yellow | White | Red | Russeted | Purple | Early | Mid | Late | Baking | Boiling | |
| Superior | x | x | x | x | x | |||||||
| Red Pontiac | x | x | x | x | x | |||||||
| Russet Burbank | x | x | x | x | ||||||||
| Caribe | x | x | x | x | ||||||||
| Yukon Gold | x | x | x | x | x | |||||||
| Kennebec | x | x | x | x | x | |||||||
| Red Norland | x | x | x | x | ||||||||
| All Blue | x | x | x | x | ||||||||
| Yellow Finn | x | x | x | x | ||||||||
Information in this publication is provided purely for educational purposes. No responsibility is assumed for any problems associated with the use of products or services mentioned. No endorsement of products or companies is intended, nor is criticism of unnamed products or companies implied.
© 2009
Call 800.287.0274 (in Maine), or 207.581.3188, for information on publications and program offerings from University of Maine Cooperative Extension, or visit extension.umaine.edu.
University of Maine Cooperative Extension is an equal opportunity institution and provider committed to nondiscrimination. For more information, visit extension.umaine.edu/nondiscrimination.