Bulletin #2072, Maine Poultry Facts: Hatching Your Own Chicks

Originally developed by Professor Emeritus Robert O. Hawes, reviewed by Professor Emeritus H. M. Opitz
Updated by Donna Coffin, Extension Professor, University of Maine Cooperative Extension.
For information about UMaine Extension programs and resources, visit extension.umaine.edu.
Find more of our publications and books at extension.umaine.edu/publications/.
Table of Contents:
- Obtaining and Storing Eggs for Hatching
- Care of Eggs
- Incubating and Hatching Eggs
- Troubleshooting Hatching Problems
- References
There are two ways to get chicks for your small or backyard poultry flock. You can buy day-old chicks, or you can hatch them yourself. If you choose to hatch your own chicks, read on! We will explain how to find a reliable source of fertile eggs, how to clean and store hatching eggs, and how to choose and operate a dependable incubator or care for a broody hen.
If you’d rather buy day-old chicks: Sources of day-old chicks include your local feed store, by mail order from a seasonal hatchery, or from a neighbor who keeps chickens. Wherever you get them, make sure that you get a good quality chick. If you buy them at the feed store, make sure that they came from a National Poultry Improvement Plan (NPIP)-registered hatchery. If you order chicks by mail, choose a hatchery that is NPIP-registered. You can get a list of registered hatcheries at your county University of Maine Cooperative Extension office or on the University of Maine Cooperative Extension poultry website. If you are buying the chicks from your neighbor, make sure that the farm is a clean, disease-free operation. Deal with someone who has a good reputation and knows about keeping a breeder flock.
Obtaining and Storing Eggs for Hatching
Eggs can be ordered by mail from the seasonal hatcheries or purchased from a local breeder. Or perhaps you already have a flock of birds, either for exhibition purposes or just for your own use as egg or meat producers.
Producing and using homegrown hatching eggs
For ease of hatching, the most desirable eggs will come from a crossbred mating. If you are looking for practical backyard chicks, choose crossbreds.
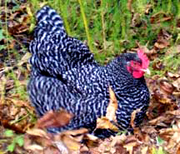
One of the old tried and true crosses is that of a Rhode Island Red male with a Barred Plymouth Rock female. The chicks will usually hatch well and they can be sexed at one-day old based on the presence or absence of a white head spot (males have one; females don’t). Pullets from this cross are superior brown-egg layers and the males can be reared for roasters, although they will require about twelve weeks to mature and the conformation won’t be comparable to that of a Rock x Cornish cross.
There are several crosses utilizing heritage American breeds, such as the Delaware, New Hampshire, or White Plymouth Rock, that will produce great brown-egg layers and reasonable broilers. Or try a cross of a Brown Leghorn male on one of the American breed females. The eggs are not brown but are classified as “tinted” and there are lots of them. However, be aware that when using a Leghorn parent the male offspring aren’t of much use as meat birds.
Eggs from purebred matings generally do not hatch as well as those from a crossbred mating. Many exhibition breeders would agree that “the better the hen, the poorer the hatch.” Good exhibition females are often inbred. In general, the greater the degree of inbreeding, the poorer the egg production. The poorer the egg production, the poorer the hatch. The better laying females have the best fertility and good fertility begets good hatchability. Probably those females that lay well transport more sperm to their sperm storage glands and that increased storage results in better fertility. Inbred males may show less interest in mating and subsequently produce fewer sperm cells. Another aspect of inbred exhibition birds is the accumulation of recessive deleterious genes. Even if fertility is successful the embryo may die during incubation due to an inherited recessive. But in spite of all these cautions, many exhibition breeders successfully hatch chicks from inbred matings.
Nutrition plays a major role in egg fertility and hatchability. Some feed companies offer a “breeder ration” that will be slightly higher in protein than the ordinary layer rations and also higher in certain amino acids, notably lysine and methionine. Vitamin/mineral mixes may be purchased from the poultry supply houses to supplement the ordinary layer rations—these are useful when keeping purebred, exhibition stock. Breeder birds should not be fed high amounts of fattening feeds such as whole corn or rations designed for broilers. This is especially true for waterfowl. Birds on range or on grass runs will generally have a higher rate of fertility and more vigorous embryos due to their increased exercise and their access to plant and insect material.
Making the mating
Let’s talk a little about the biology of fertilization and oviposition. In birds, fertilization occurs in the upper region of the oviduct, known as the infundibulum. During normal copulation, the male deposits several million sperm cells into the vaginal area of the female reproductive tract. These sperm are then stored in special sperm storage glands that line the inner surface of the upper and lower ends of the oviduct. As each ovum or yolk is released from the ovary, sperm cells are evacuated from the storage glands into the upper region of the oviduct, allowing fertilization to occur. Fertilization must take place before any of the albumen layers are added to the yolk.
Sperm cells can be successfully stored for days or even weeks in the female oviduct. In domestic fowl, fertility levels will start to decline about seven days after a successful mating or insemination. Fertility may persist for as long as three weeks in chickens, but on average lasts ten to fourteen days. When switching males in a pedigree program, spermatozoa from a new mating will tend to dominate over those of the first male; however, it’s best to wait two weeks before saving eggs from the new male. Turkeys have a much longer fertile period and one insemination may last as long as four weeks.
If you were following a program of artificial insemination (AI) with exhibition breeders, a general recommendation would be for inseminations every five to seven days for chickens. Most of the exhibition turkeys are produced by natural matings but if AI is used a schedule of every seven to ten days is sufficient. AI should be used sparingly in heritage turkeys. One of their virtues is the ability to mate naturally.
Getting eggs from other places
Grocery store eggs are not fertile and cannot be hatched, although eggs purchased at farmers markets might come from a flock that has a male in attendance. You can order fertile eggs from hatcheries or from poultry farms with breeder flocks.
A good general recommendation is to produce your own hatching eggs or purchase them close to home. Eggs sent through the U. S. postal system face a daunting journey. In some cases, when eggs are well packed and the boxes are clearly labeled, hatchability of up to 90 percent have been reported. However, in general, the eggs shipped by mail suffer from breakage or from floating air cells caused by being shaken en route. The chances of hatching an egg with a cracked shell and a torn membrane are slim. Some suggest covering such cracks with cellophane tape and we have seen this done successfully. But it takes only a small gap for bacteria to enter, and with egg yolk as a food source, bacteria will thrive.
If the only way you can obtain the desired variety is through the shipping of eggs, then insist that they be well packaged and well labeled. The best position for shipping eggs is with the small end down, with the shipping container marked “this side up” to keep the eggs in that position. Upon receipt, carefully unpack the eggs and hold them undisturbed (small end down), for a few hours (but not longer than twenty-four hours) at room temperature (70°F), before setting. If you must hold them longer than twenty-four hours, keep them in a basement at 60-65°F.
Care of Eggs
Should you wash hatching eggs?
For home production, a successful hatch starts at the nest box by providing females with clean, dry nests. In the northeast, soft pine shavings are the general choice for nesting material, while chopped hay or straw also works well. Don’t allow birds to roost in the nests at night, and remove any wet or soiled nest material immediately. Waterfowl eggs are especially difficult to keep clean. In the northeast, the spring months tend to be wet and cool, and producing clean eggs from wet, mucky nests is not easy.
Even so, you shouldn’t wash eggs unless it is really necessary. Slightly soiled eggs can be cleaned with dry sandpaper. If the egg is valuable and washing seems necessary, use a mild detergent and a water temperature that is warmer than the contents of the egg. Using warm water will cause the contents of the egg to expand and prevent the entrance of bacteria. Heavy scrubbing damages the cuticle and may push bacteria into the pores of the shell, which can lead to infection when the egg is incubated. Don’t submerge eggs in the wash water, and do allow them to air dry. Washed eggs should not be held more than a few days to reduce the entrance of bacteria. Eggs that are heavily soiled could be boiled up, chopped, with shell, and fed back to the flock. (No, this won’t cause egg eating; they don’t recognize the cooked egg as their own.)
Collecting eggs
When the egg is laid it is the same temperature as the hen’s body (about 105°F). During the cold spring months, collect eggs as often as possible to prevent chilling. The laying pattern of domestic hens corresponds to the initiation of the light period. The earlier in the day birds are lighted the earlier the eggs are laid. Knowing this, you may be able to adjust your lighting pattern to accommodate your work schedule so that eggs will have the least amount of time in a cold nest. Waterfowl eggs tend to be laid during the night or very early in the morning.
Broodiness in a hen is not a virtue to be prized if you will be using an incubator. When a hen becomes broody, her estrogen levels drop, which will slow—or even stop—her egg production. A broody bird could be out of production for a few weeks. Broodiness not only reduces egg numbers, but fertile eggs will start developing if warmed for only a few hours under a broody hen. Development starts at temperatures between 68°F and 70°F: this initiation of development will reduce the viability of embryos during storage, leading to higher mortality when the eggs are placed in the incubator.
Storing eggs
After collecting, store eggs in cartons or cases, large end up, at 50°F to 60°F with a relative humidity of about 75 percent. Hatching eggs should be incubated within a week to 10 days after they are laid. Hatchability declines rapidly when incubation is postponed for more than 10 days. Some work has shown that eggs do better at temperatures of 58°F to 60°F for holding periods up to seven days, but that temperatures of 50°F to 54°F are better if eggs will be held for more than seven days. When the eggs are stored for more than seven days before incubation, turn them daily so the yolks won’t stick to the shells. Begin by propping up one end of the case or carton; each day, change the position of the block or turn the container end for end.
If you will hold the eggs for several days, place the full egg cartons in a plastic bag to reduce evaporation, leaving the bag unsealed. Some claim that eggs should be warmed at room temperature for 24 hours before being placed in the incubator. For eggs held more than seven days there is an advantage to warming them, but for less than seven days the results are less positive.
When selecting eggs to incubate, choose those that are a typical, elliptical egg shape. Reject eggs that are unusual in shape, such as those that are long and narrow, round, or flat-sided. Likewise, eggs with thin and brittle or pebbly shells should be rejected. In the case of breeding exhibition birds, this may mean discarding all of the eggs from a prize female — a decision that the breeder may not care to make.
Incubating and Hatching Eggs
If you plan to hatch your own chicks rather than buying them, you will need to decide whether to use an incubator or, if you have the option, whether to let a “broody” hen—a hen that shows readiness to sit the eggs—incubate them.
Using a broody hen
The majority of backyard flock owners and fanciers will choose an incubator for egg hatching. Incubators are ready at a moment’s notice and are dependable (generally). They can be placed in a spare bedroom or in the basement where a broody hen might not be welcomed. They will continue to work even after a brood of chicks has been hatched and they don’t need feed and water while they are incubating the eggs. They may need water for humidity and we’ll cover that later.
However, there are many who praise the humble hen as the champion of poultry reproduction. She is, after all, the one who started this intriguing process. Hens have one decided advantage over incubators; when the chicks are hatched they automatically become the “brooder.” Broody hens come in many shapes and colors and no one breed is best. Most keepers will say that the Silkie and the Cochin Bantam are the two breeds above all others when it comes to motherhood. But the Wyandotte bantam and many of the feather-legged breeds do very well as setters. Among the large fowl, generally the American and the Asiatic breeds are the better choices, while the Mediterraneans plus Hamburgs and Polish should be avoided. Unfortunately, among the Americans, two of the old stand-bys for egg production, the Rhode Island Red and the Plymouth Rock, are not considered the best mothers.
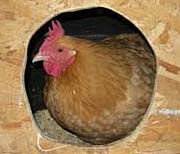
Hens usually “go broody” in the spring and early summer. As a bird feels the urge to “set,” she will refuse to leave the nest and will peck the hand of the egg collector. If she is still on the nest at evening, that’s a good sign. Broody birds will also give a characteristic “cluck” that you won’t hear at other times.
Location of the nest
Decide on a quiet place for the nest. Locate her somewhere safe from rodents, skunks, and the family dog. In early spring the basement works well, but broody hens do produce rather pungent feces and need frequent cleaning. Do not leave the hen in the pen with other birds; fighting and egg breakage will be the result. Decide if you are going to remove the hen for the daily feeding or if you plan to let her decide when she would like to eat. Many prefer the former method, as you assure that the hen gets a regular schedule of feed and water. Some birds will sit so faithfully that they may not eat for two to three days at a time. If you do choose to let the hen decide her own schedule, check her once or twice a day to be sure she has gotten back on the eggs after feeding. Some first-time moms can be very happy sitting on the floor in plain view of the eggs without making the connection that they should be covering them.
Setting the eggs
Choose a box that fits the size of the hen. A nest too large can allow the eggs to roll away from the bird; a nest too small can leave the hen uncomfortable and may break eggs. Place a couple of inches of dry sand or soft earth in the bottom of the nest and then a couple of inches of bedding material such as chopped straw or hay. Older sources suggest placing a piece of sod under the straw to provide moisture during incubation. This may be especially useful if waterfowl eggs are being incubated. Sprinkle a little insecticide powder into the bedding to keep parasites down. Make sure that the hen has no mites or lice; dust her well if she does, but don’t dust her within a week of the expected hatch.
Move the hen to the nest after dark; give her three to four dummy eggs and cover the box. Check the following morning; if she is sitting tight, leave her another day for good measure. If she is pacing or standing and the nest is disarranged, take her back to the pen and try her again in a few days. When setting the final nest do not overload it. Large fowl hens can cover 10 to 12 of their own eggs and bantams can cover 10 to 12 bantam eggs. Set the hen in the evening and check her in the morning to see if all eggs are covered. If an egg seems to be uncovered, remove it and allow more space for the remaining eggs. Some breeders feed the setting hen on scratch feed since it tends to firm up the droppings and probably lasts longer in the digestive tract.
Different varieties hatch at slightly different times. Some may be out on the evening of the 20th day while others may require another 24 hours. Don’t disturb the hen after the 19th day. However, if the chicks are particularly valuable, you may want to remove them as they dry and brood them artificially, or at least brood them until all chicks are hatched and then return them to the hen.
Some first-time mothers may be horrified at what has appeared under their wings and attack new babies. Be prepared to rescue chicks when mother and babies first meet. If you are going with the “broody hen method,” keep those successful mothers for future generations. A good hen can be used for five to six years.
Using an incubator (artificial hen)
Incubators, like hens, come in many shapes and sizes. Incubators are of two main types; still air and forced draft.
The still-air machine is essentially an insulated box with one layer of eggs. Small, manually operated vents regulate the amount of air in the machine. Since the air is still, it tends to stratify and there can be a difference of about 4°F from the top to the bottom of the machine. These machines are generally run at about 103°F. The temperature at the egg level should stay between 99°F and 100°F.
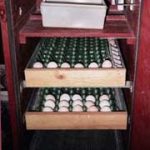
In the forced-draft machine, a fan is constantly moving the air, which means that the temperature is more uniform and so can be set at a lower level. The correct temperature is very important—buy two or more thermometers and test them against one another. Forced-draft machines usually accommodate 3 to 4 trays of eggs and turning is accomplished by tilting the entire tray.
The price of an incubator can range from as low as $45 to as high as $800 and up. Most first-timers start with the simple and inexpensive “Hovabator” available at most feed stores. These small incubators come in a variety of models, from still-air hand-turn models up to a “turbofan” model with forced air and an automatic turner. It is beyond the scope of this bulletin to discuss all the styles available but this information can be found in other publications, a few of which are listed at the end of this bulletin. A brooder or some type of heat source will also be needed for rearing the chicks once they are hatched.
Heat sources with a thermostat are the most reliable. Although electric heating pads, electric frying pans, and light bulbs have all been used to hatch a few eggs, these heat sources are not recommended. Heating sources without a thermostat are pretty difficult to control unless the room temperature is very constant.
Positioning the incubator
To help maintain a constant temperature, place the incubator where it will receive as little room-temperature change as possible. Do not place it near a window where it will get direct sunlight or near a heat source. The sun’s heat can raise the temperature enough to kill the developing embryos. Most people put their incubators in the basement. Not only does this provide a constant temperature, but many older basements also provide some humidity.
Keep in mind that the colder the location the harder it will be for your incubator to maintain the proper temperature and the more electricity it will use. Connect the unit to a dependable electrical source, and make sure that it will not be accidentally unplugged.
In the event of a power outage, close all the vents and cover the machine with a blanket to maintain temperature as long as possible. Developing eggs can last a few hours in this situation. The problem with sealing the incubator in this manner is that it also prevents the movement of oxygen and carbon dioxide in and out of the machine. If you have a wood stove, move the incubator close to it but watch the temperature and open the vents if possible. Once the power returns wait a day and then candle the eggs (see below) to see if the embryos are alive. If the machine is nearing hatching time the chicks will generate their own heat and it is not necessary to insulate the machine. In fact it may be necessary to open the door slightly to keep the temperature from climbing too high. A loss of power may cause the hatch to be delayed for a day or more and there will be some mortality, but with a little care the hatch may not be a total failure.
Preparing the incubator
Before you put valuable eggs in the incubator, be sure it is working correctly. Place warm water in the humidity pan, and adjust the heat source. Generally, still-air incubators will have a recommended temperature of 101.5°F, while forced-draft models will run at about 99.5°F. Check the owner’s manual for the suggested temperature for your model. Most incubators will come equipped with some type of “wet-bulb thermometer” for measuring humidity within the machine. If your machine does not have one they can be purchased from most poultry supply companies. (See Table 1 below for determining relative humidity.) Run the incubator for 48 hours and check the temperature and humidity several times each day before setting the eggs. You may want to run a dummy hatch; put in some surplus fertile eggs for about a week and get to know the machine. Candle the eggs at the end of the week and see if they are developing.
Setting the eggs
If you are using a still-air model, place the eggs in the incubator on their sides. Mark the date or an “X” on each egg so you will know whether they have been turned: you will need to rotate them 90 to 180 degrees at least twice a day—three times would be better. The hen turns the eggs several times each day when she is setting. Turn the eggs an odd number of times so the position that is up the longest (at night) will alternate. When you turn the eggs, move them to a different part of the tray to protect them from temperature variation. If the eggs are not placed on their sides, they should be placed at an angle so the small ends are in the downward position.
If your incubator has an automatic turner in which the entire tray tilts, then you will set the eggs small end down in a plastic egg flat. In some of the smaller machines the eggs are placed small end down in a plastic grid and the eggs are “turned” in a rocking motion. The purpose of turning the egg is to keep the yolk and the developing embryo floating freely within the albumen. If the egg is left in only one position, the yolk, being less dense than the albumen, will slowly float to the top of the egg and the embryo will adhere to the shell membrane, resulting in abnormal development and eventual death.
Operating an incubator
Place the thermometer at the same level as the center of the eggs, or slightly above. Overheating the embryo is much more damaging than underheating it; overheating speeds up embryo development, lowers the percentage of hatchability and causes abnormal embryos. Although a short cooling period may not be harmful, long periods of low temperatures will slow embryo growth. Temperatures outside the range of 97°F to 103°F will produce very few hatched eggs.
The moisture level (humidity) in the incubator should be about at 60 to 65 percent relative humidity, with an increase to about 75 percent for the last three days of incubation. Moisture is provided by a pan of water under the egg tray. Add warm water to the pan as needed. To boost humidity, increase the size of the pan or add a wet sponge. You can also adjust the humidity by adding or cutting back airflow. A full incubator needs to have the vents at least half open for the last three days.
The egg needs to lose moisture during incubation, and so the air cell will grow larger based on temperature and humidity. The drawing at right shows the normal size of an egg’s air cell at 7, 14, and 18 days of incubation.
Ventilation is adjusted by opening or closing vents at the rear or the top of the incubator. Normal air exchange is needed during embryo development. The embryo needs oxygen and produces carbon dioxide. You’ll need more airflow as the chicks begin to hatch. However, you should maintain correct relative humidity until most of the chicks are out of their shells. It’s a bit of a balancing act to keep up the humidity and also keep a good airflow through the incubator for the last three days. Do not open the incubator unless necessary during the last three days of incubation. You may need to open it to add water, depending on the model you have.
Candling the eggs
“Candling” is the process of checking the egg contents using a shielded light in a darkened area. (Before electricity, eggs were held up to a candle, hence “candling.”) You can also check air cell size and determine incubator humidity by candling.
You can make an egg candler from a wood or metal box, or a container, in which you mount a 60-watt light bulb. Make a one-inch hole in the end near the bulb. For better viewing, place a felt or cloth cushion around the opening so the egg fits the opening better and light does not leak around the egg.
Hold the large end of the egg up to the candling light. You won’t see much development until the fourth of fifth day of incubation. Embryos are quite sensitive to jarring during the first four days of incubation—another reason to hold off on candling. Embryos will be seen more easily in white or light-colored eggs. Those that appear to have a reddish spider-like body are fertile and developing. When eggs are infertile you will see only the round shadow of the yolk passing by as you turn the egg under the light. Some eggs may show a black loop extending down from the bottom edge of the air space. This is called a “blood-ring” and indicates that the egg was fertile and the embryo started development but then died. Remove these infertile and “early-dead” eggs. Toward the end of incubation, the egg contents will appear dark except for the air cell, as the embryo starts to fill the egg space. You will also see movement by the embryo. Candling will not hurt embryo development or hatching time if you handle the eggs gently. Remove the eggs from the incubator only a few times and keep them out only a short time.
Getting ready for the hatch
Three days before hatching you will turn the eggs for the last time and move them to the hatching tray. In the larger incubators, eggs that have been held in an upright position are laid on their sides in a special hatching tray, which usually has a wire cover. At this time place a layer of cheesecloth on the screen under the eggs. This will make cleaning the incubator easier after hatching. Newspaper for the hatching trays is not a good choice, as some chicks will have trouble standing on the slippery surface.
Some incubators are set up with two or three setting trays and one hatching tray. In this way, you can set eggs every week and continue incubation of the younger eggs even while a hatch is taking place. In this situation, you should still drop the temperature about half a degree F and increase the humidity to accommodate the oldest hatch. As soon as the hatch is complete then the temperature can be raised again and the humidity dropped back to the setting level. Some prefer to set eggs every three weeks and run the incubator in a manner that caters to only one hatch.
Most chicks should hatch within a 24-hour period. Resist the temptation to help late-hatching chicks: they lack vigor or may be abnormal and can present problems as they grow. (However, if these are chicks from an expensive exhibition mating, help them out and hope for the best!). After the chicks are dry and fluffy, they can be removed from the incubator. Sanitation is an important part of incubation. Throw out the cheesecloth, along with the shells and other remains. Clean the inside of the incubator with soap and hot water, and let it dry before the next hatch is set.
Incubation recommendations for chicken eggs generally apply to hatching eggs of other species but check out the specifications for each one before setting valuable eggs. Waterfowl especially require greater humidity. Increase the incubator humidity by using a large water pan. Some hatcheries sprinkle waterfowl eggs with lukewarm water every other day after the first week.
Troubleshooting Hatching Problems
There are many reasons for poor hatches: the type of flock, breeding, feeding, and management program; care of the eggs before incubation; and the incubation environment. Also, the health of the mother hen can be a factor. Infections such as mycoplasma or salmonella can be traced to the females. These can all affect the hatch. Here are some common problems and possible causes.
References
Anderson-Brown, A.F. and GES Robbins, The Incubation Book. Hancock House Pub. Ltd, second revised edition, 2002.
Damerow, Gail. Storey’s Guide to Raising Chickens. Storey Books, 4th edition. 2017.
Damerow, Gail. The Chicken Health Handbook. Storey Books, 1994.
Sanfilipo, Lisa Marie. “Incubation and Brooding.” Brigadoon Farm website, 2000.
http://lsault.tripod.com/incubation_tips.htm
Austic, Richard and Malden Nesheim. Poultry Production. Lea and Febiger, 1990.
Virtual Hatch Project, Virginia Tech, College of Agri & Life Science, undated, https://www.sites.ext.vt.edu/virtualfarm/poultry/poultry_incubation.html
Information in this publication is provided purely for educational purposes. No responsibility is assumed for any problems associated with the use of products or services mentioned. No endorsement of products or companies is intended, nor is criticism of unnamed products or companies implied.
© 2009, 2020
Call 800.287.0274 (in Maine), or 207.581.3188, for information on publications and program offerings from University of Maine Cooperative Extension, or visit extension.umaine.edu.
University of Maine Cooperative Extension is an equal opportunity institution and provider committed to nondiscrimination. For more information, visit extension.umaine.edu/nondiscrimination.