Maine Home Garden News — April 2022
In This Issue:
- April Is the Month to . . .
- Plant a Peach Tree — You Won’t Regret It!
- Live Staking for Stream Restoration
- Hedgerows and Homes
- Common Grackle
- Maine Day of Giving, April 27, 2022: Support the Maine Master Gardener Volunteers Program
April Is the Month to . . .
By Sandra Mitchell, Penobscot County Master Gardener
April is the month to rejoice that spending time in the true outdoors, in the dirt gardening, is right around the corner! It is a busy time of year, full of anticipation, plans, and hopes for the season to come. Most seasoned gardeners also think of the “routine” and common April garden chores, like getting a soil test done if you forgot to in the fall and setting out your frost-tolerant crops. But then, there is that list of things that we often think of later in the season that slipped past us. And often, they continue to slip past us! This month, we will feature some of the “odd duck” garden things that you might want to tend to before the season really heats up!
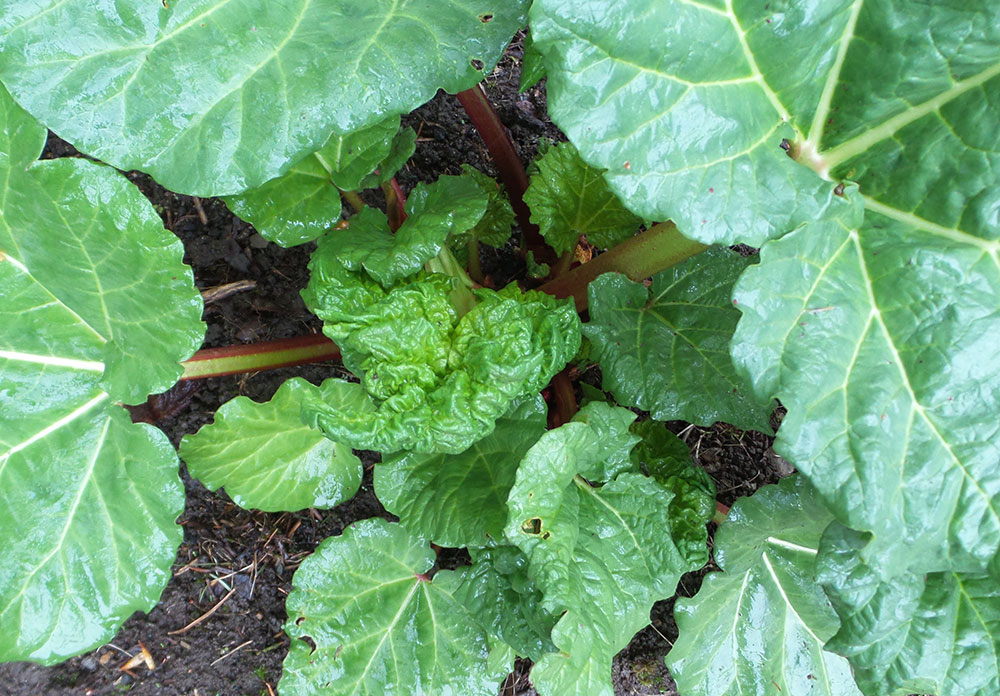
 Split your rhubarb. Remember that giant plant that took up most of the bed and half of the walkway last season? Do something about it now, while it is still small enough to handle! Dig up the plant as soon as the soil can be worked, and divide it into pieces, leaving at least 2 or 3 buds and a large section of the root system with each division. Replant them immediately at the same depth they were growing previously and water thoroughly, at least weekly through the remainder of the growing season (especially if it is dry). See bulletin #2514, Growing Rhubarb in Maine.
- Leave that soil alone. As tempting as it is to start working the soil as soon as it is thawed, remember how important those air pockets are and how quickly you can compact them if you work wet soil. Even though you are really eager to get rolling, waiting until those beds dry out just a touch will stand you well for the entire season.
- Remove tree guards. You might have forgotten them from last year or the year before (oops), or just remembered to put them on for the winter, but your trees don’t need them now, and they are likely to do more harm than good. Take a few minutes, enjoy a beautiful April day, and do your trees a huge favor by removing the tree guards. And while you are there, consider any staking system you might have, or other tags or foreign items on the plants. If you are looking to expand this project, look around at the branches, too, and decide what needs to be culled. Remember, however, you might want to wait on flowering branches until after they’ve bloomed.
-
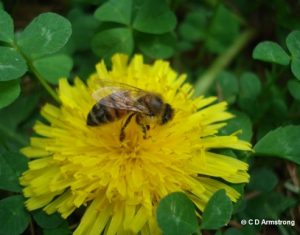
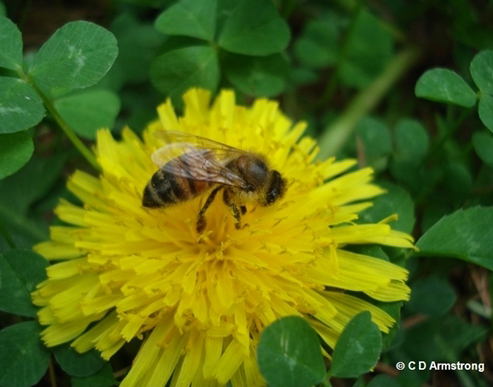
Honey bee on a dandelion. Photo by C. D. Armstrong. Leave the dandelions alone. Yes, I said to leave it right there! Did you know that dandelions are one of the earliest natural food sources for some of our favorite pollinators, including the honeybee? You will be doing the pollinators, and your garden, a world of good if you can resist pulling these early season flowering plants, at least until nature’s bounty has made them less crucial for our insect friends. But this point leads right into the next one…
- Don’t let the weeds get out of control. Okay, yes, it is early, and that weed looks tender enough. But in another six weeks, you’ll be tugging on a taproot several feet long and cursing the plant the entire time. Unless you’d like to add weeder geese as your garden helpers, take some time to get ahead of those weeds. You’ll be grateful that you did come mid-season. Take it from someone who never finds the time to weed until, oh, late June when I can’t find my garden anymore! See UMaine Cooperative Extension’s Managing Weeds.
- Remember your feathered garden-mates. Take a little time to clean out your birdhouses from last season. Old nests retain parasites and mold that can be harmful to chicks, so birdhouses need to be cleaned out well. The early nesters will be starting to look for boxes in April, so this is the time to get everything shipshape and ready for their return!
- Fertilize. Yes, I said fertilize. I know it seems early, but some of your crops — such as fall-planted garlic, fruit trees, roses, and bulbs — will appreciate a ready-to-digest snack as they wake up from a long winter. See UMaine Extension’s Fertilization of tree fruits information.
-

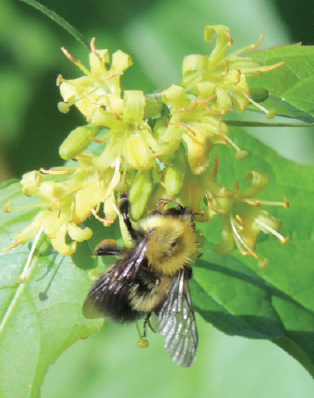
Bee on native bush honeysuckle Consider adding a few native plants. Okay, they might not be as showy as some ornamentals you’ll see in the garden centers, but they are beautiful in their own way. And they contribute to a healthy, well-functioning ecosystem in your yard. Add to that, once they take root they tend to be much hardier than many exotics! There is nothing against a few eye-catching showies in your garden, but if you vow to plant one or two natives each year, you will be richly rewarded, even if only from the increase in pollinators you can attract. Check out UMaine Extension’s Plants for the Maine Landscape.
- Do one final check for browntail moth nests. These nasty little beasts (okay, I know they are actually pollinators, but they are one of the few I DON’T want in my yard) will start to emerge from their nests by the middle of the month. This is your last chance to get the nests down and properly disposed of before you are overrun with the caterpillars. For more information see Browntail Moth (BTM) Frequently Asked Questions.
- Try something different. Join a Big Night brigade and help amphibians get across roads to their breeding grounds. Although you may not find them in your garden, they are vital to the ecosystem that keeps your garden as alive as it is. How cool is this? Big Night: Amphibians Are on the Move!
- Check for ticks. They will be active this time of year. Check yourself, your family, and your pets constantly. Wearing light-colored clothing helps you to spot them, and showering after you come in from the garden will help rinse some off before they attach. Try to keep them from attaching if at all possible! For more information, see UMaine Extension: Tick Lab.
- And lastly, go out and ENJOY! Gardening is fun year-round, but there is nothing like the magic of watching the garden wake up after a long winter. Take time to stop and smell the flowers and consider visiting a new public garden! Public Gardens in Maine.
Plant a Peach Tree — You Won’t Regret It!
By Abby Zelz, Penobscot County Master Gardener Volunteer
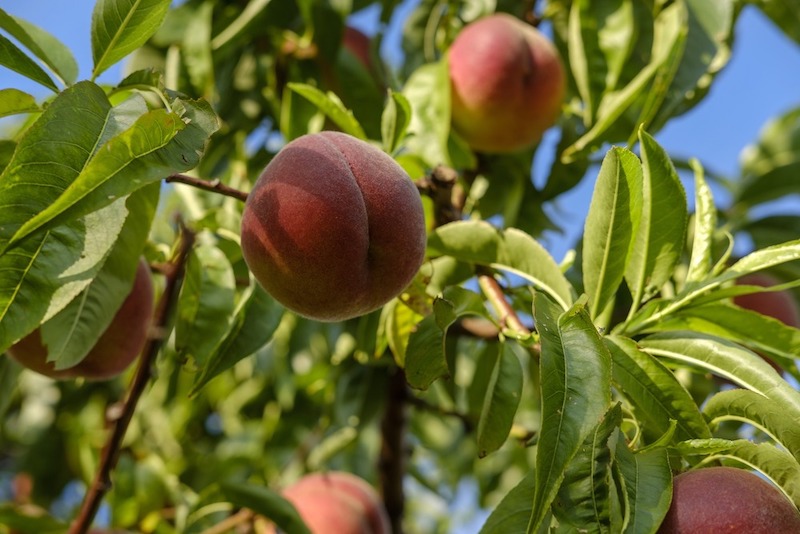 We didn’t know if we were setting ourselves up for disappointment when we planted the peach tree. Would it thrive or struggle in our in-town lot in Bangor? As it turned out, other than pruning and thinning, there’s been little effort involved and much to enjoy.
My sister in midcoast Maine bought a peach tree for herself as well as one for my husband and me at the Knox-Lincoln Soil & Water Conservation District’s plant sale. I’m not sure which variety we got, but I think it was Reliance.
We planted it in a sunny spot in the yard, trying to anticipate the future spread of its limbs. For the first year or two, we protected the thin trunk from nibbling pests. When it first produced pink blossoms, we were relieved, and after about three years, it began to bear fruit.
We never fed our peach anything other than some peat moss when we planted it and occasional servings of compost.
Early each spring, I would tackle it with clippers and a pruning saw. It was easy to trim in the early years, first from the ground or standing on a step stool, then by climbing it, and more recently by using a tall ladder. In the past few years, it has grown too tall for me to reach the skyward-reaching shoots and new growth. Even my awkward acrobatics with a tree pruner on a long pole yield limited success. Perhaps more aggressive pruning during the earlier years would have helped. A dwarf variety would also have eliminated this challenge. I haven’t wanted to prune aggressively in recent years, in case I speed its demise. Unlike apple trees, peach trees don’t generally live more than a dozen years, and ours is about that age.
Besides trimming, you need to thin the many developing “baby peaches” to let fewer peaches grow large. Thinning also reduces the weight of the fruit on the branches and allows the tree to put its energy into a smaller number of peaches that will mature. And mature they do, to a delicious conclusion!
As my sister joked, “imagine how exhausted you’d be if you had to have multiple babies every year!”
Moving the step ladder around the tree to reach as many branches as possible, I remove most of the tiny developing peaches and toss them in the compost. Leaving one peach every 8 to 10 inches along the branch enables the remaining fruit to grow larger.
Like the challenges of trimming the mature tree, I can no longer reach many of the developing or ripe peaches.
Our peach developed leaf curl, a common fungus, several years ago. The fungus is unattractive and has likely affected the tree’s productivity. Despite that, the tree still bears abundant and delicious fruit. Our bigger challenge comes from the neighborhood squirrels. They taunt us from the peach tree’s branches, take one or two bites of the hard, unripe peaches, and then leave the damaged fruit. Even a well-aimed spray with the garden hose has a limited effect, and they return to the tree when we leave the yard. At least they have good taste — along with the peaches.
These are minor challenges, however, and the advantages far outweigh them. Go ahead and plant a peach tree — you won’t regret it!
Live Staking for Stream Restoration
By Jennifer R. Fetter, Extension Educator, Water Resources (jrf21@psu.edu) and Kristen Koch, Program Manager, Penn State Agriculture & Environment Center (klk343@psu.edu)

The following is a brief introduction and instructional guide to using live staking as an inexpensive and simple technique to restore eroding stream banks.
An Introduction to Live Staking
Development, agriculture, and a variety of other disturbances can often lead to unhealthy streams because they remove plant life along streams and increase flow of water. Stream banks that experience these disturbances are often left bare and without a strong root mass in the soil. Without plants and roots, soil particles are more likely to wash away during high waters, heavy rains, and rapid snow melts, which leads to a number of undesirable results including sediment pollution in the water, loss of land, and deeply channeled streams.
There are a number of practices that add plant life back to these stressed streams and help protect and stabilize stream banks, improving the health of the streams. You may have heard the words “riparian buffer” to describe the plants or forest along the sides of streams. Restoring a riparian buffer is one practice, and it often includes planting young trees or seedlings, evenly distributed, along the sides of the stream and up to 30 meters away from the stream. These trees not only help hold soil in place but they also soak up nutrients, absorb rainwater, and provide habitat for wildlife.
Live staking is another practice, which reintroduces plant life directly in the places that need it most, the stream banks. It has a low cost and is something that landowners can do easily on their own property. Stem cuttings taken from trees during their dormant season (before the buds break in the spring) are inserted directly into stream banks. These cuttings, referred to as “live stakes,” will eventually grow into new trees and are an effective way to establish a root network along the stream banks and help prevent further soil loss.
Harvesting Live Stakes
Live stakes can be purchased from some nurseries, but they can also be harvested directly from trees already on your property. Trees that grow readily along stream banks, such as black willow or red osier dogwood, are the recommended species for live staking.
You may already have some of these trees growing on your property, or you may know somebody who does. To harvest live stakes, cut branches that are roughly 0.5 to 1.5 inches in diameter (some thinner widths may be successful as well) in 2- to 3-foot lengths. Pruners or loppers work well for this.
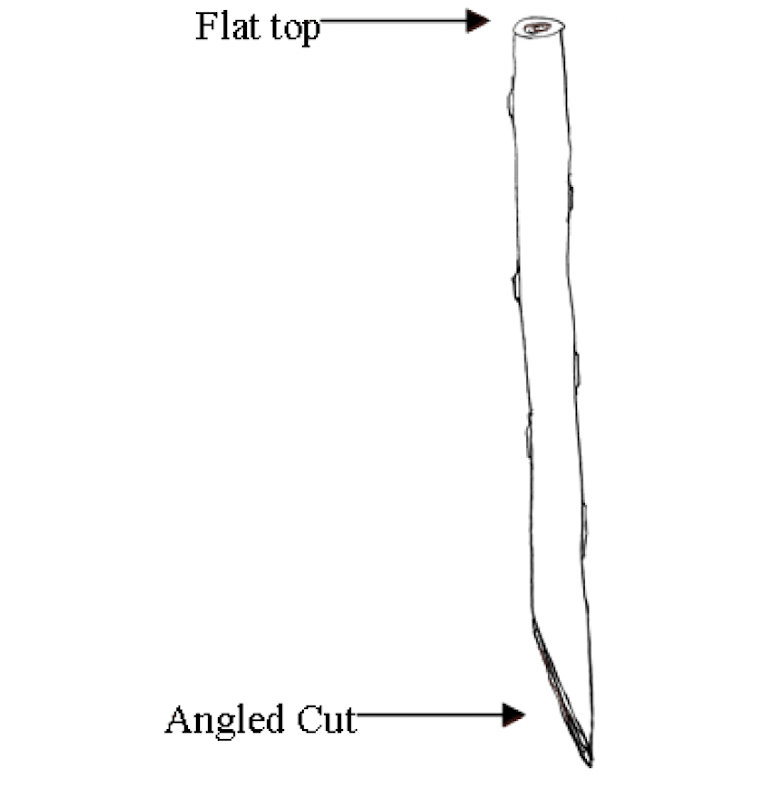 Cut the bottom of the stake on an angle to form a point. This angle will help with inserting the stakes, and it also helps you remember which end is which (since trees do not grow as well upside down!) Some branches may be long enough to cut into several stakes, so make blunt or straight cuts to the tops to keep the ends distinguishable. Small side branches should be trimmed off.
If you are collecting a large number of stakes, drop your cuttings into a bucket of water as you work to keep them from drying out.
Live stake cuttings should be made during the dormant season, before buds break. In Pennsylvania, mid- to late March is usually an ideal time for live staking.
It’s best to plant your live stakes right after cutting them. If you will be waiting a few days, keep them fresh by storing them in a bucket of water or wrapping them in wet burlap. If you ordered your live stakes from a nursery, it’s best to soak the bottoms in a bucket of water for a day or two before planting them. Stored and purchased live stakes also benefit from a fresh, angled cut at the bottom.
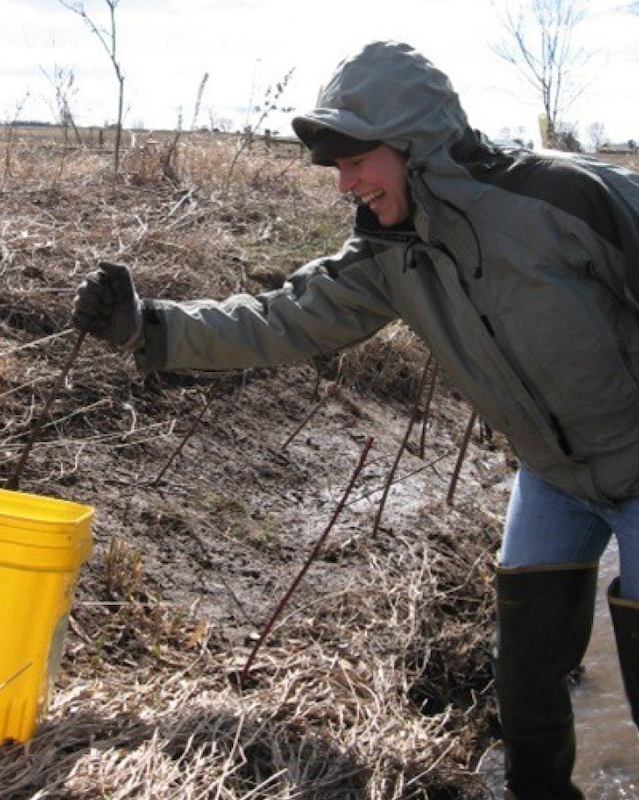
Planting Live Stakes
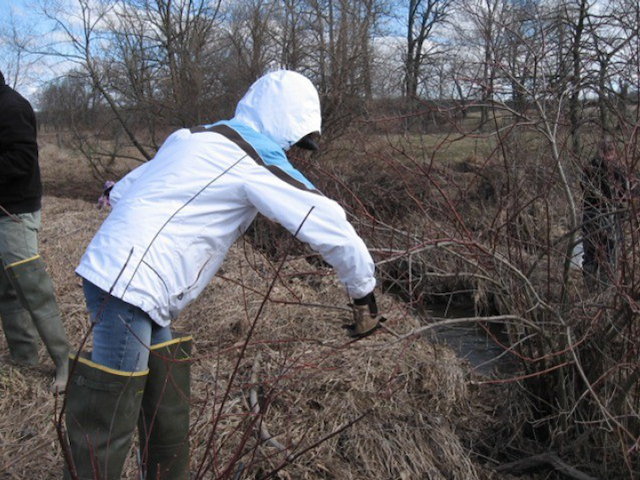
Planting live stakes typically requires getting into the stream, so waders or high boots will be helpful. You will also want a 2-foot length of rebar or similar material to help create pilot holes for your stakes. You can plan out your planting site in advance or just estimate as you go.
Live stakes should be placed 2 to 3 feet apart in several rows along the stream bank. A triangular arrangement helps fill spaces best. Live stakes are planted more densely than these tree species normally would be because there is an expectation that not all stakes will survive. Don’t plant stakes so high in the stream bank that they won’t reach the water table. They need to be in contact with the moisture to succeed.
 Create a pilot hole at a 90-degree angle to the soil surface by pushing the rebar into the soil and then removing it. Then insert stakes, pointed end first, on the same 90-degree angle, so that about one-half to two-thirds of the stake is in the soil.
If banks are nearly vertical, planting stakes so they are pointed slightly upward can help increase growth success. A rubber mallet can help drive a stake into firm soil, but make a fresh cut on the exposed end afterwards to remove mallet damage.

After Planting
You may see some leaf growth on stakes in the first growing season, but good root growth is more important in the first year. Don’t assume stakes didn’t survive just because you don’t see new growth above ground.
A gentle tug in the fall on a few stakes will help you determine how successful your planting was. Additional stakes can be added in future years to fill in areas where trees didn’t survive. Other than that, they don’t require much maintenance at all.
This article was prepared as part of Penn State’s Greening the Lower Susquehanna Project, supported by a grant from the National Fish and Wildlife Foundation.
Hedgerows and Homes
By Kathy Molatch, Hancock County Master Gardener Volunteer
Even in our rural state of Maine, native habitat and plant, insect, and animal populations are declining. Hedgerows, windrows, and windbreaks are important habitats for species whose territories are being decimated by human activity. They provide safe travel access for wildlife as well as food and pollen sources, nesting sites, and shelter.
Creating new areas of native plants and rewilding our lawns are ways home gardeners can restore some much-needed habitat. In addition to the benefits hedgerows provide to wildlife, planting one composed of native perennials, flowering shrubs, berry bushes, and trees will provide fruits, nuts, and flowers, as well as beauty and privacy for the gardener.
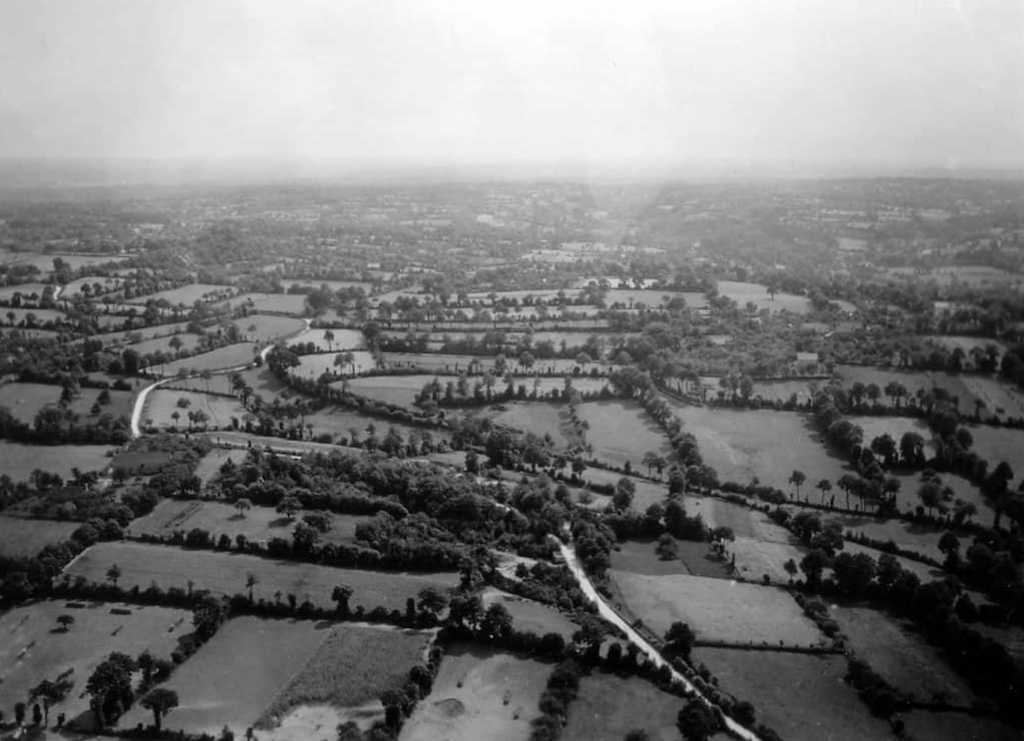
What is a hedgerow? In ancient Britain and Europe, the Romans dug ditches and built long, high mounds to protect areas of significance. Over time, these areas became havens for plants. Edges of crop fields, pastures, and gardens were so delineated, and the hedgerows grew to form effective fences and walls. These defined boundaries separated livestock from crops, provided protection from winds, helped manage water flow, and created visual privacy from roads and neighbors. The plantings were managed to become permanent delineations, many now hundreds of years old.
In New England, farmland was bordered by walls of rocks removed from the fields, which became places where native shrubs and trees could thrive. These hedgerows are ubiquitous in our country lanes.
Hedgerows shelter garden spaces from winds and animals. They can improve the microclimate for tender plants, provide shade, and act as backdrops for flowers to shine against. They can create garden “rooms” and separate use areas.
Once established, hedgerows are low maintenance and will last far longer than traditional fences.
Planting a hedgerow first means deciding its purpose: privacy, windbreak, shade, beauty, food, habitat for wildlife, pollen and nectar for bees, or even a secret garden. Its purpose will help you determine where it should be placed and which plants will make their home in it.
Once a site has been determined, there are a few recommended steps for preparation (Native Hedgerows: Low-Maintenance Woody Plantings for Climate Resilience and Biodiversity):
- Mow existing vegetation low to the ground.
- Lay overlapping layers of cardboard (the bigger the better) to cover the whole area.
- Add a thick layer of mulch—at least 3 inches—making sure the cardboard is well covered.
- Mulch can be leaves (best), wood chips (aged is better), a very thick layer of straw or spoiled hay, or bark mulch for a neater look.
- Wait 3 to 12 months to let the cardboard and mulch kill the existing vegetation.
- Choose your plants while you wait.
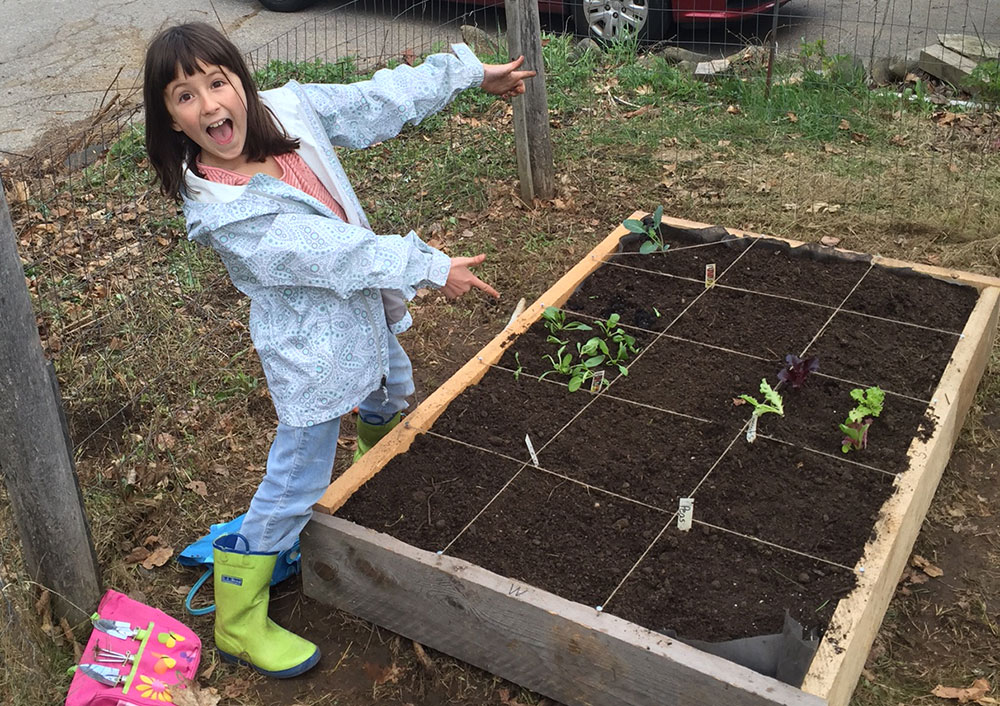
Plant selection will be informed by the purpose of your hedgerow. Plant large species toward the rear with subsequent rows diminishing in stature toward the front. Nearest rows can even include vegetables, which can be changed each year. It is recommended that the hedgerow be at least 6 feet in depth to provide adequate space for the plants’ future growth. Depending on the length of the hedgerow, you might want to plant the occasional large tree or fruit tree to add visual interest or to reward you with a fruit harvest. A hedgerow is a planting for the future, a gift to the future with benefits.
Sources:
- How to Start a Hedgerow (5 Steps)
- Native Hedgerows: Low-Maintenance Woody Plantings for Climate Resilience and Biodiversity
- Hedgerows play key roles in landscapes
- Native Hedges and Hedgerows: Beauty and Biodiversity
- Hedgerow Revival: Grow a Living Fence
- How to Make a Wild-life Friendly Hedgerow
- Planting a Hedgerow Habitat
- What is a Hedgerow?
Resources:
What is a Hedgerow? Excellent article; overview of hedgerows; benefits; step-by-step planning
Two awesome books all about native plants and how to design with them.
- Bringing Nature Home, by Doug Tallamy
- The Living Landscape, by Rick Darke and Doug Tallamy
Could Hedgelaying Catch on in the United States? Lisa Fernandes, communication director for the Food Solutions New England Network, was drawn to the traditional, multipurpose land management skill and has experimented by growing hedgerows in her own yard about five miles outside of Portland, Maine.
“I consider our hedge a very successful experiment,” Fernandes said. “It’s excluding deer from our side yard [and] it’s creating a visual barrier. We trim it every two or three years, and that provides us a ton of kindling for our wood stove. It just fit perfectly with a permaculture mindset as a landscape feature that involves multiple elements at the same time.”
“There are a number of species that will work depending on your goal,” Fernandes said. “You just have to decide if you’re looking for something thorny to keep deer out, something that produces fruit, something that’s good for the bees, or something like birches and willows for basketry. The sky’s the limit, and people are really experimenting with different species.”
“They’re really good for pollinating insects in fields, and they’re really good in farm landscape, good for lots of animals,” Jones said. “They stop the flow of water going over land, which has helped in flood management as well.”
How to Start a Hedgerow? (5 Steps) Outlines steps for planning and implementing a hedgerow
-
- Determine the main purpose of your hedgerow.
- Decide where you want to plant your hedgerow.
- Decide how wide and tall it will be.
- Set up basic planting rows.
- Pick your plants.
Useful Data for Irish River Conservation/Water Quality: “Hedgerows are an essential component in a range of ecosystems and provide valuable services to agricultural activities, such as habitats for pollinators, flora and fauna, prevention of soil erosion, interception of water flows and the sequestration of carbon.”
Hedgerows play key roles in landscapes: “What I saw before me resonated with the Vermont Fish and Wildlife Department’s recent announcement that it was adding hedgerows to digital maps used for conservation planning. Research is showing that many animals use hedgerows as corridors to move between large blocks of intact forests, and researchers expect hedgerows to play an increasingly key role in the migration of animals as they adapt to climate change.”
“Hedgerows differ from hedges in several ways. The goal is not a uniform look, but instead a diverse planting of at least a dozen species of woody plants, from shrubs to small trees, along with herbaceous groundcovers at their base, all chosen with similar demands of soil type, moisture, and sunlight.”
How to Make a Wildlife-Friendly Hedgerow
Common Grackle
By Doug Hitchcox, Maine Audubon Staff Naturalist

As spring swells and shakes off the cold grip of winter, early migrants such as the Common Grackle become more…well, common. This bird can be found striding around backyards or gardens carefully searching for grubs and insects in the grass. Grackles belong to a family of birds called Icterids (or New World blackbirds), which include other more brightly colored members like Bobolinks, Eastern Meadowlarks, and Baltimore Orioles. While grackles’ colors are less conspicuous, in the right lighting you can see their brilliant green, purple, and blue iridescent feathers. While the name suggests the mundane, a Common Grackle’s plumage, at the right angle, is certainly anything but!
For more on the importance of Maine native plants to support birds and other wildlife, visit Maine Audubon’s “Bringing Nature Home” webpage.
Maine Day of Giving, April 27, 2022: Support the Maine Master Gardener Volunteers Program
 Your gift today plants the seeds for tomorrow’s community gardening projects!
Please make a gift to the Master Gardener Fund on April 27, 2022!
Three members of our wonderful Extension family have come together to kick off this day of giving. If we receive 100 gifts during the Maine Day of Giving campaign, they will donate $1,100 to the Master Gardener Fund. A gift of any amount counts towards this challenge.
The Master Gardener Fund provides financial support to the Maine Master Gardener Volunteers Program. The bigger we grow the Fund, the more financial support we will be able to provide to Master Gardener Volunteer projects across the state. Much like growing a garden, growing the fund will lead to beautiful impacts in the local communities we serve.
Please consider actively supporting our Master Gardener community today — for the future!
Help us grow the Master Gardener Fund
Every gift makes a difference toward our goal of 100 donors!
You can help us get to 100!
In 2021 Master Gardener Volunteers donated 28,830 hours of their time to a variety of educational and food security projects throughout the state including community gardens and youth programs.
- Extension trains and supports Master Gardener Volunteers, who help extend University knowledge to their communities through the teaching of sustainable gardening practices.
- Master Gardener Volunteers receive current, research-based information from our educators and industry experts and are connected with meaningful service projects in their communities that match their interests, skill set, and availability.
- While many volunteers join with the goal of improving gardening knowledge and skills for their own projects, they are surprised by how deeply involved and passionate they become about community outreach programs.
Do you appreciate the work we are doing?
Consider making a contribution to the Maine Master Gardener Development Fund. Your dollars will support and expand Master Gardener Volunteer community outreach across Maine.
Your feedback is important to us!
We appreciate your feedback and ideas for future Maine Home Garden News topics. We look forward to sharing new information and inspiration in future issues.
Subscribe to Maine Home Garden News
Let us know if you would like to be notified when new issues are posted. To receive e-mail notifications, click on the Subscribe button below.
University of Maine Cooperative Extension’s Maine Home Garden News is designed to equip home gardeners with practical, timely information.
For more information or questions, contact Kate Garland at katherine.garland@maine.edu or 1.800.287.1485 (in Maine).
Visit our Archives to see past issues.
Maine Home Garden News was created in response to a continued increase in requests for information on gardening and includes timely and seasonal tips, as well as research-based articles on all aspects of gardening. Articles are written by UMaine Extension specialists, educators, and horticulture professionals, as well as Master Gardener Volunteers from around Maine. The following staff and volunteer team take great care editing content, designing the web and email platforms, maintaining email lists, and getting hard copies mailed to those who don’t have access to the internet: Abby Zelz*, Annika Schmidt*, Barbara Harrity*, Cindy Eves-Thomas, Kate Garland, Mary Michaud, Michelle Snowden, Naomi Jacobs*, Phoebe Call*, and Wendy Roberston.
*Master Gardener Volunteers
Information in this publication is provided purely for educational purposes. No responsibility is assumed for any problems associated with the use of products or services mentioned. No endorsement of products or companies is intended, nor is criticism of unnamed products or companies implied.
© 2022
Call 800.287.0274 (in Maine), or 207.581.3188, for information on publications and program offerings from University of Maine Cooperative Extension, or visit extension.umaine.edu.
The University of Maine is an EEO/AA employer, and does not discriminate on the grounds of race, color, religion, sex, sexual orientation, transgender status, gender expression, national origin, citizenship status, age, disability, genetic information or veteran’s status in employment, education, and all other programs and activities. The following person has been designated to handle inquiries regarding non-discrimination policies: Director of Equal Opportunity, 101 North Stevens Hall, University of Maine, Orono, ME 04469-5754, 207.581.1226, TTY 711 (Maine Relay System).