Activity 6: Crime Scene Scientists
Topic: By looking at evidence of animals, we can determine whether they have been somewhere. This is another way in which we can narrow our search for animals and gather information about where they actually are within their species range.
Time: This lesson should take approximately 45-60 minutes to complete.
Video: Activity 6: Crime Scene Scientists (YouTube)
Learning Outcomes:
At the end of this activity, youth should be able to…
- Identify evidence that is left behind by animals.
- Explain how evidence can be used to identify which animals are present in an area.
Background Information for Facilitators:
Similar to a human crime scene investigation, animals and plants can also leave behind evidence. Evidence can range from feathers, scat, bones, hair, and more, thus communicating that a species has been in that spot. Observing that evidence can tell you what species it’s from and possibly how long it’s been there. This is another way in which we can narrow our search for animals and gather information about where animals are within their species range. By looking at the evidence of animals, instead of catching the animals themselves (catching a bunch of fish in a lake to see how many fish there are or trapping animals to see how many there are in an area), we can consider this a sustainable way to determine if an animal is present.
However, this evidence doesn’t stay around forever. Time and disturbances are factors of evidence decay. Feathers blow away, tracks wear down over time due to weather and foot traffic, and scat breaks down to become part of the soil. When we take a closer look at our environment (soil, water, sediment, mud, ice), can we find traces of evidence? We’re going to find out!
Materials:
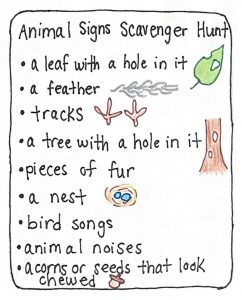
- Animal signs scavenger hunt cards
- Small pieces of paper
- Pencils
- Plastic baggies
- Pocket microscopes
- Soil samples (if youth are unable to go outside)
- Paper
Vocabulary:
- Evidence = facts that come from observations or artifacts
- Habitat = the natural home or environment for a living animal (or plant)
- Inference = a conclusion or explanation based on evidence
- Soil = the upper layer of the earth, where plants grow, consisting of a mixture of organic remains, clay, and rocks
Methods:
Engage
- Ask youth to think about this question: “How do you know where an animal has been? What clues can you look for that give away the presence of something?” Then ask them to share their ideas.
- If they need some help, give them an example: you know your dog was here because there is hair on the floor, you know a bird was here because there is a nest in a tree.
- Have them share some examples.
- “What do deer leave behind?”
Explore (there is an indoor option if youth are unable to go outside)
Outside: Animal signs scavenger hunt
- In this activity, youth go outside with scavenger hunt cards that list animals signs that could be found in the backyard/schoolyard. Before bringing youth outside, establish rules (what do you pick up vs. leave, behavior expectations) and boundaries (between these trees, no father than __). If you have time, brainstorm some ideas before handing out the cards, “What are some things we should be looking for?”
- This could be physical evidence, sounds (ex. birds chirping or chipmunks) or even smells.
- Pass out scavenger hunt cards once you’re outside and let youth explore within the boundaries you have identified. Let them know that they are not limited to only signs of animals that are on the list (i.e. sounds, smells, anything they think could be evidence).
- After youth have had time to explore, bring them back as a group.
- Creating a circle allows everyone to see each other and what they brought back from their scavenger hunt.
- Allow youth some time to do a little show and tell to share what they found.
- Here is a prompt you can use: “What did you find? What do you think it’s evidence of? What questions do you have based on what you found?
- “Did anyone find the same thing?” “Do you agree with what it came from?” Limit youth sharing to a sentence or two so everyone can share (if they want).
- If your group is large and you think this will take too much time, allow students to put the evidence they collected on the ground to create a museum so everyone can appreciate, comment, or ask questions.
- Explain to the youth that as scientists, we could consider these animal signs evidence of their presence.
- Have youth consider and share “What are your inferences or conclusions based on evidence (what animal did the evidence come from? How did it get here?)?”
- “What can you infer about what is going on here?” The area may be passing for deer or small mammals, or squirrels may like the seeds from the trees.
- Have youth consider and share “What are your inferences or conclusions based on evidence (what animal did the evidence come from? How did it get here?)?”
Inside: Who am I (with clues)?
- This activity allows youth to create their own evidence of species presence and gives others a chance to guess what the species is.
- Split youth into groups of 3 or 4.
- Explain to the youth that they will be drawing animal signs on small pieces of paper (one sign per paper, have them try to shoot for 3-4 total).
- Before that happens though, each group has to decide on what animal they will be drawing signs for.
- After youth have agreed on a species or animal, supply them with pieces of paper and writing utensils.
- On these pieces of paper, they will draw and label animals’ signs that signal their animal has been somewhere. Consider these signs as clues. “What clues do you want to give to your peers in order to guess the animal?”
- As the facilitator, model what this would look like. Pick an animal (ex. a chipmunk), think of three signs that are evidence of an animal (ex. A golf ball-sized hole in the ground, the “chip-chip” sound they make, and a collection of eaten acorns).
- Once groups have completed their clues, exchange them with another group.
- With their new clues, encourage groups to discuss and infer what species or animal was present based on the clues.
- After groups have decided on an animal, come back together as a group.
- Have groups report out what animal they inferred was present based on the clues. In other words, have youth justify their claims with evidence.
- “Were they correct?”
- “Was this easy or hard? Why?”
- “How did your group come to one agreed-upon conclusion?”
Explain
- Creatures leave behind evidence of themselves in their habitats. Oftentimes the evidence is actually bits of the species or remains (i.e. feathers, crab legs, hair, scat).
- Remind youth that habitat is the natural home for an animal or plant.
- These pieces of evidence can be considered clues for what species are present in an area. Like crime scene investigators! They find hair from a person, supporting a claim that the person was there.
- If youth are unfamiliar with crime scene investigation, share the video: CSI: Who Did It? | Science Trek (PBS|Maine Public website)
- Thinking back to the last lesson, we learned about species range and the factors that limit where a species can live. Species range tells us where species maybe, but finding evidence of them tells us they were actually there and perhaps even what they were doing.
Elaborate
- We’ve looked at large-scale evidence, now let’s look at the evidence at a smaller scale and see what we can find.
- Have youth collect soil samples from outside. If youth are going outside for the animal sign scavenger hunt, they can collect samples at that time, putting them in plastic bags to transport inside and save for later.
- To get youth thinking about where to collect soil and how to do it safely, ask youth “What counts as soil?” “Where should we be going to collect it?” They should collect a large handful of soil.
- Soil collection can happen just under the surface of the ground (i.e. below the grass). It can be from the schoolyard, backyard, or woods. Be careful to not grab soil near poison ivy, any thorny bushes, or scat.
- To get youth thinking about where to collect soil and how to do it safely, ask youth “What counts as soil?” “Where should we be going to collect it?” They should collect a large handful of soil.
- Have youth wash their hands after coming back inside.
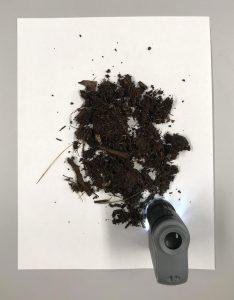 Once youth have their soil samples, have them (carefully) pour their soil onto a blank white piece of paper.
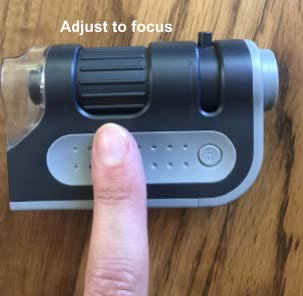
- Hand out pocket microscopes and review how to use them (pictures below):
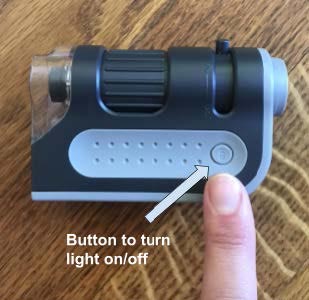
- To turn it on, move the light switch from ‘off’ to ‘on’ on the side of the pen.
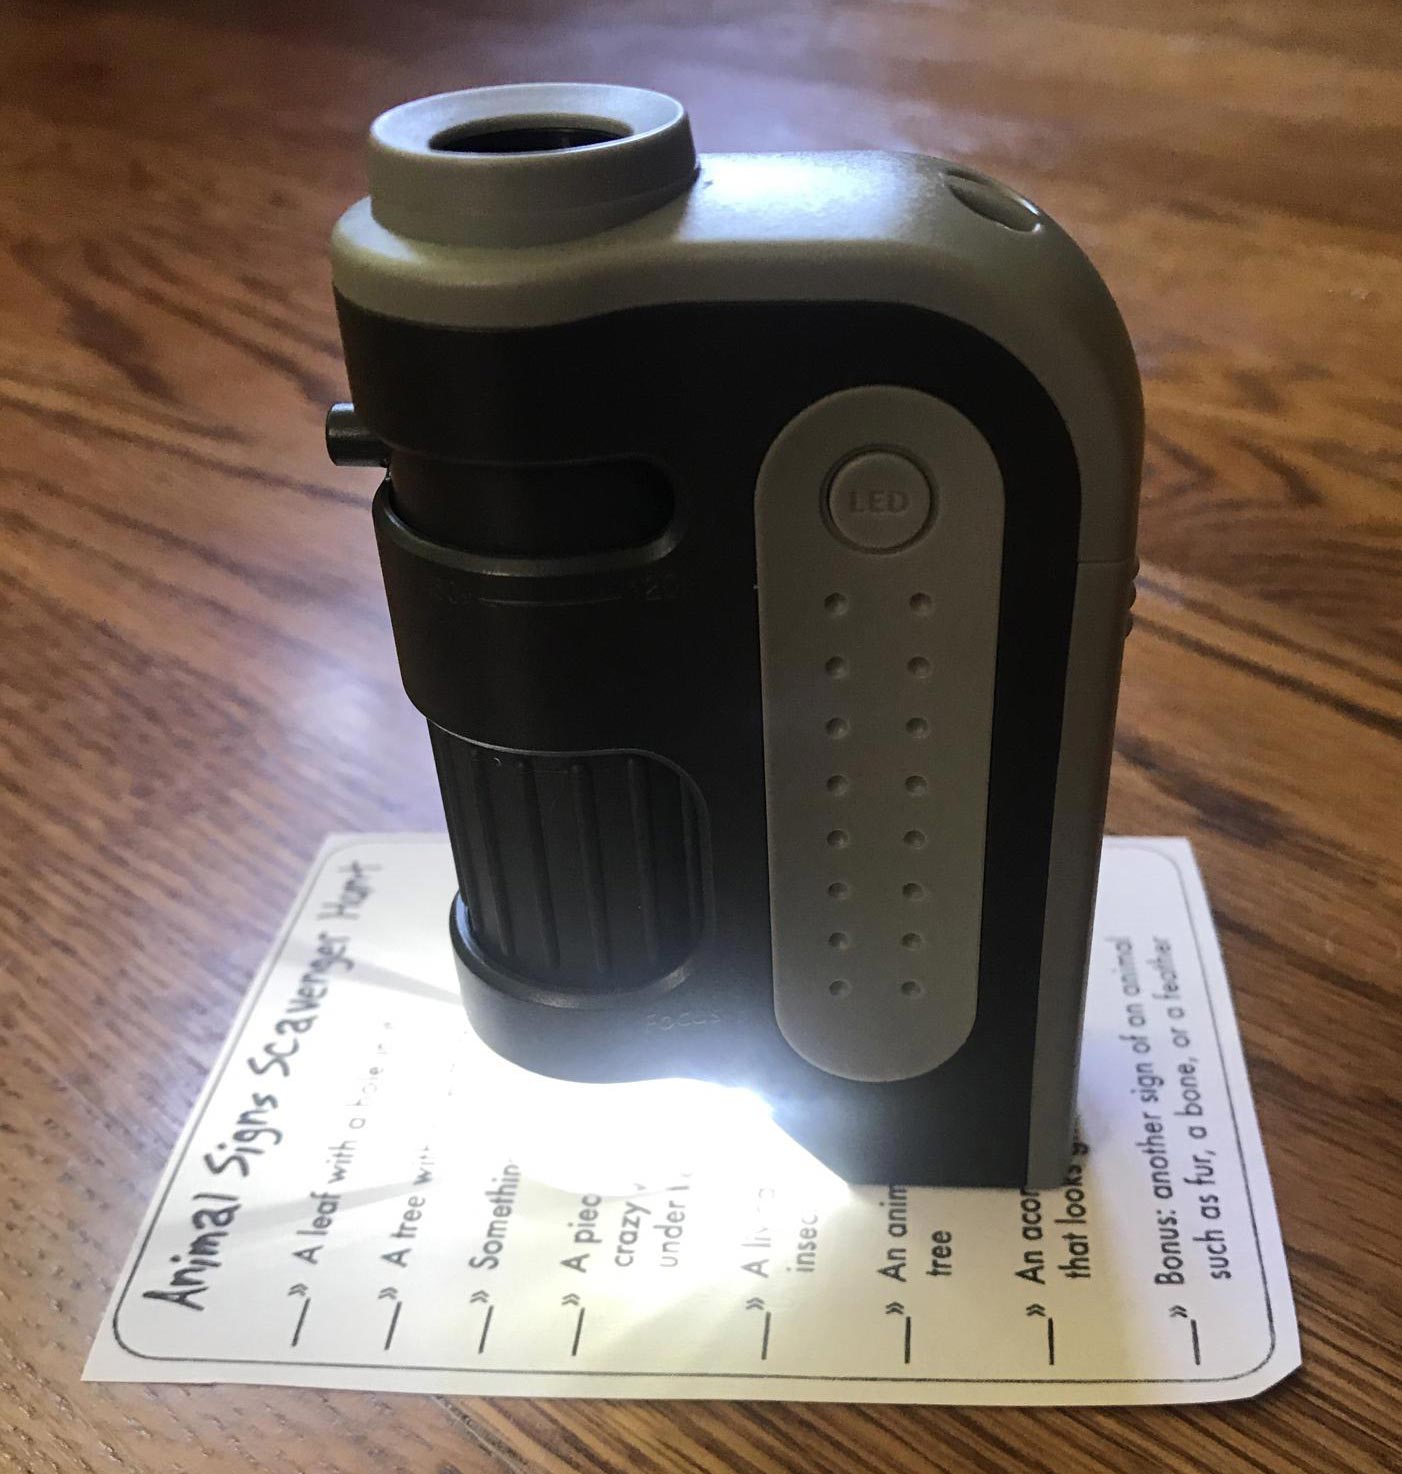
- To look at something, bring the top of the pen (the side with the light) close to your soil sample.
- Use the focus and magnification adjustments on the top of the pen to adjust your focus. Youth may need to play with adjustments or practice looking at something first.
- Allow youth to look closely at their soil sample.
- Encourage youth to make observations about their soil (color, moistness, texture) and look for evidence of animal presence.
- After, have youth clean up their soil and wash their hands.
- Come back together to discuss as a group.
- Have youth share out what evidence they found, if any. “Can you infer anything from your observations?”
- “Do you think someone in another state or another country would infer the same things you did?”
- “How does your background knowledge influence your inferences or explanations?”
- Over time, the big pieces of evidence we see outside (feathers, scat, tracks, fur, etc.) get broken down over time by weather and foot traffic, to smaller and smaller pieces. It’s possible that you have small bits of evidence right in your hands!
- Have youth share out what evidence they found, if any. “Can you infer anything from your observations?”
Photos for Elaborate, Step #5:
-

- Button to turn light on and off.
-

- Adjust to focus.
-

- Adjust to magnify.

Evaluate
- “How did the evidence change going from a larger scale (from the ‘explore’ portion) to a smaller scale (using microscopes to look at soil)?”
- “Did you look for the same type of evidence at both scales? “If not, what changes did you make?”
- “How did the evidence change from the large area of the explore portion (either going outside for the scavenger hunt or picking any animal you wanted in the drawings) to a small area?”
- “What would make you more certain about your inferences?”
Extension
- Have youth write a narrative about an animal leaving evidence in an area.
- “How did the animal leave the evidence?”, “Does it match where the animal lives or their species range?”
Additional Resources:
- Video explaining crime scene investigation: CSI: Who Did It? | Science Trek (PBS|Maine Public website)
There is an emphasis on forensics, but the PBS video does mention DNA, fish, and other uses for forensics.
Supported by National Science Foundation award #OIA-1849227 to
Maine EPSCoR at the University of Maine.

This project is part of the RII Track-1: Molecule to Ecosystem: Environmental DNA as a Nexus of Coastal Ecosystem Sustainability for Maine (Maine-eDNA) at the University of Maine.