Photo Tip Sheet
Taking Photos of Your Project
Taking Photos of Your Project for Upload
Download Taking Photos of Your Project for Upload (PDF)
You have worked hard to create a blue ribbon-worthy project! You want to make sure that it looks as good to the judges as it does to you. Taking great photos of your project is key. Of course, some projects are easy to upload…like photography or typed writing projects! Others take a bit more thought.
Save all photos as a JPG file.
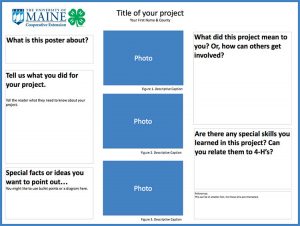
NOTE: For posters, you should use the template provided and create your poster digitally: Google Doc template or Powerpoint Template.
2-D Projects
Flat art, like paintings and drawings, and illustrated writing projects
Contrast: Projects that will show best for judging will have good contrast. Think about this when choosing which art to enter, and when creating projects. Lots of light, dark and medium tones give the best image quality for art and photos you include on posters. If everything is one tone, it won’t “pop!”
Lighting is very important! Full-spectrum light shows your work’s true colors best. This can be a full-spectrum light fixture, but not everyone has those. For most people, sunlight works well. Photographing outside in full noontime sun can cast too much light and create harsh shadows. A somewhat shady spot on a sunny day can work well. Just choose even shade, not dappled with sunny spots. Shooting on a slightly overcast (but dry) day works well, too. Avoid using a flash!
Neutral Background: Use a white board or sheet laid as flat as possible. Avoid busy backgrounds.
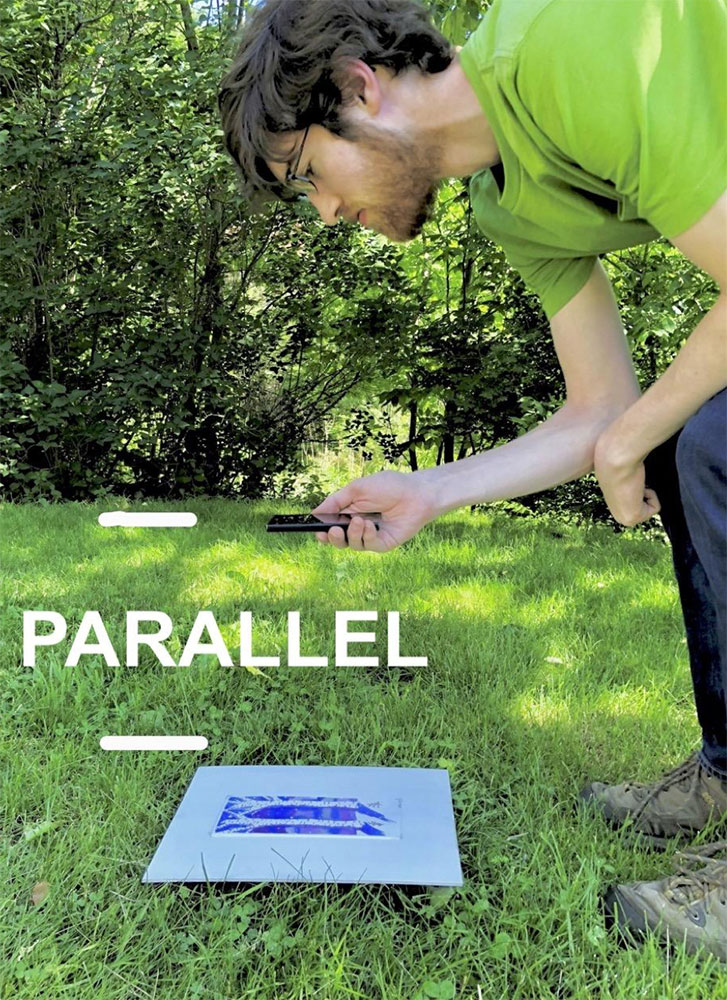 Shoot Head-on: The edges of the piece should be evenly framed by the camera or phone view frame. Position your camera or phone perfectly parallel to the piece. If you can avoid casting your own shadow, lay your piece flat on a low table or the ground (a deck works well) and position your camera or phone flat over it. You can prop your piece up on a flat wall or an easel to take the photo. Just be sure to tilt your camera or phone to be parallel to the angle of the piece for even framing.
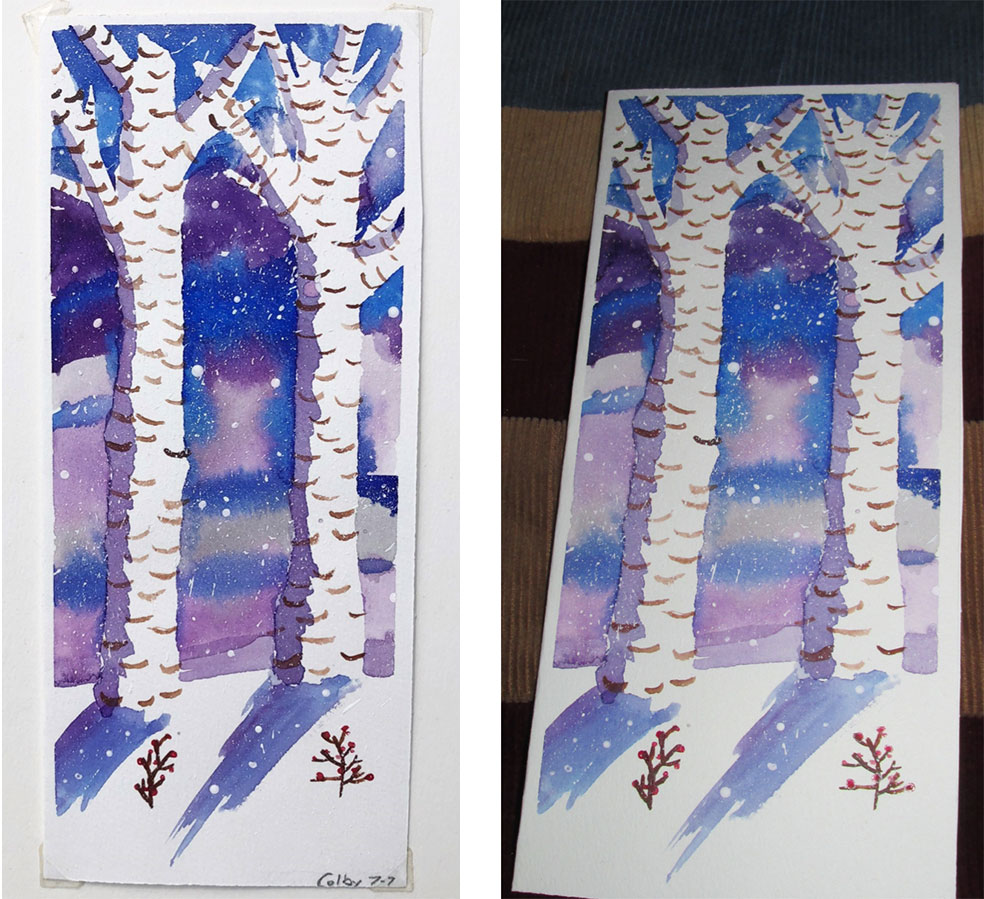
Take Several Shots: Look at them on a computer screen later. Have your art or poster there with you while you choose which photo looks the most like your original piece. Do the colors look the same? Is it evenly lit? Is it evenly framed all around? You usually can do some adjusting in your photo-viewing software if necessary. Be careful not to over-do it!
Crop If Needed Cropping close to remove the background is a good idea. You will find out right away if your camera was not parallel, too! If you are having trouble with this, but it is close, that is OK!
3-D Projects
Anything that is not flat, like sculpture, pottery, models, vegetables, etc.
Contrast and Lighting are important here, too. See tips above.
Neutral Background: Avoid busy backgrounds. Use a white sheet or other non-patterned cloth as a backdrop. You will probably need to drape it up behind your project, which you can do over the back of a chair, or have someone hold a board behind it to drape the sheet. Alternatively, you can shoot on a white table with a flat white board held up in the background. Do the best you can! The important thing to avoid is clutter behind your project.

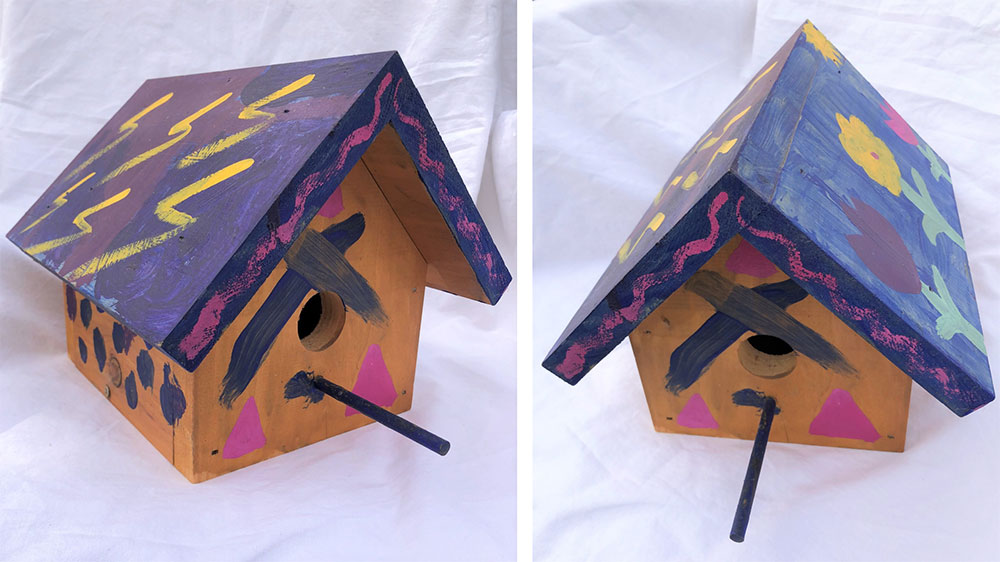
Shoot Several Angles: You don’t necessarily want a head-on shot in this case. Take photos from several angles that show the project best. You can submit up to 3 photos of your 3-D project if that is needed for judging. We will choose one to display in the virtual hall. Avoid casting your own shadow on the piece. Make sure any labels are visible and readable.
Take several shots: Look at them on a computer screen later. Have your project there with you while you choose which photo looks the most like your original. Do the colors look the same? Is it well lit? You usually can do some adjusting in your photo-viewing software if necessary.
Crop if needed: Cropping close to remove unwanted background is a good idea.