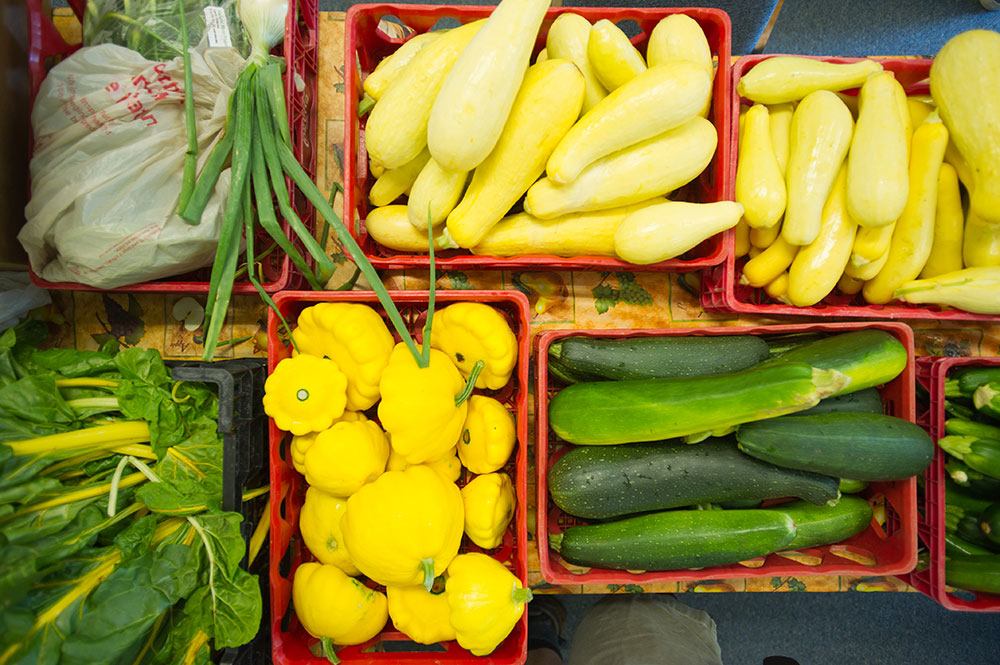
Maine Home Garden News — October 2016
- October Is the Month to . . .
- Give Hardworking Garden Tools a Good Conditioning before Putting Them Away
- Merrymeeting Gleaners
- Grow a Little Garlic
- Food & Nutrition: Making Better Baked Goods
October Is the Month to . . .
By Kate Garland, Horticulturist, and Jonathan Foster, Horticulture Community Education, Coordinator Rogers Farm Demonstration Garden, UMaine Extension Penobscot County
- Step away from the pruners. While it’s tempting to trim back certain woody plants during fall cleanup, it’s usually best to wait until late winter or early spring to prune most ornamental and edible trees and shrubs. Find more details: Pruning Woody Landscape Plants, How Do I Prune Raspberries?, How to Prune a Blueberry Bush, Pruning fruit trees.
- Take in a country fair and revel in the beauty autumn in Maine has to offer. Check out Facts About Leaf Color in Maine before you head out on the road so you can impress your fellow leaf peepers.
- Plant garlic and ornamental bulbs after the soil has cooled (typically mid- to late-October). See Growing Hardneck Garlic in Your Maine Garden or Grow a Little Garlic below for more information.
- Conversely, dig tender bulbs or bulblike structures after the foliage is hit by the frost (ex: dahlias, gladiolas and canna lilies). For excellent tips on how to cure and store a wide variety of these plants, check out this excellent resource from University of Minnesota.
- Start a compost pile while leaves are abundant. Leaves make an excellent substrate for a compost pile — especially when first shredded with a mower. Collect excess leaves in a separate pile to add when depositing food scraps and other high nitrogen inputs.
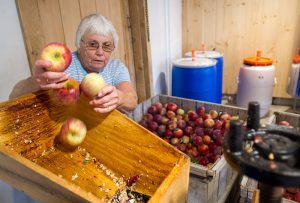
- Make some tasty and safe apple cider. For more information, see Safe Home Cider Making.
- Score some great deals at a local nursery. It’s not too late to plant trees, shrubs, and perennials. If you don’t have a perfect spot for those terrific half-price impulse purchases, remove them from the pot and temporarily sink them into the ground in a holding area for the winter. Water and mulch well before the ground freezes solid.
- Save seed. Be sure to know whether the seeds being saved are going to produce plants with the same traits as the “parent plant” — any plant you may have purchased with “F1” in its name is a hybrid and will not produce the same characteristics. See An Introduction to Seed Saving for the Home Gardener for more information.
- Test your soil. Soil testing can be done anytime, but it’s especially helpful to find out what needs to be added to the soil and incorporate it when there are typically fewer other garden chores to be done.
- Stretch the growing season a few more weeks, or even longer, by constructing a simple low tunnel over cold tolerant crops such as spinach and kale. If using plastic to cover the low tunnel, vent on warm sunny days to prevent overheating.
- Dry those beautiful herbs or make your own herbal vinegar. Don’t miss the opportunity to gather mint, oregano, thyme, and other items that will be much appreciated in teas and soups this winter.
- Prepare for live Christmas trees. If you’re thinking ahead to the holidays and are considering having a potted living Christmas tree, now is the time to dig the hole where you plan to plant it outside. Store the soil in containers where it won’t freeze solid. Living trees should only be inside for a short amount of time in order to minimize stress. Learn more here.
- Find the best place to store fresh produce to ensure longer shelf life. Not all produce should be treated the same.
Give Hardworking Garden Tools a Good Conditioning Before Putting Them Away
By Marjorie Peronto, Extension Educator, UMaine Extension Hancock County, and Reeser Manley, Horticulturist
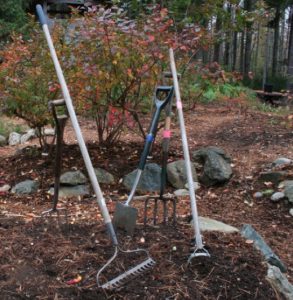 The gardening year is almost over and it’s almost time to put your tools to bed for the winter. When things wind down in the garden, take the time to give your tools the attention they deserve after a season of hard work. Soothe those rough cracked wooden handles and those rusty metal blades caked with soil.
To clean the working end of a digging fork, shovel, trowel, rake, or hoe, first remove all soil and other debris with water. A stiff wire brush and/or putty knife will help remove stubborn caked-on soil and much of the rust. Any remaining rust can be removed by rubbing with course steel wool. Finally, give the tool head a thorough wiping down with a dry cloth. When all of the dirt and rust has been removed, coat the metal heads with a light oil to prevent rust formation. Many gardeners apply this oil by rubbing the metal with an “oil sock,” an old sock filled with sand and soaked in fresh engine oil, then squeezed out and stored in a zip-lock bag when not in use.
Other gardeners prefer to use a large pot or wooden box filled with oil-saturated sand (again, fresh engine oil). The cleaned tools are coated with oil by plunging their heads into the sand. Some gardeners store their digging tools through winter with the metal ends buried in the sand. Either way, the oil-soaked sand will last “forever” if you use it only for clean tools.
Don’t forget to recondition the handles of your tools. If a handle is loose, tighten or replace the essential screws and bolts. If the handle is broken, replace it. Handles can be purchased at most hardware stores, but you may have to reshape the replacement handle to fit your tool’s head. This can be done with a wood rasp or sanding machine.
Clean each handle with a stiff brush, then sand away nicks and splinters with medium-grade sandpaper. Finally, slowly rub the handle with a rag soaked in boiled linseed oil. Repeat the application several times, allowing time for the oil to be absorbed into the wood between applications.
When it comes to cleaning pruners and loppers, wipe the blades with rubbing alcohol, a solvent that will dissolve pitch. Remove rust by rubbing the blades with steel wool, then rinse with rubbing alcohol, and wipe with a dry cloth.
For sharpening a bypass pruner, the type that cuts like a pair of scissors, you should sharpen only the side of the cutting blade with a beveled edge. For an anvil pruner, the type with a cutting blade that strikes an anvil-like surface, both sides of the cutting blade should be sharpened. For either type, sharpening is done by holding the open pruner firmly in hand and slowly passing the sharpening stone across the beveled blade, following the contour of the blade as if you were removing a thin layer of metal from the blade surface. I like to use the DiaSharp Diamond Mini-Hone Kit, available from on-line retailers, because they are easy to hold. The kit contains three stones in extra fine, fine, and course grits. After sharpening your pruners but before putting them away, oil the moving parts with a little squirt of 3-in-1 Multi-purpose Oil.
If you often work the soil with a digging fork, you have probably experienced the frustration of bending one of the tines on a buried rock. To straighten the bent tine, often first noticed when cleaning and putting the fork away for the winter, I use a long galvanized one-inch pipe driven into the ground with about 12 inches left above ground. Sticking the bent tine into the end of the pipe, I can usually straighten it as good as new, or nearly so. This works well for pitchforks, too.
With freezing temperatures imminent, be sure to keep your garden hoses drained when not in use, as it’s quite frustrating trying to use a hose filled with ice. When you no longer need hoses in the garden, let them drain completely, then coil them for storage in the garage or basement.
In May, when you take your favorite digging tool down and feel the smoothness of its handle in your palm for the first time in months, October’s work will be rewarded.
Merrymeeting Gleaners
By Lynne Holland, Community Education Assistant (Home Horticulture), UMaine Extension Androscoggin and Sagadahoc Counties
 There is a lot of buzz around Bath coming from farms, farmers’ markets, and food pantries; but it is not from the bees. The buzz is about the Merrymeeting Gleaners. New to the Midcoast this year, this small, yet determined group of Master Gardener Volunteers, area leaders, and college students are working to address food insecurity in Bath and surrounding towns.
Their efforts began last fall when the Merrymeeting Food Council formed as a coalition of citizens and organizations focused on hunger, nutrition, and food waste in the towns around Merrymeeting Bay. The council developed several work groups including one focused on food security. Part of that work group included Master Gardener Volunteer Michelle Rines who brought her strong interest in gleaning (collecting leftover crops from farmers’ fields after they have been commercially harvested or from farmers markets). UMaine Cooperative Extension, Kennebec Estuary Land Trust (KELT), Brunswick Topsham Land Trust (BTLT), MidCoast Hunger Prevention Program, Access Health, and Bowdoin College all supported the team as they developed a framework for the gleaning team over much of the winter. The plan is to start small and be prepared to scale up if need and capacity increase in the future. The work group acted as a steering committee and each step was documented by Bowdoin Fellow Shannon McCabe and discussed at monthly food council meetings. By early June they were ready to start gleaning.
Rines and Rebecca McConnaughey led teams of fellow gleaning volunteers in a successful effort to deliver over two tons of otherwise wasted food to distribution sites such as the Bath Food Pantry, Bath Housing, Richmond Food Pantry, Bowdoinham Food Pantry, and Midcoast Hunger Prevention Program. This food comes from picking up donations at the end of the Bath Farmers’ Market (participating members: Goransens, Squire Tarbox Farm, Borealis, and Hootenany Breads) and on-farm gleaning at Six Rivers Farm.
 As the growing season comes to a close, the group continues to glean while keeping the future in mind. They have applied for a grant for equipment to help grow the program next year and the Forest Foundation via Bowdoin College has underwritten Shannon’s fellowship through next spring. A major one-day orchard glean is planned for later in October and market gleaning will continue as long as product is available.
By starting small and focusing on each pilot project, the Merrymeeting Gleaners have created a “buzz” of dialogue regarding food security and a foundation for an exciting program to minimize food waste and get food to the folks that need it.
For more information: lynne.Holland@maine.edu or merrymeetingfoodcouncil.org – Food Security Work Group. See more at http://www.slowmoneymaine.org/blog/#sthash.dCAydUGH.ifFZY2n2.dpuf.
Grow a Little Garlic
By Trisha Smith, Community Education Assistant (Home Horticulture), UMaine Extension Piscataquis County
 If you attended the Common Ground Country Fair in Unity this (or practically any) year, you could hardly miss the garlic. Myriad varieties were sold in the Farmers’ Market, displayed in the Exhibition Hall, and even incorporated into useful kitchen décor in the craft and folk arts areas. And that’s not to mention the fragrance in the air and flavor in the food!
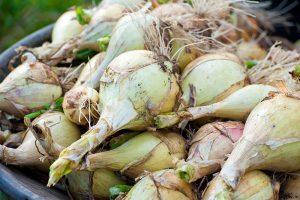
Garlic is a member of the allium family and has become a popular crop for Maine farmers and gardeners. Humans have cultivated garlic for 5,000 years, treasuring it for culinary and medicinal uses. Hundreds of varieties are grown all over the world’s temperate regions. Garlic is divided into two groups: hard- and soft-neck. Elephant garlic is actually a leek, and does not generally thrive in our climate. Most Maine growers favor hard neck garlic for its reliability and size. Popular varieties include Philips, Russian Red, and Georgian Fire.
In addition to the usual reasons of supporting farming and farmers in your area, it is important to get your garlic from local suppliers. Imported stock can harbor disease and fungal pathogens that can affect your own crop as well as your neighbors’. “Grocery store garlic” is most likely grown far away (China or maybe California) and is often subjected to post-harvest treatments to make it sprout- and rot-resistant. Because garlic adapts to the soils and conditions of your area, you will be more successful growing garlic from your own stock or that of a trusted local. UMaine Extension has recently published a list of Maine seed garlic growers: Maine Seed Garlic Directory.
Garlic is a fairly simple and rewarding plant to grow. Every clove you plant has the potential to become a bulb of garlic with 4-8 cloves. When you are selecting planting stock, choose the largest bulbs. It is the size of the bulb you choose, not the individual clove you plant, which determines the size of the bulb you will harvest next July-August.
Where will you plant your garlic? You won’t need a lot of space to give it a try, but the area should be sunny and as weed-free as possible. Garlic cannot out-compete grass or other aggressive weeds. Get your soil tested to pinpoint the amendments you may need to grow the healthiest garden possible. Garlic is a heavy feeder, and thrives in rich, well-drained soil with a pH of 6.8-7. Working compost or well-rotted manure into the bed before planting is generally a good practice. Dave Fuller’s video “How Do I Grow Garlic in Maine?” shares excellent information and planting tips.
No more than a day or so before planting, carefully break bulbs apart into cloves, preserving the point of attachment to the basal plate (where roots emerge). If you encounter a double (fused) clove, set it aside for culinary use. Most growers recommend leaving the papery covering as intact as possible. The garlic will be in the ground over the winter; it’s going to need its “jacket” and “boots!” Timing your planting involves a bit of guesswork, because we never know for sure when the freeze will come. The cloves need a chance to settle into the soil and get some root growth on, but it’s best if they don’t put up sprouts. Mid-October is usually a safe bet for most of Maine. Garlic is usually the last crop to be planted, and one of the first to emerge from the soil in the spring. (See MOFGA’s So When is the Right Time to Plant Garlic?).
After you’ve planted your garlic (2 inches deep, 5 inches apart, in rows 8 inches apart), it’s time to mulch. Mulch insulates the soil, holds moisture, and smothers weeds. Use a weed-seed-free mulch and apply to a depth of 6 to 8 inches. A bale of straw is just about the perfect amount for a 4×8′ bed. Shredded leaves will also work, but whole leaves have a tendency to mat together, and may be difficult for garlic to sprout through in spring. Although some growers pull the mulch aside in spring to aid sprouting, most leave it in place.
Garlic is a great crop for snowbird gardeners. You can plant it as the leaves are turning, tuck it in for the winter, it comes up in late spring, and is harvested in midsummer. Unless you choose to side dress with a nitrogen fertilizer, all you’ll need to do until scapes (flowers) emerge is keep the garlic watered and weeded. Check out Dave Fuller’s video for UMaine Extension: “Garlic in the Garden: Removing Scapes.” A month or so after scapes are removed, it will be time to harvest (usually late July-early August in Maine). The “Harvesting and Drying Hardneck Garlic” video below offers specific suggestions.
Unless you are growing at a commercial scale, garlic is a fun and relatively undemanding plant. Helpful information is available online through University of Maine Cooperative Extension (Garlic) and Maine Organic Farmers and Gardeners’ Association (Garlic, In Depth). Your farmers’ market is a great place to find local favorite varieties and to learn and share gardening and cooking tips. Grow some garlic and bond with your farmers!
Food & Nutrition:
Making Better Baked Goods
By Kate Yerxa, Associate Extension Professor, and Kathy Savoie, Extension Educator, Extension UMaine Extension
Muffins, scones, and quick breads are a “go-to” breakfast food for many people. Unfortunately, some baked goods from coffee shops or grocery stores are oversized and have a high amount of calories, fat, and sugar. Not all baked goods are created equally. You can make your own baked goods at home and control the ingredients. Below are instructions on making your favorite baked goods recipe healthier.
| Reduce Sugar | Sugar makes baked goods tender and moist and gives muffins a golden brown flavor. You can reduce the sugar by ⅓ in a recipe. To ensure that muffins are tasty, use at least 1-tablespoon sugar per 1 cup flour. You can also add extra vanilla, cinnamon or nutmeg to get a sweeter flavor. |
| Reduce Fat | In baking, fat adds moisture, flavor, and tender texture to cookies, cakes, quick breads, and muffins. Using fruit puree, such as banana, prune, or apple, help to give some fat-like flavor and texture characteristics to homemade baked goods.
Try substituting half of the fat with applesauce, up to ½ cup. if the recipe calls for 1 cup of fat, use ½ cup applesauce and ½ cup butter, margarine, or oil. |
| Reduce Salt | As long as your recipe is not a muffin recipe that uses yeast, you can eliminate salt completely from the recipe. |
| Add Fiber | Substitute whole wheat flour for ¼ to ½ of the all-purpose flour in the recipe. Oat bran, or 100% bran cereal (ground to flour in a blender) can replace up to ¼ of the all-purpose flour.
Also, try adding fruit such as diced apples and raisins, or vegetables such as shredded carrots to your muffins for added flavor and fiber. |
For additional information, check out the UMaine Extension Bulletin #4167, Altering Recipes for Better Health.
If you are interested in making your own applesauce to use as a fruit puree to substitute for fat in your baked goods recipe, check out the UMaine Extension Bulletin #4035 Let’s Preserve Apples.
University of Maine Cooperative Extension’s Maine Home Garden News is designed to equip home gardeners with practical, timely information.
Let us know if you would like to be notified when new issues are posted. To receive e-mail notifications fill out our online form.
For more information or questions, contact Kate Garland at katherine.garland@maine.edu or 1.800.287.1485 (in Maine).
Visit our Archives to see past issues.
Maine Home Garden News was created in response to a continued increase in requests for information on gardening and includes timely and seasonal tips, as well as research-based articles on all aspects of gardening. Articles are written by UMaine Extension specialists, educators, and horticulture professionals, as well as Master Gardener Volunteers from around Maine, with Katherine Garland, UMaine Extension Horticulturalist in Penobscot County, serving as editor.
Information in this publication is provided purely for educational purposes. No responsibility is assumed for any problems associated with the use of products or services mentioned. No endorsement of products or companies is intended, nor is criticism of unnamed products or companies implied.
© 2016
Call 800.287.0274 (in Maine), or 207.581.3188, for information on publications and program offerings from University of Maine Cooperative Extension, or visit extension.umaine.edu.

