Bulletin #7040, Getting Geared Up for Maple Sugaring: Supplies and Equipment Needed for 50 to 500 Taps

By Jason Lilley, Assistant Extension Professor, Sustainable Agriculture and Maple Industry Educator, University of Maine Cooperative Extension
For information about UMaine Extension programs and resources, visit extension.umaine.edu.
Find more of our publications and books at extension.umaine.edu/publications/.
Table of Contents
- Tree Identification
- Tapping
- Sap Collection Options
- Sap Storage
- Reverse Osmosis
- Boiling Options
- Fuel Source
- Defoamer
- Determining When Done
- Filtering
- Grading
- Canning
- Labeling
- License
- Additional Resources
When considering starting or scaling up to a commercial-scale maple sugaring operation, planning for the needed equipment for efficiency, quality, and profitability is an important first step. This factsheet will list the key supplies and equipment needed for an operation of between 50 and 500 taps and will make distinctions between bare minimum supplies, and supplies that will increase your efficiency of production and the quality of your finished product. When sizing your systems, consider not only your current scale but where you plan to be three to five years down the road. The majority of the following listed materials can be sourced from regional maple equipment suppliers, with some supplies available at local hardware and feed stores throughout the state. A reliable and experienced equipment dealer will be able to assist you with system design and setup, get you needed supplies in a pinch during sugaring season, and help with troubleshooting.
Tree Identification
If you are just getting started with maple production and are unfamiliar with which trees to tap, a good tree identification book will be helpful. While any type of maple tree can be tapped, sugar maples produce sap with the highest sugar content, followed by red and Norway maples.
- Forest Trees of Maine, published by the Maine Forest Service, is an excellent resource available both in print and on-line.
- Surveyors’ tape or other marking materials can be used to identify trees for tapping while the foliage is on, which is the easiest time to identify species.
- Fabric diameter measuring tape or another method to measure the diameter at breast height (DBH). Trees should be at least 10” dbh to tap, over 18” dbh before getting two taps, and over 25 dbh for three. Never install more than three taps per tree.
Tapping
- Spouts: Current guidelines recommend taphole sizes of 5/16”. While you may find 7/16” spouts for sale they cause more damage to the trees than the newer 5/16” spouts. You may also find 3/16″ spouts and systems for sale. Research has demonstrated that these systems can result in reduced yields after a few years of use, so we recommend the 5/16″ spouts for most producers. Choose spouts made of food-grade plastic or stainless steel. Old tin spouts may contain significant amounts of lead and should be avoided. Spouts are specific to bucket systems, or tubing systems so be sure to identify how many of each you plan to use.
- Drill bit: Once you choose the size spout that you will use, choose a drill bit that matches that size. Drill bits produced specifically for maple production are designed to pull out more shavings from the tap hole. Consider buying a maple specific 5/16” drill bit.
- Drill: Battery-powered drill and extra batteries.
- Mallet for setting taps: Rubber mallets work well for setting taps. The rubber helps get the tap set without overdriving. Overdriving taps can split the tree, increasing damage to the tree and causing sap loss. Hammers can also be used for setting taps if used carefully.
Sap Collection Options
2-Gallon Sap Bucket Systems:
- Spouts with hanger hooks: If you choose to use the traditional 2-gallon sap buckets, be sure to buy spouts that include a hook on them to hang the bucket from.
- Buckets: Buckets should be made of food-grade plastic or aluminum. Galvanized buckets may contain lead, which will leach into the sap. Avoid non-food grade containers such as box store buckets, kitty litter containers, etc. Also avoid containers that had other types of food in them, which will impart an off-flavor to your syrup.
- If you have galvanized buckets, you may be able to find sap bucket liners, a food-grade plastic bag that is inserted into the bucket to prevent the sap from contacting the galvanized metal.
- Lids: Install lids that are made for the buckets you’re using. This keeps rainfall, insects, and debris out of the sap. Find a system that is easily removed and re-installed to enable efficient sap collection.

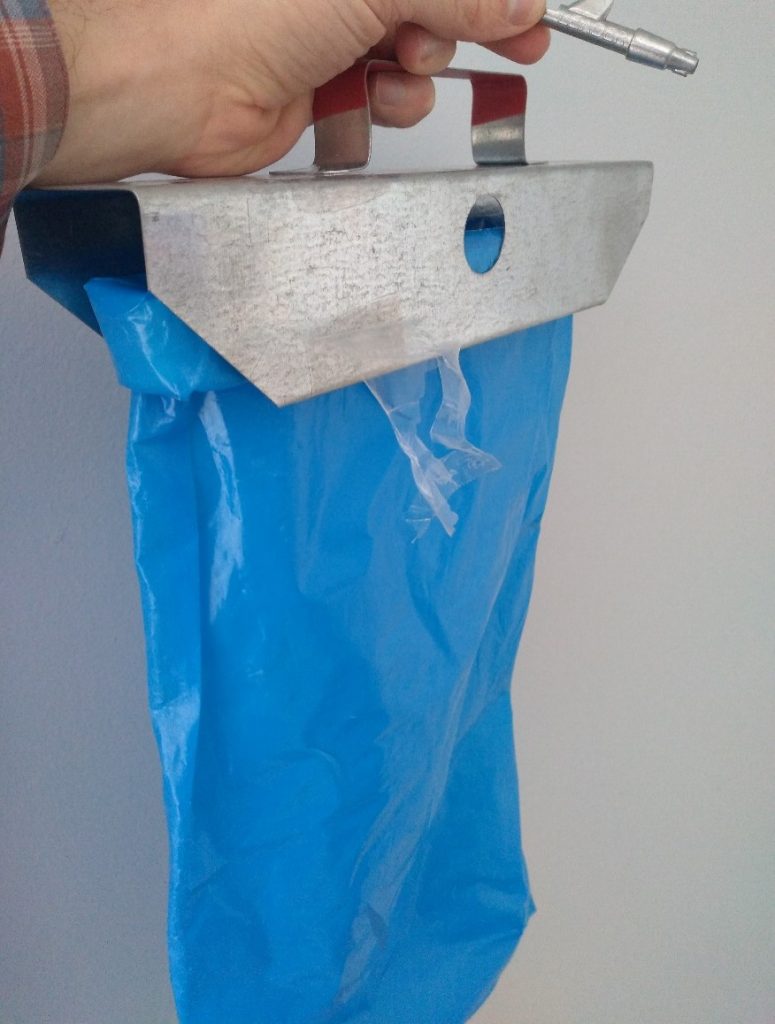
Bag Systems:
- Bag sap collection systems are relatively new. They consist of a metal bracket that hangs on a specialized spout. A food-grade plastic bag is hung from the bracket and can be easily slid in and out of the bracket for sap collection. If using this system be sure that your spouts work with the bracket.
5-Gallon Food Grade Bucket and Tubing System:
A system that works well for trees with more than 1 (but never more than 3) taps is to place a 5-gallon food-grade bucket at the base of a large tree. Be sure to securely support the bucket. Snow melts on sap run days and can result in buckets tipping over if not supported.
- Use spouts that are designed for tubing systems.
- Maple, food-grade 5/16” inside diameter tubing.
- 5-gallon food-grade bucket with holes drilled toward the top, on the sides of the buckets. Drilling holes in the lid would allow rainwater and snow to melt in with the sap.
Tubing Systems:
When scaling up your operation tubing systems save significant time spent collecting sap. Tubing can also prevent tapholes from plugging and healing over too quickly, increasing sap yields over bucket systems. The following is one example of a maple tubing system equipment list. Refer to the North American Maple Syrup Producers Manual (3rd edition) or the New York State Maple Tubing and Vacuum System Notebook, for a more detailed overview of setting up a tubing system.
- Lateral Line Maple Tubing: For groups of 10 to 15 taps a 5/16” inside diameter maple tubing (food grade) is used. 3/16” systems are available, however, there is concern about the long-term productivity of those small diameter systems.
- Mainline Tubing: If collecting sap from more than 10 to 15 taps, the lateral lines need to be tied into a mainline. These lines are ¾” in diameter or more, depending on how many taps are connected to the system.
- Mainline saddle fittings: Used for tying the lateral lines into the mainlines. A mainline punch will be needed to drill holes in the mainline prior to installing the saddle fitting.
- High tensile wire, a wire ratchet, a wire ratchet tightener, wire ties, and a wire tie tool are used to suspend the mainline. Keeping mainlines and laterals tight and with a slight downward slope is key to the success of the systems.
- Clinometer: Measures the slope of your proposed tubing system. Depending on the size and number of taps per section, aim for a 5% slope or greater for the mainline, and at least a 2% slope on very tight lateral lines. These grades are very important for gravity systems and can be slightly reduced for vacuum systems.
- Spouts: Spouts for tubing systems have barbed outlets for connecting the tubing. Check valve spouts have been shown to increase late-season yields over their lifetime compared to traditional open spouts.
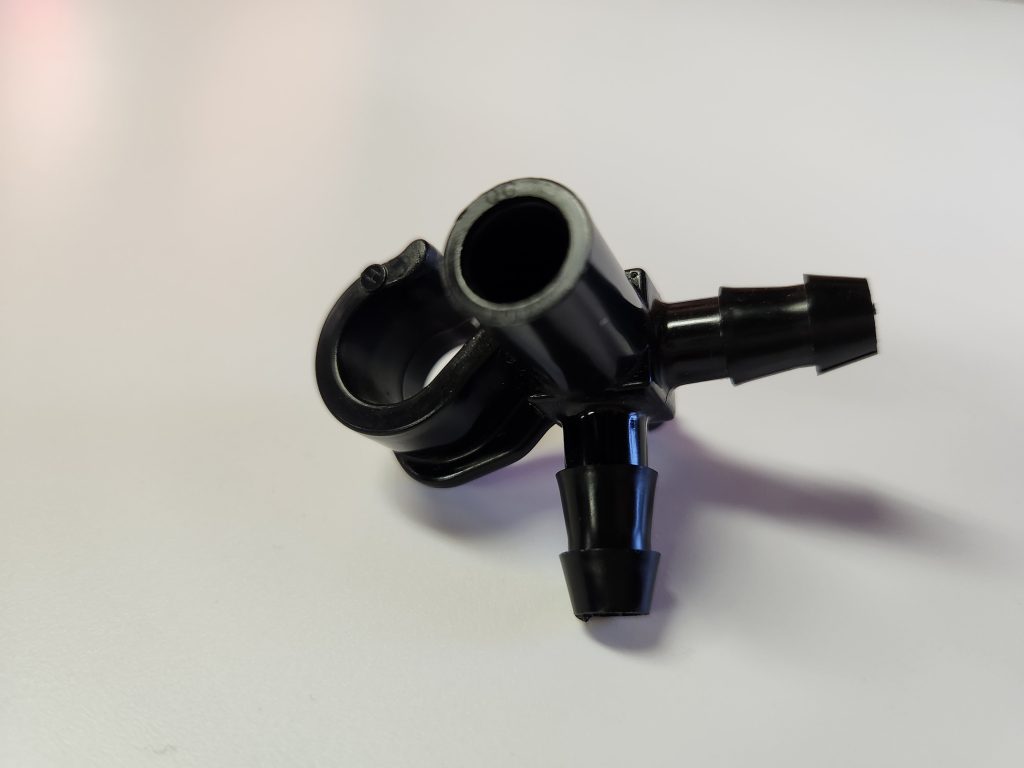
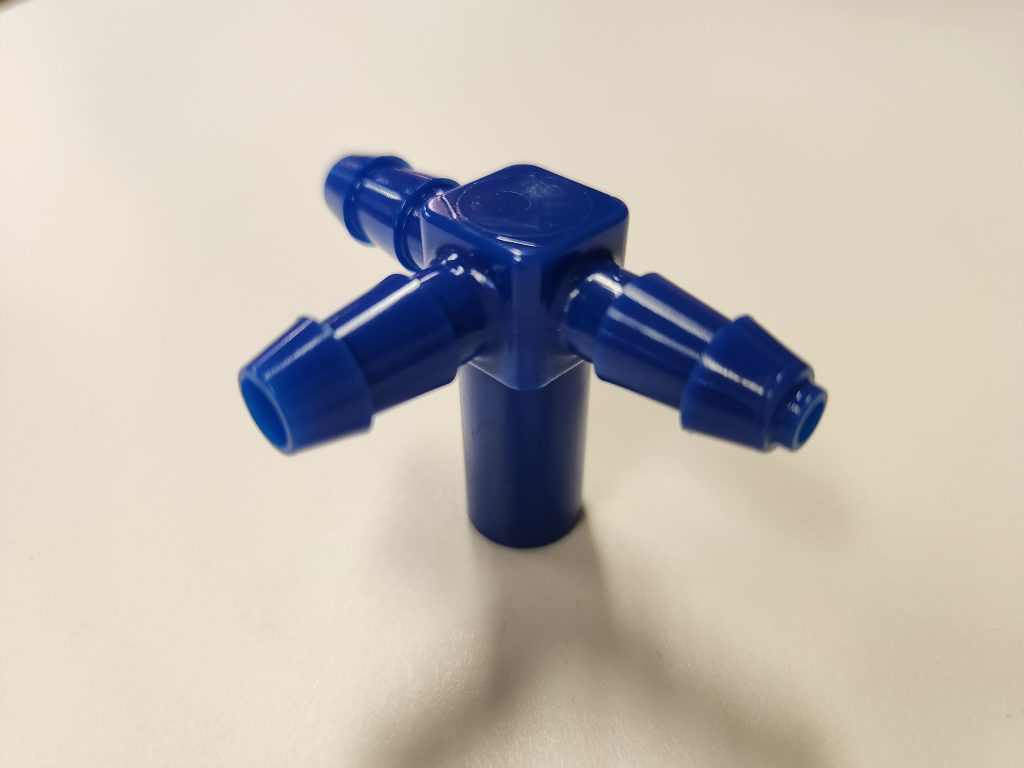
- T-Fittings: 5/16” t-fittings are installed in the lateral lines at each tappable tree to connect the drop line and spout from the tapped tree to the lateral collection line.
- End-of-line hook fittings: These work to anchor the line, holding it in place at the top and of the lateral line run by hooking the line onto itself after wrapping around an anchor tree.
- End line t-fittings: are used next to the hook fitting to only allow sap from the anchor tree to run down the line (not behind the tree).
- Tubing tool: A 5/16” Maple Tubing Assembly Tool will enable you to put adequate tension on the line while installing fittings, and aid in the installation of fittings. Small systems could be installed with a thermos of hot water instead of this tool; however, the process will be significantly easier and result in a much tighter system with the tool.
- Collection vessel: To avoid sap overflow and loss, account for 1 to 2 gallons of sap per tap per day. A covered 55-gallon food-safe barrel works for some systems, while larger setups will need to tie several 55-gallon barrels together, or invest in larger food-grade stainless steel or polyethylene containers. Ensure that the barrel was not used for food products that could impart an off flavor in the sap.
- Food-safe pump: If collecting sap at a central location, away from your sugarhouse, plan to pump that sap onto a vehicle for transportation using a food-safe pump.
- Vacuum pump: Many producers are adding vacuum pumps to their tubing systems to increase sap yields. Contact the UMaine Extension Maple team or your maple equipment dealer to discuss considerations for incorporating a vacuum pump into your sap collection system.


Sap Storage
No matter the sap collection method, you will need to plan for storage between the time when the sap is collected, and when you are able to boil it. Ideally, the sap would be boiled the day it runs to prevent spoilage, however, that is not always practical.
- Use a storage vessel that is big enough to hold one to two gallons of sap per tap, per day of sap run.
- Example: If you plan to boil once per week, gamble on no more than three sap runs per week. (Ideally, you would boil more frequently than once per week).
- 3 days of sap x 1.5 gallons per tap, x 30 taps = 135 gallons of storage capacity needed.
- Example: If you plan to boil once per week, gamble on no more than three sap runs per week. (Ideally, you would boil more frequently than once per week).
- Storage vessels must be food-grade and not have been used to store other products that could impart an off-flavor to the sap.
- Consider investing in chilling tanks, such as those used in the dairy industry to keep the sap cool.
Reverse Osmosis
Reverse Osmosis (RO) units are being utilized by most commercial maple syrup producers. These units extract pure water from the sap prior to boiling. These units require special storage and regular cleaning; however, they significantly reduce the amount of fuel needed and time spent to produce finished syrup.
Boiling Options
Oil Tank Evaporator:
- A common first step to a designated evaporator is the converted 50-gallon metal drum or 275-oil tank. The barrel or tank acts as the firebox and is cut to allow for installing catering pans, or a sap pan for boiling. The sap should never come into contact with the barrel or tank.
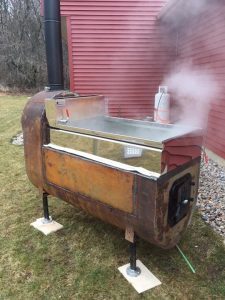
Designated Maple Evaporator:
- These designated maple evaporators are built for the efficiency of boiling maple sap. There are many optional add-ons for evaporators that can increase the evaporation rate and efficiency.
- Speak to a maple equipment dealer to appropriately size your evaporator to your expected sap yields, considering current yields and projected future expansion.
Fuel Source
- Wood-fired is an effective way to boil sap, particularly if you have access to cheap firewood. Oil, wood pellets, and even electric-heated evaporators are also available.
Defoamer
Defoamer is an important part of the boiling process. When boiling efficiently, the sap will frequently foam up and threaten to boil over. Having a designated defoamer on hand will break the surface tension and bring down the foam. Allowing the pan to boil over creates a big mess and loss of product and should be avoided.
- Popular defoamers include vegetable oil or designated synthetic defoamers from a maple supplier. Use as little defoamer as possible to be effective, in order to avoid creating off flavor and texture.
Determining When Done
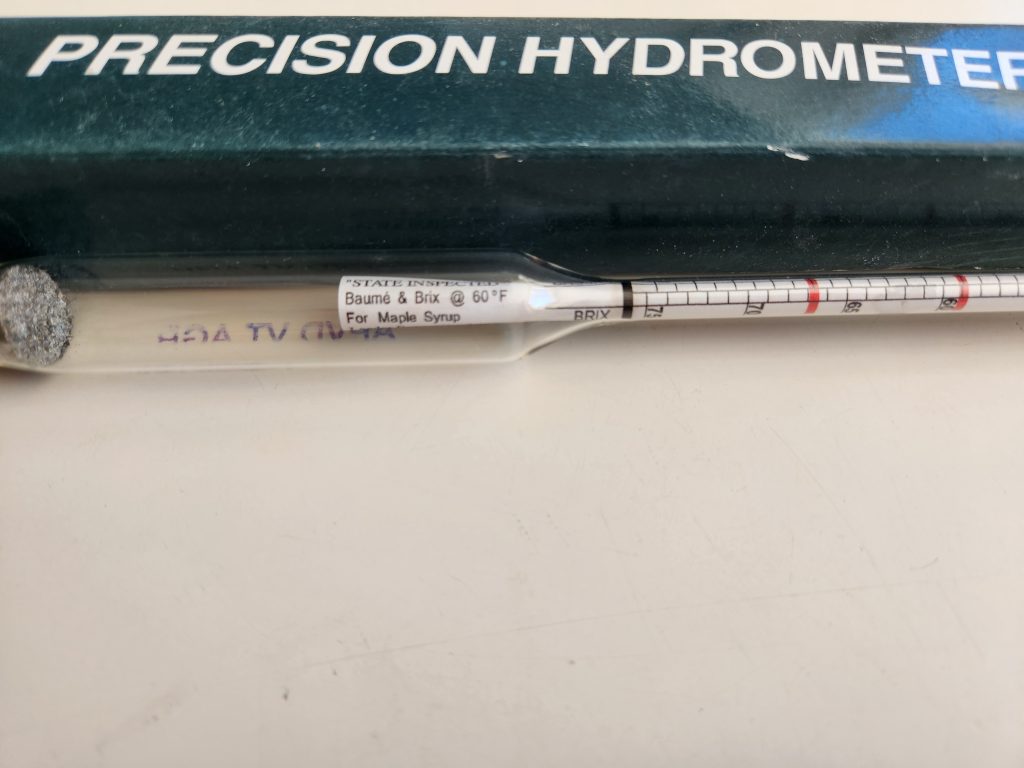
Knowing when you’re done boiling is an important part of creating a shelf-stable product without over-concentrating, resulting in the crystallization of sugars. Maine state regulations state that you must only sell syrup that is between 66- and 68.9-degrees Brix. Being accurate with that measurement is important.
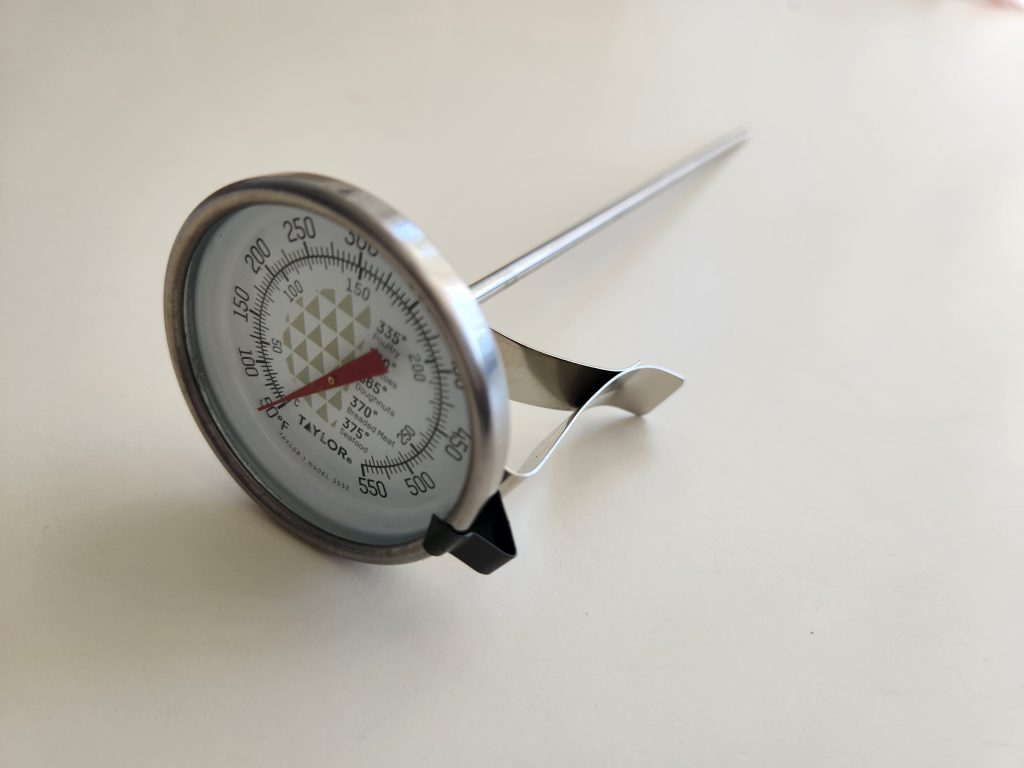
- Hydrometer and hydrometer cup: The hydrometer allows you to get an accurate reading of sugar concentration. Be sure to get a hydrometer that is specific to maple syrup. Hydrometers are temperature dependent, so be sure to also have a reliable thermometer on hand.
- Digital or handheld refractometer: Refractometers can also be used to measure syrup density, however, may not be suitable for hot syrup right off of the evaporator. Be sure to get a temperature-compensating refractometer. These tools are mostly for testing syrup that is at room temperature.
Filtering
The syrup should be filtered to remove sugars and other sediments from the syrup. This is also a required step by state regulations for the commercial sale of maple syrup.
- A cone filter and paper or synthetic pre-filter made for filtering syrup work well for filtering sediment from small batches of hot syrup. The pre-filter is easy to switch out, which increases the speed of filtering as the filters get dirty. While cone filters work effectively enough for marketing syrup, they do not result in a crystal-clear product like filter presses do.

Grading
- Color is the primary method for grading and labeling syrup, although density, clarity, and flavor are also important factors. To categorize batches of syrup into their color grade use one of the following tools.
- Vermont temporary maple color grading kits are affordable and effective for determining the color and grade of your syrup. Be sure to buy a new kit every year as the standard colors in the kit can fade.
- Digital light transmittance maple syrup grader: These graders reliably and quantitatively categorize syrup samples into color grades.
Canning
- Syrup canner: These units heat the syrup and have a spout for accurate, clean, and sometimes measured filling of containers.
- The syrup should be canned while still hot (180 to 195⁰F, not higher) to sterilize the containers.
- New maple-specific plastic, glass, or lined metal containers (food grade and heat tolerant) work well for canning syrup.
- Recycled jars and jugs can introduce contaminants, cause off-flavors, or increase the chance of mold growth.
Labeling
If you plan on selling your syrup, you will need to label your syrup.
- Labels must include:
- The name of the product
- Contents by volume
- Name and address (including zip code) of manufacturer or distributor
- The grade of the product
- To determine the grade, you will likely need a Vermont Temporary Maple Color Grading Kit. This will allow you to accurately determine the color, and therefore the grade of your syrup.
License
- If you plan to sell syrup, Maine-based producers will need to apply for a Maple Syrup Processing License from the state of Maine. Application forms for that license are also available from the Quality Assurance and Regulation branch of the Maine Department of Agriculture, Conservation, and Forestry. (207) 287-3841.
Summary
The basics you will need to produce syrup at an entry-level are:
- 5/16” Spouts
- 5/16” Drill bit
- Battery powered drill
- Rubber mallet
- Food-grade buckets with lids
- Food-grade storage vessel for storing sap between runs, and boiling
- Boiling pan with a wide surface area
- Outdoors boiling method
- Fuel source (wood, oil, propane)
- Long-stemmed candy thermometer
- Cone filter or cheesecloth
- New mason jars or maple jugs and lids
When investing in a maple sugaring operation, it is important to consider the scale that you plan to reach in 3-5 years. As you invest more in equipment, do so with a mind towards improving quality and efficiency.
Additional Resources
Bulletin #7036, How to Tap Maple Trees and Make Maple Syrup
Bulletin #7038, Maple Syrup Quality Control Manual
Bulletin #7039, Getting Geared Up for Maple Sugaring: Supplies and Equipment Needed for 1 to 50 Taps
Bulletin #7041, Licensing and Regulations for Maple Syrup Processing in Maine
University of Maine Cooperative Extension Backyard Sugaring Resources
How-to videos on How and When to Tap Maple Trees.
Information in this publication is provided purely for educational purposes. No responsibility is assumed for any problems associated with the use of products or services mentioned. No endorsement of products or companies is intended, nor is criticism of unnamed products or companies implied.
© 2023
Call 800.287.0274 (in Maine), or 207.581.3188, for information on publications and program offerings from University of Maine Cooperative Extension, or visit extension.umaine.edu.
In complying with the letter and spirit of applicable laws and pursuing its own goals of diversity, the University of Maine System does not discriminate on the grounds of race, color, religion, sex, sexual orientation, transgender status, gender, gender identity or expression, ethnicity, national origin, citizenship status, familial status, ancestry, age, disability physical or mental, genetic information, or veterans or military status in employment, education, and all other programs and activities. The University provides reasonable accommodations to qualified individuals with disabilities upon request. The following person has been designated to handle inquiries regarding non-discrimination policies: Director of Equal Opportunity, 101 Boudreau Hall, University of Maine, Orono, ME 04469-5754, 207.581.1226, TTY 711 (Maine Relay System).