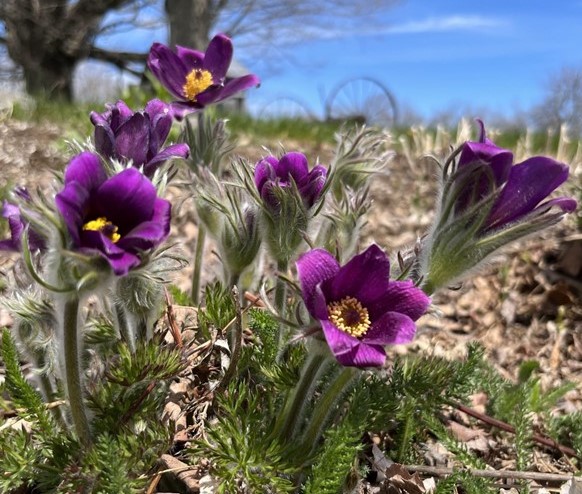
Maine Home Garden News April 2025
In This Issue:
- April Is the Month to . . .
- A How-To Guide for Creating Sustainable Staking in Your Garden
- Soil Erosion in the Home Landscape
- Backyard Bird of the Month: Brown Creeper
- Keystone Plants: Giants of the Pollinator-Friendly Garden
- Maine’s Community Garden Map
- Ask an Expert: Can Meadows and Orchards Mix?
- Maine Weather and Climate Overview
April Is the Month to . . .
By Jonathan Foster, Horticulturist, UMaine Cooperative Extension
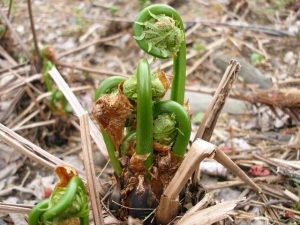
Photo by David Fuller.
Collect, consume fiddleheads.
Be on the lookout for our annual spring treat, the tender, coiled shoot of the Matteucia struthiopteris fern — learn how to identify the plant in Ostrich Fern Fiddleheads, Bulletin #2540. Once you’ve got a full bucket, and have explained to your puzzled, chilly relatives from away what they are about to enjoy for supper, get quick and easy instructions for cooking them up in Facts on Fiddleheads, Bulletin #4198.
Wind down the sap operation.
Make sure you complete your maple syrup tapping operations before the trees begin to bud out with new growth for the spring — the taste of the sap will deteriorate thereafter. Learn more about how to make sugary deliciousness in your own yard from How to Tap Maple Trees and Make Maple Syrup, Bulletin #7036.
Be patient digging your soil.
Working in your garden beds before the ground dries will damage the structure of your soil, giving you a heavy, leaden mess with few air pockets and greatly diminished capacity for root and soil microbe health. Remember that the ideal soil is 45-25% not even there! That is to say, we like to see about that much air space in any given sample, to provide proper aeration for the living community beneath our feet and plants. Take a look at the comparison in UFL Extension’s “Soil Compaction, Is It Good Or Bad?” To check your soil, take a good handful and squeeze it into a ball, then prod it gently or drop it to the ground — if it crumbles easily, you are ready to work, but if it is overly pliable or compresses, fight the temptation to dig. If you absolutely must get your hands dirty, this can be an excellent time to get a head start on early season weeds.
Wait to collect leaves and plant debris.
Many of our native bees and countless other insects rely on these materials for shelter through the fluctuating spring weather. It’s best to wait until nighttime temperatures consistently reach the 50s to give insects enough time to emerge. Other indicators, according to the Xerces Society, that signal it’s time to clean up include when it’s the right time to plant tomatoes in your area or when the grass begins to require regular mowing.
Sow seeds and plant cold-tolerant crops outside.
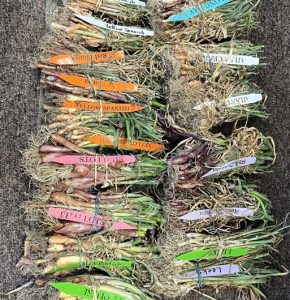
Once the soil has warmed and dried, it’s finally time to get out there to plant — beets, carrots, lettuce, peas, radishes, spinach, chard, spinach, onions, and turnips can be directly seeded and plants of some cold-tolerant crops such as onions, scallions, leeks and head lettuce can also go in. Always check a planting calendar (see here and here) before sowing or transplanting, to make sure you have the window correct for optimal chances of success.
Continue starting seeds indoors.
They will have to wait a bit before exploring the outside garden, but tomato, basil, cabbage, broccoli, kale, chard, bok choy, Brussels sprouts and flowers such as cosmos, zinnia and straw flower are all great opitons to start indoors this month.
Scout for invasive species.
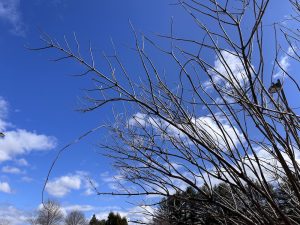
While you’re finishing up early spring pruning tasks, keep an eye out for plants that don’t seem to belong to your trees and shrubs. Look for stems of different colors or vining stems climbing on more upright plants. These could be invasive species introduced by birds and other wildlife. If you can’t identify a potential invasive species when it’s leafless, simply mark the area with flagging so you can revisit it later. Come summer, when the plant has more distinguishable characteristics, you’ll be able to assess whether it needs to be removed. Be sure to set a reminder to scout again in June. Or, you can trim it now just to be on the safe side.
Join us for our Perennials for the Resilient Maine Garden webinar on April 9th.
Stephanie Burnett will explore the vital role herbaceous perennials play in providing essential ecosystem services and their vulnerability to environmental changes, including shifts in temperature, rainfall, and snowfall. She will also share plant recommendations to help create more resilient gardens in Maine.
A How-To Guide for Creating Sustainable Staking in Your Garden
By Clarisa Diaz, seasonal gardener at McAlpin Farm, Mount Desert Land & Garden Preserve
With spring around the corner, the season is underway for garden preparations. One of many tasks is prepping pea brush for staking, as we do at the Land & Garden Preserve for the annual and perennial plants at the Abby Aldrich Rockefeller Garden, Thuya Garden, and more recently in the farm field at McAlpin Farm. Staking is important because it provides support for plants to grow upright in the gardens. Upright growth keeps blooms lifted. In other contexts such as a vegetable garden, staking helps with proper growth of stems for crops to ripen.
Pea brush is a method of staking using natural materials that is more environmentally friendly compared to other staking materials such as manufactured wood, metal, or plastic. Brush staking also provides an artistically sculpted aesthetic, cut neatly to stand up around plants in a garden.
The pea brush method originated in old English gardens to hold up vining pea plants, hence the name. Cuttings from any species of tree or shrub with dense branches can be used for pea brush staking. It is a popular technique in estate gardens in England.
At the Preserve, we gather young gray birch trees (Betula populifolia), one of the first fast-growing succession trees to grow in blueberry fields in this part of Maine. If left to grow, these trees can turn a cultivated field back into a forest. We harvest the trees after they have gone dormant in early winter, late November or early December for us. We have been lucky to work with the same homeowner for many years who allows a large team of staff to harvest trees from their blueberry field each year, a kind of symbiotic relationship in which we both benefit.
We recommend using brush from locations where you’re already doing thinning or pruning. In your home garden, you can use branches from trees found on your property. Apple branches from your spring pruning work great. Any deciduous tree branch is lovely, even if they have less side branching. Enjoy getting creative in your garden!
At the Abby Aldrich Rockefeller Garden, most of the brush is installed so that as the plant it supports grows, it is hidden and not apparent to visitors. This is very precise and intentional for the clean blooming aesthetics of the garden, but you can decide how much precision you want in your garden. For the home gardener needing a quick fix for a plant that is falling over, finding a fallen branch to use as a rough stake will do.
At Thuya Garden, brush is cut in a similar ornamental way as at the Abby Garden but with more utility to serve the needs of plants as they grow. Brush at Thuya is more visible than at the Abby Garden as it is added to prop up leaning plant stems after they are fully grown. Letting the brush be more visible aligns with the natural rustic aesthetic of the garden and surrounding woodlands.
At McAlpin Farm, since the plants are not publicly facing, the pea brush is purely utilitarian and clearly visible in a more traditional sense, as it would be in most home gardens.
Below is a how-to for the home gardener wanting to use a more sustainable staking technique in their garden. Find a new purpose for that branch yard waste by following this visual guide as we cut a piece of pea brush.
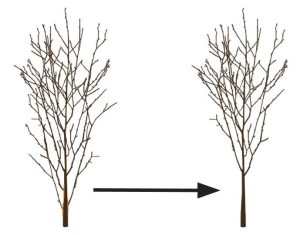
Step 1: Selecting the pea brush
Branches the size of one to six feet can be used to cut brush. To cut a piece of brush, locate the portion of the tree that has thickest branching and a solid stem
branch that will not bend when the plant leans on it. Note: If you can bend the pea brush you have cut, the plant will bend it when saturated with heavy rain.
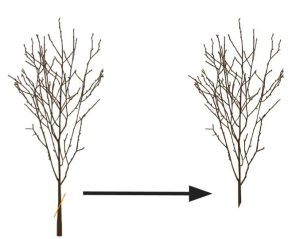
Step 2: Making the angled cut
At least two to four inches of your pea brush branch will need to be stuck into the soil. To make this easier to do, an angled cut is ideal. You may also need to clean up the bottom of the branch by cutting off branches that will be in the way when sticking the branch several inches into the ground.
Step 3: Determining the height
How do you pick the right height brush for your plants? Optimally, pea brush will be two-thirds the height of a plant when it is fully grown. At the Preserve we use brush as short as one foot tall and as high as six feet tall depending on
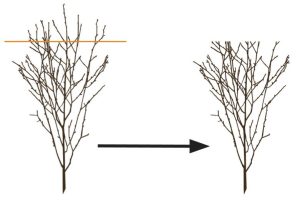
the plant height.
Measure from your angled cut at the base to your desired height to see where to make your final cut along the top of the branches. Preserve gardeners attach wooden measuring sticks to a movable base so they can hold up the branch with one hand in line with the measurement stick as they make their cuts.
Bundle all those branches together in your hand just below the desired height. Use pruners to make a straight cut above your hand. When you let go, you will have a uniform piece of pea brush with an angled cut at the base, and dense branching at the top.
A common mistake is to cut away additional branches below the desired height. Removing more branches will result in a less effective brush. The perfect pea brush branch is very dense; all those side branches will work harder to hold up the plant.
Tall heavy perennial plants like sunflowers (Helianthus sp.), kamchatka meadowsweet (Filipendula kamtschatica), and garden phlox (Phlox paniculata) at the Abby Garden require cutting four- to six-foot tall brush (with ~1 foot pushed into the soil) to hold up a five- to seven-foot tall perennial in full flower. A taller piece of pea
brush from a small tree will naturally have a thicker diameter which is what you want to give stronger support.
For shorter plants like snapdragons (Antirrhinum majus), mayweed (Matricaria sp.), bush violet (Browallia sp.), and petunias (Petunia hybrids), a smaller size of brush
is appropriate because they do not need as much support. The branch circumference should be no smaller than the circumference of a pencil. Remember if you can bend it, so can the plant!
Step 4: Installing the brush
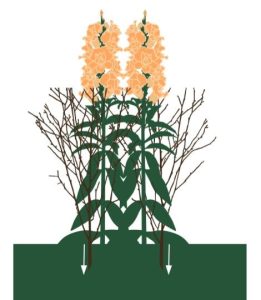

Thuya/McAlpin Style: Propping leaning stems
We like to install the brush as the plant is growing, so at maturity the plant grows around and through the brush helping to hide it. Our goal is to provide support around each plant in the plant clump that is being brushed. For example, in a snapdragon clump with 10 plants, each of the inner plants will have brush on four sides.
Plan to install the pea brush at least two inches to two feet away from the stem of your plant, depending on the plant height and how much support they need to stand upright. For shorter plants use the two-inch rule of thumb, for mature taller plants that have stems two to three feet high, install your pea brush one to two feet from the base of the plant.
It can be tricky to install taller brush deep enough in the soil but be sure at least four to six inches or more of your brush is in the soil. You may need to carefully tap it in with a mallet. With a shorter piece of pea brush you should be able to push it into the soil by hand. Grab the base of the brush and push down. If you have trouble, the soil may be compacted.
You can give your freshly installed pea brush a light test to see if it will hold up. Gently push on one side and see if it moves. If it moves easily, you should sink it into the soil a bit more.
In preparation for the spring, you can cut brush through the winter. This is a great opportunity to be outside on a sunny winter day as you wait for spring seedlings in anticipation of planting. We like to organize the different brush heights into different piles or bins. When planting season arrives, your staking brush will be ready to go.
By sharing our expertise at the Preserve, we hope you will be inspired to try these materials and techniques in your own garden. Happy pea brush cutting!
Soil Erosion in the Home Landscape
By Jonathan Foster, Horticulturist, UMaine Cooperative Extension
“The storm took place at sundown, it lasted through the night,
When we looked out next morning, we saw a terrible sight.
We saw outside our window where wheat fields they had grown
Was now a rippling ocean of dust the wind had blown. “
Woody Guthrie, “The Great Dust Storm”
We are fortunate, here in Maine in 2025, not to be dealing with erosion on the scale of the American Dust Bowl, but without good growing practices, it remains a risk to garden protection, homeowner budget, and nearby ecological integrity. According to the National Resources Defense Council, the impact of soil erosion on US agriculture/horticulture costs roughly $12 billion dollars per year, and these impacts ”result in the loss of food crops, negatively impact community resiliency and livelihoods, and even alter ecosystems by reducing biodiversity above, within, and below the topsoil.” And it’s not a quick fix without bringing in amendments–Columbia University’s Climate School estimates the rate of new topsoil creation and accumulation at several hundred years and more per inch to naturally occur through the processes of weathering (the breakdown of minerals in the soil), deposition (the arrival of new particles by wind or water), and biodegradation (animal and plant life transitioning to organic matter).
Even at the level of home horticulture, soil erosion can cause degradation and loss of lawn and garden soil, damage to landscaping, destruction of structural features like streambanks and retaining walls, smothering of delicate surface ecosystems, and waterway blockage from silt deposition. Our 2023-24 growing seasons prompted countless erosion questions to the Cooperative Extension in the wake of strong winter and spring storms that uprooted trees and demolished the webwork of root systems that bind our topsoil together. Fortunately, planting vigorous plants and practicing good soil management (two of our favorite activities at the Cooperative Extension) offer excellent protection against soil erosion!
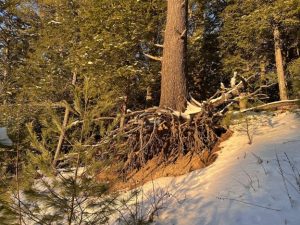
In general, you’re seeking three things to mitigate and/or prevent problems:
1) High quality soil, with the right amount of organic matter and good texture (which helps plants root better and provides a resilient, cohesive structure to the growing medium). A soil test through the UMaine Analytical Soil Lab can tell you how much organic matter you currently have, and unless you are above optimum already, we broadly advise a scant inch or so of compost or well-composted manure added each season to cultivated soil. You can pick up a test kit in any Cooperative Extension office or ask the lab to mail you one. Also, don’t overwork your soil, which tends to break up aggregates and collapse spaces that are useful for holding air and water. Loosening a garden bed with a fork each spring is usually sufficient for the season’s planting. As we sometimes say, no recreational roto-tilling! For forested and other natural areas, leaving leaf fall, duff, and detritus where they fall is a no-effort method of improving the soil over time, inhibiting overground runoff, and providing natural mulch (see next).
2) Canopy cover and/or mulching to prevent rainfall from directly striking bare soil (especially on a slope). Planting trees, shrubs, and groundcovers (like turfgrass for a lawn) will provide a layer of foliage for deflecting varying amounts of rain from direct hits on the soil, as well as protection from eroding winds. Evergreen shrubs or trees in particular on the upwind side of a site can also help create a nice windbreak. For the garden beds, a nice thick layer of mulch will perform this function nicely, as well as maintain the texture of the soil below.
3) A sturdy plant root system to bind the soil in place with a strong, flexible “skeleton” of sorts. One of the primary reasons plants need soil is for anchorage, and in turn they hold together the soil within their rootballs, where countless root hairs pervade the ground around each plant. Typically, a horizontally spreading network of fibrous roots works better than plants with deep taproots, but a mix of both is also a great strategy. If you’re interested in the details of how erosion occurs and how various root structures interact with it, you can spend a rainy afternoon consulting the Oklahoma State University resources for Using Vegetation for Erosion Control. A slightly more lay-friendly resource from University of Delaware Extension discusses the phenomenon, as well as suggesting other mitigation strategies for controlling erosion.
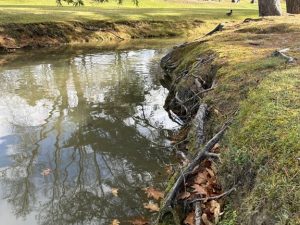
For more active runoff, consider constructing your own berms to slow the flow of surface water and allow it more time to seep into the soil. If you have downed branches or trees, broken masonry, unearthed rocks from your garden, etc., these can all be incorporated into these raised barriers (as my colleague UMaine Horticulturist Lynn Holland points out, the process is similar to hügelkultur). Planting the top of the berm with erosion control plants binds it together and locks it into place. Also pay attention to downspouts from the gutter, which can create rivers during precipitation. You can place flat stones to break up the waterfall, utilize a rain barrel to collect the runoff, or create a rain garden (numerous suggestions for these tactics can be found on this Univ of AR Cooperative Extension page on the subject).
So, with these basic principles in mind, how do you know which plants are the best to plant? The details will depend on your site conditions, but any planting is better than no planting — bare ground is always at most risk of erosion under heavy or constant rainfall. Broadly speaking, grasses, sedges, ferns, and creeping groundcovers (lists of each of these can be found in the resources below) are excellent choices for broad, fibrous root-based stabilization, with shrubs and trees planted throughout helping to break up incoming rainfall and create periodic, bigger “anchors” with their deeper root systems. Mulch and soil texture are your best lines of defense for the soil anywhere none of the above are feasible (e.g., in a vegetable garden). Native plants are always preferable, and you should consult the Maine Do Not Sell list to make sure none of the additions you’re considering is invasive.
The Maine DEP Buffer Handbook Plant List, developed in conjunction with the UMaine Cooperative Extension, has a wealth of information on sturdy, low maintenance, mostly native species for planting in buffer zones (including slopes and embankments). I also recommend the Coastal Planning Guide from the Cumberland County Soil and Water Conservation District for plant suggestions in erosion-prone areas, particularly along the water. Also consider reaching out to your local Maine Soil and Water Conservation District for additional resources or advice on how to stabilize any erosion already underway, or contact a local landscaper if you think you may need something more substantial for architecture (e.g., a retaining wall).
Backyard Bird of the Month: Brown Creeper
By Maine Audubon Staff Naturalist Doug Hitchcox
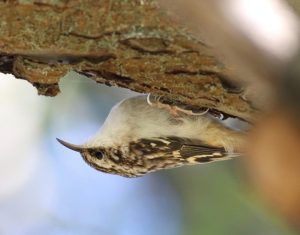
The Brown Creeper is a small, unique bird, which can be found all over Maine but is often under-detected because of its remarkable plumage. Coming in at just over five inches long, these little brown birds sport a splotchy brown back complete with slender streaks making them completely camouflaged against brindled bark. They use their long tails to brace themselves against trees, much like a woodpecker, but have a diagnostic behavior of only climbing up trunks as they forage. They are looking under the bark for invertebrates to feed on, and then they fly to the base of the next tree and begin their ascent. April is the best time to look for these birds because they are already claiming breeding territory and looking for mates, so they are very vocal. Their song is a melodic series of five phrases, mostly as single notes: a high note, a few descending notes in very quick succession, a high note again, then two notes each dropping in pitch. Many birders mistake this for a warbler’s song because of its tone and structure, but now is a good time to learn it since most warblers are still a few weeks away from migrating back to Maine.
Keystone Plants: Giants of the Pollinator-Friendly Garden
By Nancy Donovan, Ph.D., PT; Master Gardener Volunteer
I first learned about the term Keystone Plants from the book titled Nature’s Best Hope by the entomologist Dr. Douglas W. Tallamy. He attributes his adaptation of the concept with respect to plants based upon the work by Robert Paine, who studied the interactions between predators and prey in tidal pools. Paine found that the presence of specific keystone species correlated with both the abundance and diversity of species present within an ecosystem. In his book, Tallamy summarized Paine’s research by writing, “He likened such species to keystones, because, like the center stone in an ancient Roman arch supports the other stones that make up the arch, keystone species support other species in their ecosystem and help them coexist. Remove the keystone and the arch, or ecosystem, falls down.”
One of Dr. Tallamy’s students, Desiree Narrango, completed research that showed that the absence of keystone plants resulted in a 70 to 75% decline in caterpillar species even if the landscape contained 95% of plants that were determined to be native to the area. This is relevant because in Dr. Tallamy’s book he noted that the researcher, Richard Brewer, documented that, “…chickadee parents delivered 6,000 to 9,000 caterpillars to bring one nest of tiny (three-ounce) birds to fledgling.”
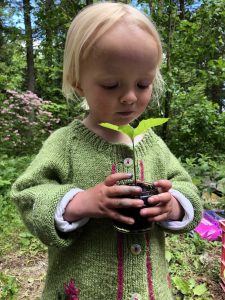
In an article titled “Keystone Plants by Ecoregion” posted on the website for the National Wildlife Federation, it is written that, “Remove keystone plants and the diversity and abundance of many essential insect species, which 96% of terrestrial birds rely on for food sources, will be diminished.”
An easy conclusion from the research is that gardeners should include
keystone plants that will attract insects in order to support the birds and bats that require them for survival. To offer some guidance, Dr. Tallamy wrote that, “Throughout most of the United States, native oaks, cherries, willows, birches, cottonwoods, and elms are the top woody producers, while goldenrods, asters, and sunflowers lead the herbaceous pack.” He continued with a recommendation that people should visit the National Wildlife Federation’s Native Plant Finder website which allows people to insert a zip code in the search box and a list of native keystone plants will be generated.
As a member of the committee that certifies pollinator-friendly gardens for the University of Maine Cooperative Extension, I want to emphasize that it is very important that native plants must be provided from early spring to late fall so that pollen and nectar sources are available for insects and other animals. Links to various lists of native plants for every season can be found on our Pollinator-Friendly Gardening website.
Maine’s Community Garden Map
By Carrick Gambell, Urban Agriculture Professional, UMaine Cooperative Extension and Natural Resources Conservation Service
Early spring is a time of barely contained anticipation. The days are longer, the sun feels warmer, and perennials poke up from the soil. We’re starting seeds, sharpening tools, and visiting local plant sales. Many Mainers are also searching for a place to garden. A UMaine Extension team has put together a new interactive tool to discover community gardens, and we’re excited to share it with aspiring growers.
First, a brief history of community gardening in the United States. Since the 1890s, gardeners have collectively cultivated in response to wars, economic recession, environmental injustice, and urban blight. During the first and second world wars, when labor and machinery shortages impacted food production from traditional farms, Americans planted millions of acres of “Victory Gardens” in their towns and cities. Around 20 million people planted Victory Gardens during World War II, growing an estimated 40 percent of the country’s produce (1). During the Covid Pandemic our country experienced a resurgence in gardening. Seed companies and garden supply stores sold out of stock as gardeners sought to feed their neighbors and insulate themselves from the instability of global supply chains.
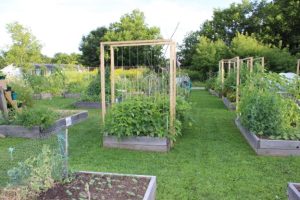
Community gardens dot our state, from Caribou to Milbridge to Kennebunk. Some have operated for decades, such as the Valley Street Community Garden in Portland. Others are just getting started, like the Berwick Community Garden. Each garden is unique, but they all function to increase food access, build social connection, and beautify communities. The Community Garden Map is a tool developed by Extension staff to raise awareness of public community garden opportunities. We launched this resource last summer, and as new gardens add their information every month, we hope to connect even more Mainers with healthy and safe spaces to grow food. If you don’t see information about your own community garden, let us know! Our goal is to make this map a comprehensive resource for the entire state.
In some communities, the demand for garden space far exceeds the supply. There is a waitlist of 500 for the Portland Community Gardens. Many gardeners wait two to four years for a spot. In your own community, there may be an unmet desire for growing space. If you’re interested in starting a community garden, Extension has several helpful resources, including Steps to Organizing Your Community Garden, and Planning and Managing a Giving Garden.
Starting or taking part in a community garden may feel like a small step, but it can be an important part of strengthening neighborly bonds and developing local resilience. Help us share the Community Garden Map and connect growers with gardens in 2025.
- “Gardening for the Common Good.” Smithsonian Libraries.
Ask an Expert: Can Meadows and Orchards Mix?
“Hello! I (think) I have decided I want the area where my orchard will be to also be a meadow. I am having trouble finding any information about this. I’m not sure if I should meadow and then plant fruit trees, or plant fruit trees and then the meadow, or if there should be time in between, etc., etc., etc. Are there any tips or resources you could share with me?”
How nice to be planning two great additions to your home garden and landscape—and I think the pairing of the fruit trees with wildflowers is a smart idea to bring plenty of pollinators into the project.
That said, there are a few concerns I would have with actually intermixing the two:
1) Competition. Grasses, wildflowers, weeds, and small shrubs from the meadow planting will compete with the (somewhat resource needy) fruit trees for soil nutrients and, especially, water.
2) Site preference. Wildflower meadows tend to do well in low-fertility soil, while fruit trees like lots of organic matter and sometimes supplemental fertilizer (producing a crop of fruits is very resource expensive).
3) Logistics. This one depends on how big the orchard will actually be and if you’ll be working it heavily or just having some nice trees to pull fruit off of sometimes. If the former, at the very least you’d want clear pathways for easy access to the trees for gear and irrigation. A thriving meadow can be a challenge to regular movement through the area.
Obviously, these aren’t hard and fast problems. You could easily plant the meadow alongside the fruit trees but in a separate space. Or you could intermingle them to some extent, but make sure there is plenty of breathing room for the trees. It depends on your plans and the details of the site, but these are the sorts of considerations I’d encourage you to think about while planning where everything will be planted.
As far as the timing goes, based on my above comments, I wouldn’t recommend getting a meadow well established and then planting fruit saplings in it—the young trees would be at a notable competitive disadvantage in that situation. It would be less problematic to establish the trees first, but then you might be waiting quite some time to plant the meadow. However, if you’re planning on some physical separation and the trees will have their own growing space, the timing is less important. Spring is a great time to launch both meadows and new tree plantings.
Here are a few resources that can help you through the next stage of planning, as well:
- Univ of NH Cooperative Extension “Planting for Pollinators: Establishing a Wildflower Meadow from Seed”
- Northeast IPM Center Webinar “Planting for Wildflower Habitat”
- UMaine Cooperative Extension “Plants for the Maine Landscape” native plants home page
- UMaine Cooperative Extension “Growing Tree Fruits in Maine” home page (numerous links to great information)
- Univ of MD Cooperative Extension “Starting a Home Fruit Garden”
Happy gardening
Maine Weather and Climate Overview
By Sean Birkel, Assistant Extension Professor, Maine State Climatologist, Climate Change Institute, Cooperative Extension University of Maine.
March 2025 began with a cold snap and single-digit morning temperatures, but a warm weather pattern began around the 5th bringing above-normal temperatures statewide for most of the month. Daily station observations from Bangor, Caribou, and Portland through the 27th show March 2025 ranking in the top 1/3 warmest with normal to above-normal precipitation. It seems the weather folklore for March, “in like a lion, out like a lamb,” has been reversed this year: as of this writing on the 28th, the forecast shows two waves of wintry weather over the weekend with snow, sleet, freezing rain, and rain! However, this precipitation will contribute to an overall improvement of hydrologic conditions, where areas of moderate drought and abnormal dryness registered on the U.S. Drought Monitor have diminished since January, and much of the state is now seeing normal to above-normal streamflows and normal groundwater levels. The southwest and Midcoast counties continue to have precipitation deficits and signs of moderate drought. See more information on the Northeast Drought Early Warning System Dashboard.
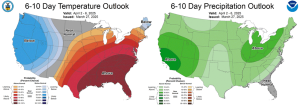
The latest 10-day weather forecast shows a cold wave moving in behind the weekend storm, bringing below-normal temperatures for April Fool’s Day and the 2nd. But then seasonable temperatures return. The probabilistic climate outlook for April (see table below) calls for above normal temperature and equal chance of above or below normal precipitation. The April–June seasonal outlook predicts above normal temperature and equal chances of above or below normal precipitation. As always, visit weather.gov for the latest weather forecast for your area. For questions about climate and weather, please contact the Maine Climate Office.
| Product | Temperature | Precipitation |
|---|---|---|
| Days 6-10: March 2-6 (issued March 27) | Below Normal | Above Normal |
| Weeks 8-14: March 4–10 (issued March 27) | Near Normal | Above Normal |
| Monthly, February (issued Feb 20) | Above Normal | Equal Chances |
| Seasonal: Feb–Mar–Apr (issued Feb 20) | Above Normal | Equal Chances |
Do you appreciate the work we are doing?
Consider making a contribution to the Maine Master Gardener Development Fund. Your dollars will support and expand Master Gardener Volunteer community outreach across Maine.
Your feedback is important to us!
We appreciate your feedback and ideas for future Maine Home Garden News topics. We look forward to sharing new information and inspiration in future issues.
Subscribe to Maine Home Garden News
Let us know if you would like to be notified when new issues are posted. To receive e-mail notifications, click on the Subscribe button below.
University of Maine Cooperative Extension’s Maine Home Garden News is designed to equip home gardeners with practical, timely information.
For more information or questions, contact Kate Garland at katherine.garland@maine.edu or 1.800.287.1485 (in Maine).
Visit our Archives to see past issues.
Maine Home Garden News was created in response to a continued increase in requests for information on gardening and includes timely and seasonal tips, as well as research-based articles on all aspects of gardening. Articles are written by UMaine Extension specialists, educators, and horticulture professionals, as well as Master Gardener Volunteers from around Maine. The following staff and volunteer team take great care editing content, designing the web and email platforms, maintaining email lists, and getting hard copies mailed to those who don’t have access to the internet: Abby Zelz*, Annika Schmidt*, Barbara Harrity*, Kate Garland, Mary Michaud, Michelle Snowden, Naomi Jacobs*, Phoebe Call*, and Wendy Robertson.
*Master Gardener Volunteers
Information in this publication is provided purely for educational purposes. No responsibility is assumed for any problems associated with the use of products or services mentioned. No endorsement of products or companies is intended, nor is criticism of unnamed products or companies implied.
© 2023
Call 800.287.0274 (in Maine), or 207.581.3188, for information on publications and program offerings from University of Maine Cooperative Extension, or visit extension.umaine.edu.
