How to create a simple interactive form using the Forms feature
Start by creating a new form
1. Go to Forms/New Form in the left-hand WordPress menu to create a form.
2. In the Create a New Form dialog box, type in the Form Title in the space provided. OPTIONAL: Add a description of the form (its purpose, intended audience, submission deadline, etc., whatever you think may be useful to the user). Click Create Form.
3. An editing window will appear with 5 steps to get you started. Read and follow these steps to create your form.
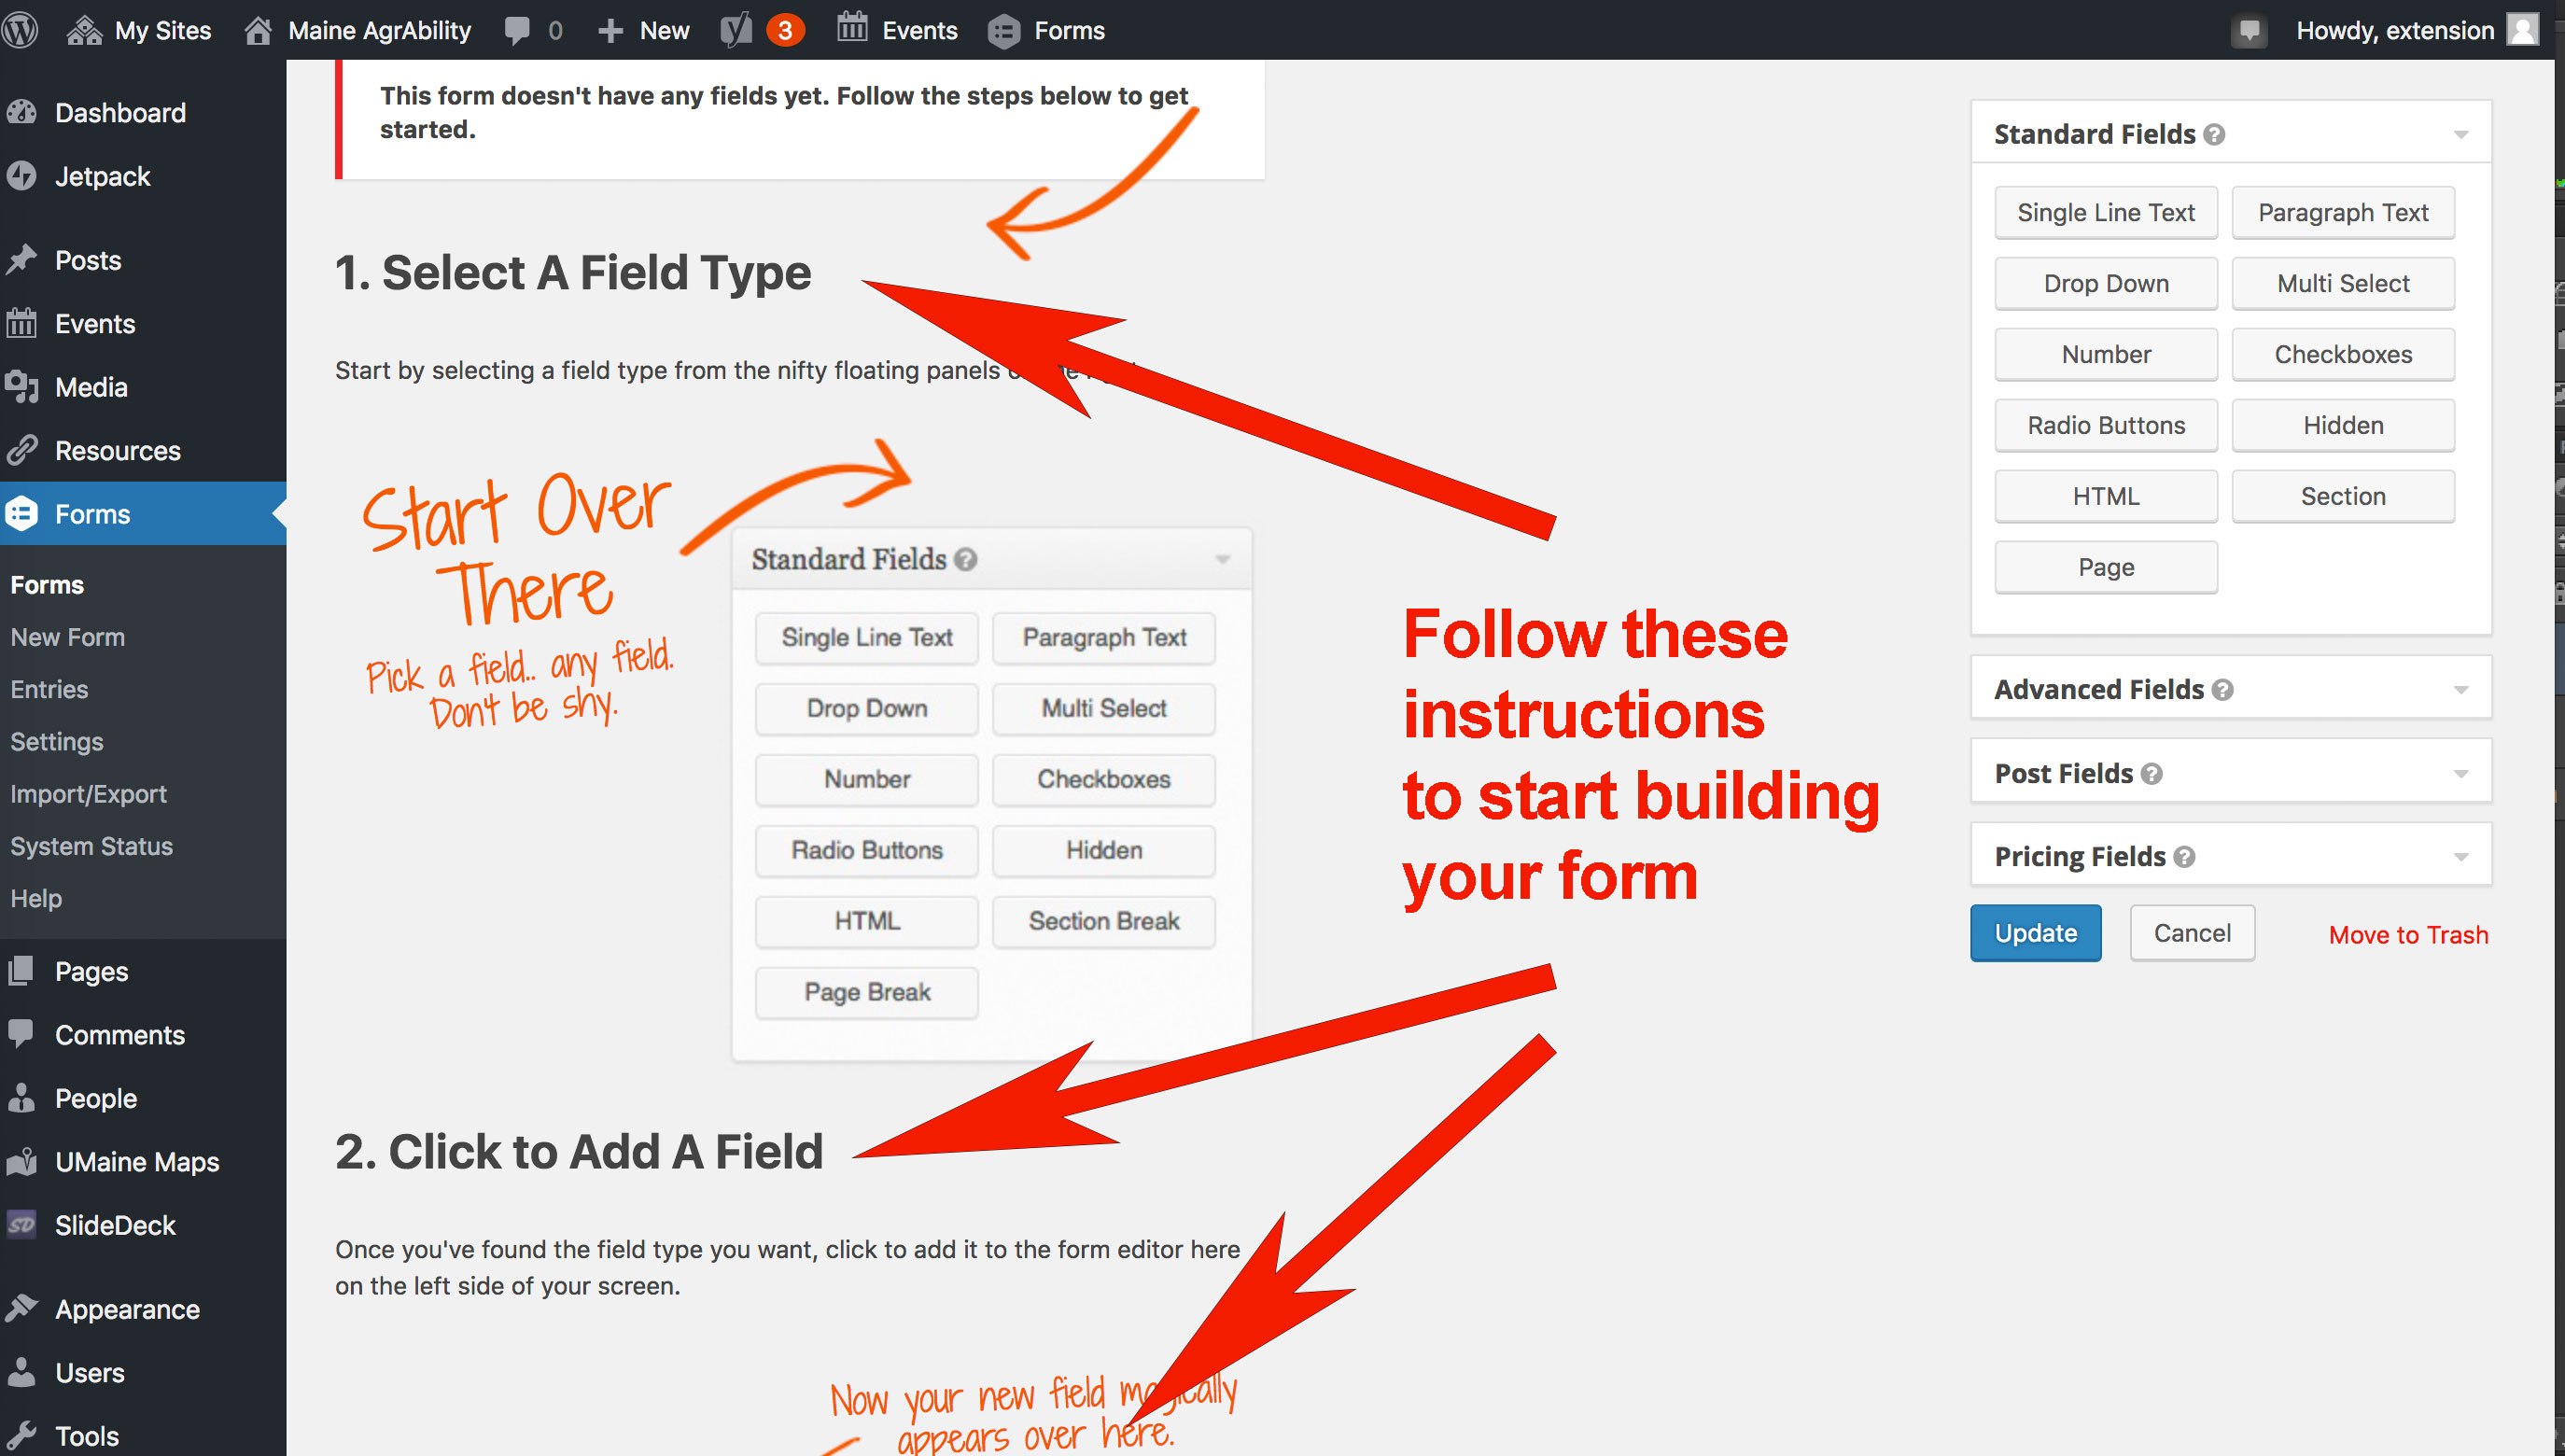
4. Click the Update Button to save changes to your form.
5. Select Settings/Confirmations to set up a confirmation message. This message will display when a user clicks the form’s Submit button. Typical confirmation messages include a “thank you” for filling out the form, information about next steps, contact information in case the user has questions, and any helpful links.
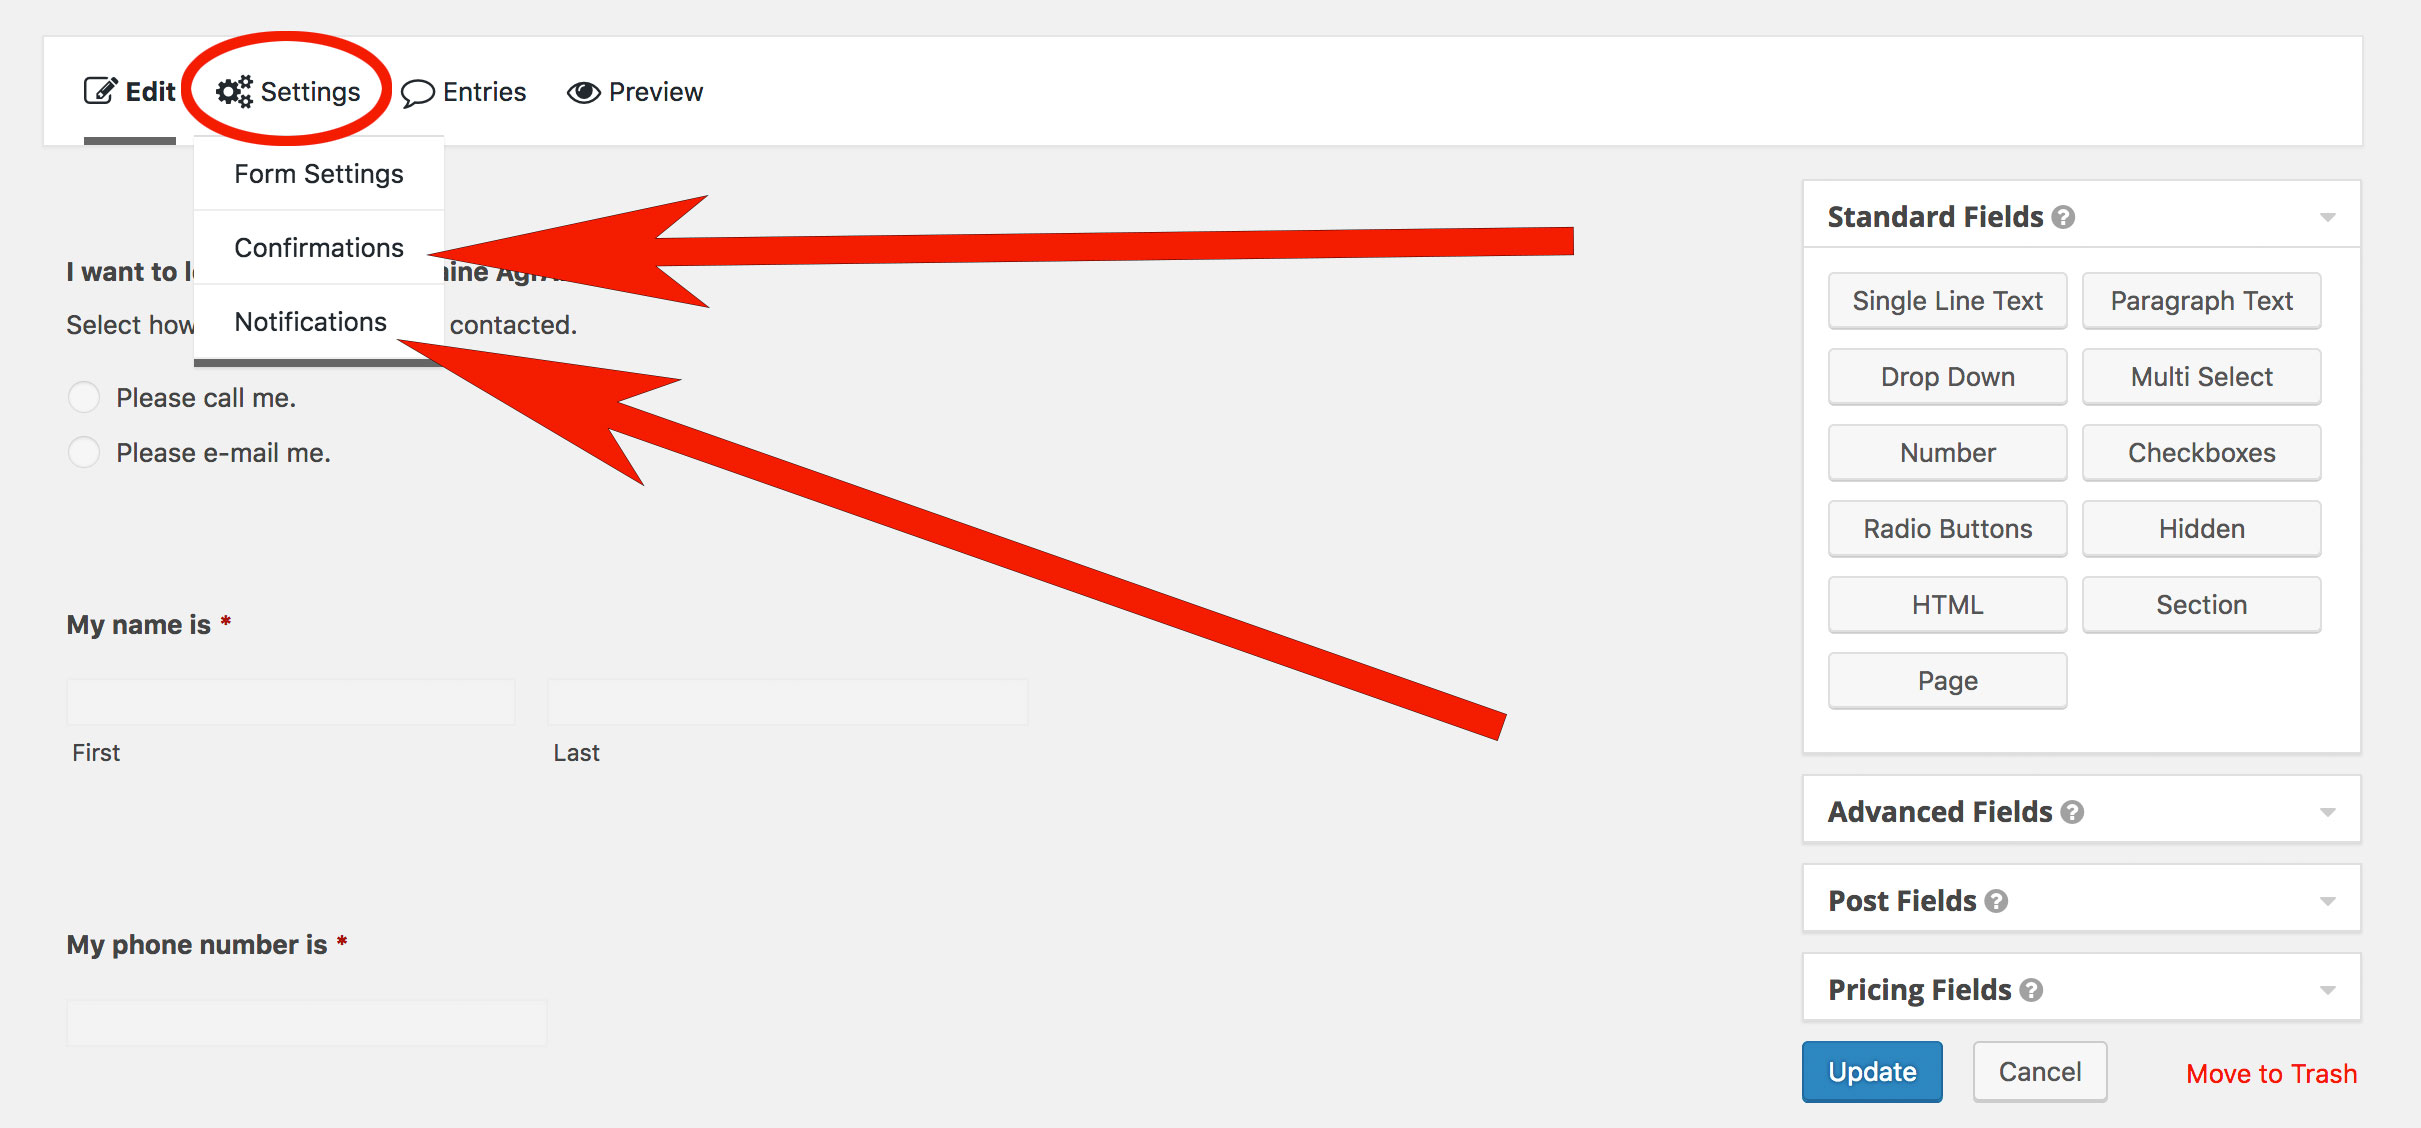
6. Select Settings/Notifications to set up automated email notifications. At a minimum, you’ll want to set up the form to automatically notify you by email whenever a user submits information via the form. You may also want to notify additional staff or have a copy sent to the user.
7. Select Settings/Form Settings to change the title or description of your form or to limit the number of submissions or to schedule the form to close on a specific date.
Reduce the risk of your Form being spammed by taking these steps:
1. When setting up the title or description of your form in Settings/Form Settings, before you click Save Settings →, be sure to use the slider to enable Anti-Spam honeypot, then click Save Settings →.
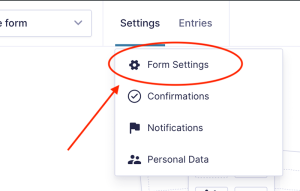
- When setting up a Gravity Form, go to the “Form Settings” menu.
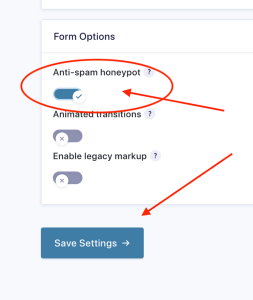
- Enable “Anti-spam honeypot” by sliding button to the right.
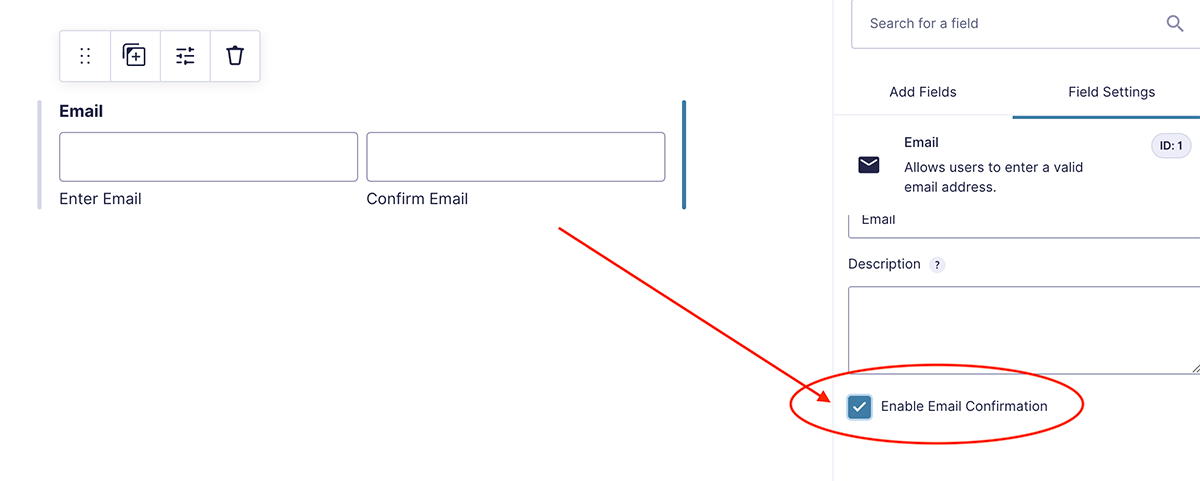
2. When setting up the Email field in your form, be sure to check off Enable Email Confirmation for clients to enter their email again.
3. An additional tip: when setting notifications to come to you or another admin on the form, include “michelle.snowden@maine.edu” so that any suspicious form submissions are tracked by the webmaster as well.
Even with these precautions in place, if you do happen to notice any irregularities in submissions (addresses that seem peculiar) received from your form or a large number of submissions sent in all at once, please contact michelle.snowden@maine.edu for instructions on preventing further spamming of the form.
Embed your form in a Page or Sidebar Widget
To embed your form in a Page
1. Create a new Page or edit an existing Page where you want your form to appear.
2. In the editing window, place your cursor where you want the form to display on the page.
3. Click on the Add Form button directly above the toolbar.
4. Select a form from the Insert a Form dropdown menu. Select or deselect the checkbox items (the form title and the form description) that you want displayed above the form.

5. Click Insert Form. A string of code, not the form, will display in the editing window. Save your changes by clicking on the Update button or the Publish (or Save Draft) button. To view the form as it will appear to the user, preview the Page in in your browser.
6. Always TEST your form to ensure 1) it’s working the way it should, 2) the confirmation message says what you want it to say, and 3) you receive an automated email notification.
See an example of a simple interactive form embedded in a Page: “10 Steps to a Healthier You” Survey
To embed your form in a Sidebar Widget
1. Go to Appearance/Widgets in the left-hand WordPress menu.
2. Click the down arrow to open the Page Sidebar widget area.
3. Drag/Drop the Form widget from the many choices on the left-hand side of your screen into the Page Sidebar widget area on the right.
4. Give the Form widget a Title (usually the same title as your form).
5. Select the Form from the dropdown menu. Select or deselect the checkbox items (the form title and the form description) that you want displayed above the form.
6. Click on Visibility. Select “Show” if “Page” is “name of your page” to ensure the form displays in the sidebar of a specific page. Add additional pages as desired by clicking the + sign.
See an example of a simple interactive form embedded in a Sidebar: Request Information about Maine AgrAbility
How to access the form’s data
- To view or manage entry data: Go to Forms/Entries. Select your form from the dropdown menu at the top of the page. To add or remove columns from the Entries view, click on the little gear icon in the upper right. Search for specific entries using the search box. To print or save entries as an easy-to-read PDF, select the entries by clicking the Bulk Actions checkboxes, then select Print from the dropdown menu.
- To download data in a spreadsheet: Go to Forms/Import/Export. Be sure Export is selected. Select your form from the dropdown menu. Select the fields you want to be included in your spreadsheet. Select a date range or leave it blank if you want all entries to be exported. Click the Download Export File button to download a CSV file. The exported CSV file can be opened in Excel or Google Sheets.
Learn more
To learn how to create complex forms that use conditional logic, are sent to multiple recipients, or require an online payment page, contact michelle.snowden@maine.edu.