How to Make ADA-Compliant Tables in WordPress
All University of Maine Cooperative Extension web pages must be accessible and comply with Section 508 Standards. Accessibility allows our information to be available to all users.
A few simple steps will ensure data tables are ADA-compliant and can be read by screen readers or other assistive technologies.
Identify the Table’s Header Cells
Row and column headers need to be identified in data tables to make the table ADA-compliant. Proper identification allows users who rely on screen readers to know which data cells belong to which header cells.
Typically, column header cells run across the top of your table. Row header cells typically run down the left-hand side. Complex tables may contain multiple column or row header cells. The instructions below are for a simple table in which the header cells are located only in the topmost row. For more complex tables, contact Michelle Snowden at email michelle.snowden@maine.edu to ask for resources and tools.
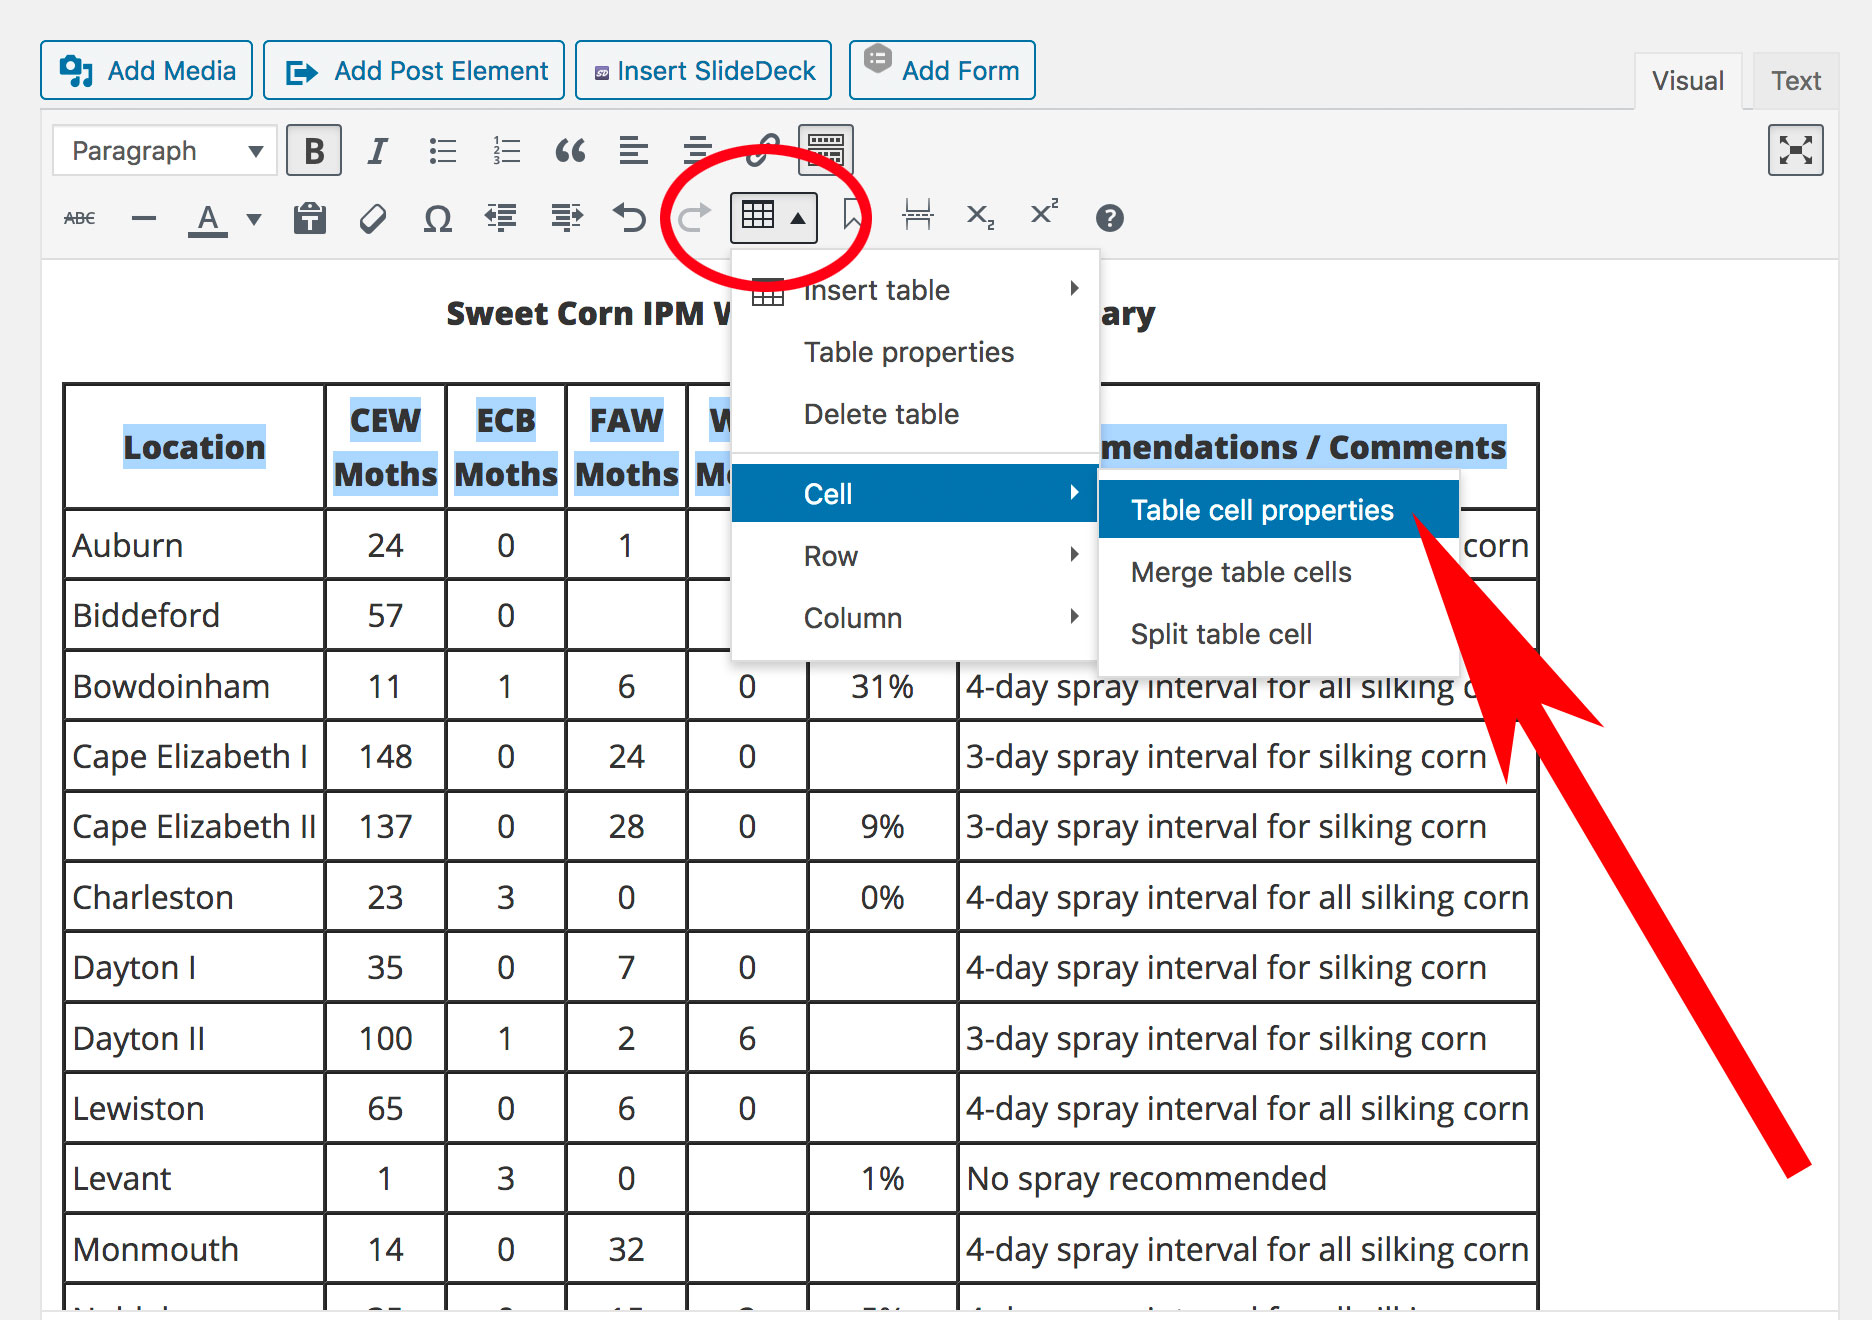
1. Select the text in the header cells by running your cursor over them. Alternatively, you can work on one cell at a time by placing your cursor anywhere within the cell, then following steps 2 and 3 below for each cell in the top row.
2. Click on the Table tool in the toolbar. Select Cell / Table Cell Properties from the dropdown menu.
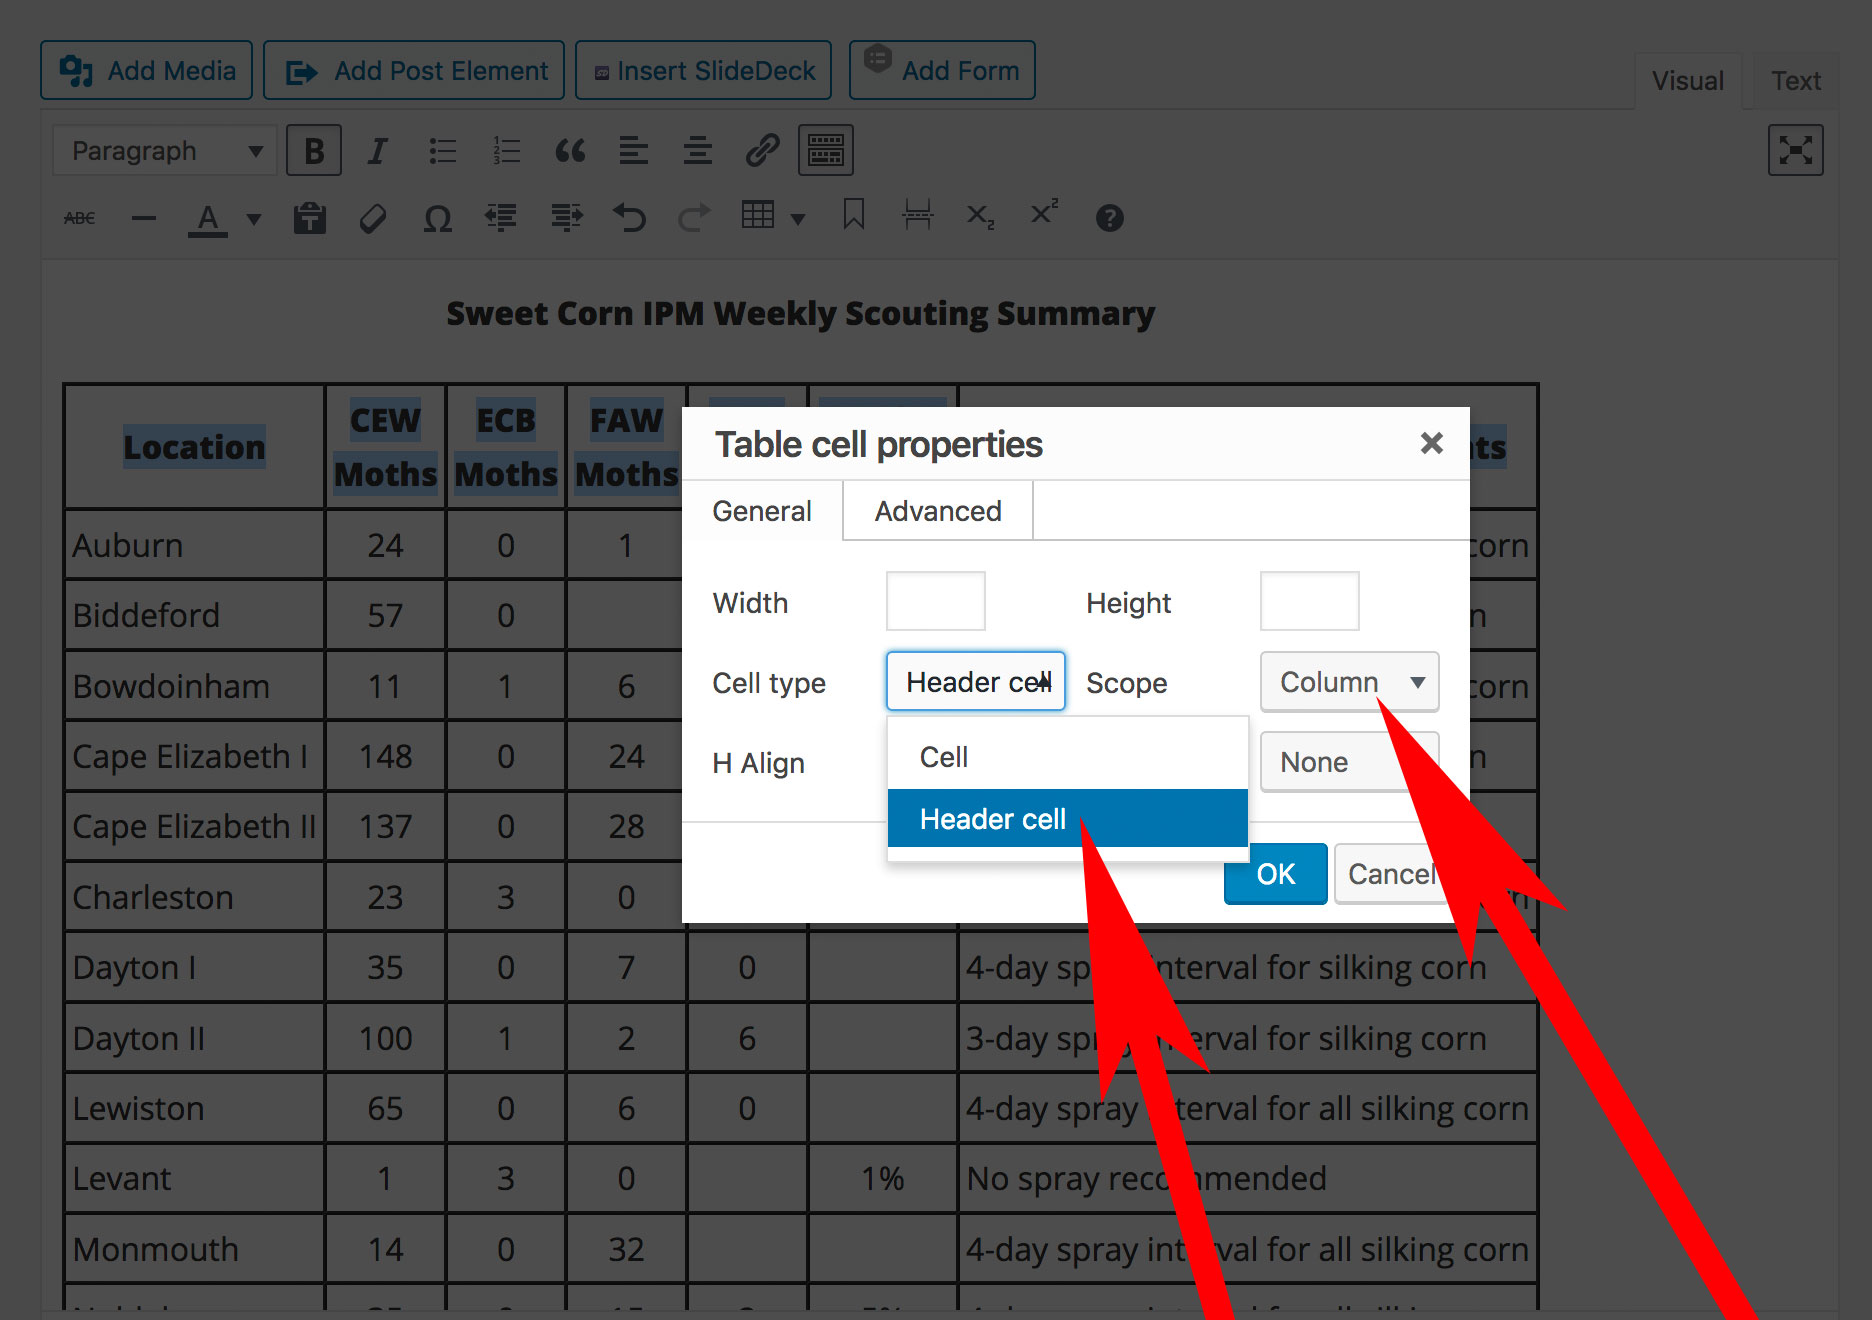
3. In the Table Cell Properties window, select Header Cell from the Cell Type dropdown menu. Then select Column from the Scope dropdown menu. If header cells span more than one column, select Column Group from the Scope dropdown menu. Click OK. Save your changes.
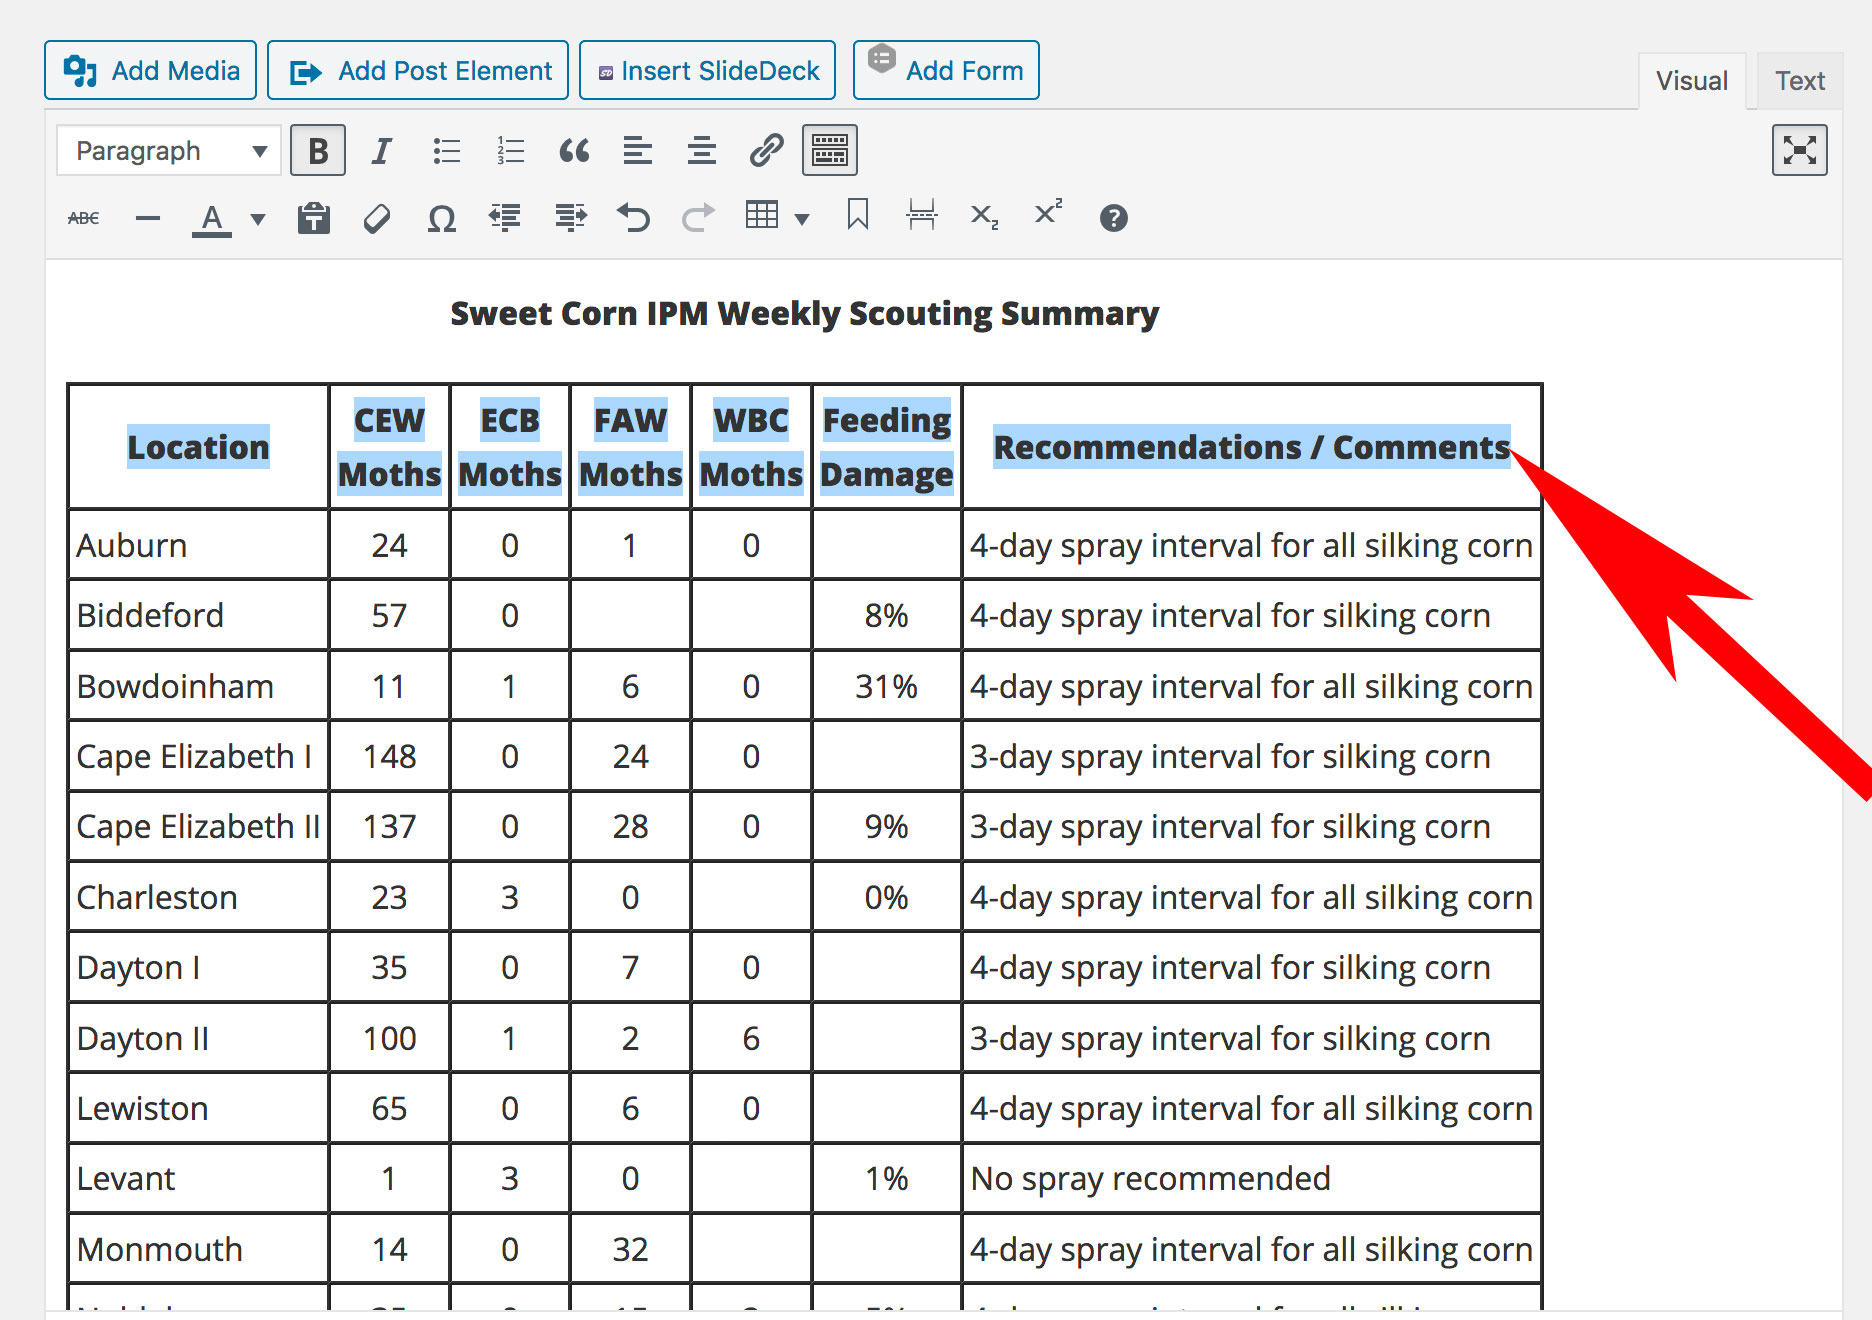
Use a Caption Tag When Your Table Has a Title
In order for screenreaders to connect a table with its title, you need to use a caption tag in the HTML code. Don’t be intimidated by the code. Follow these easy steps:
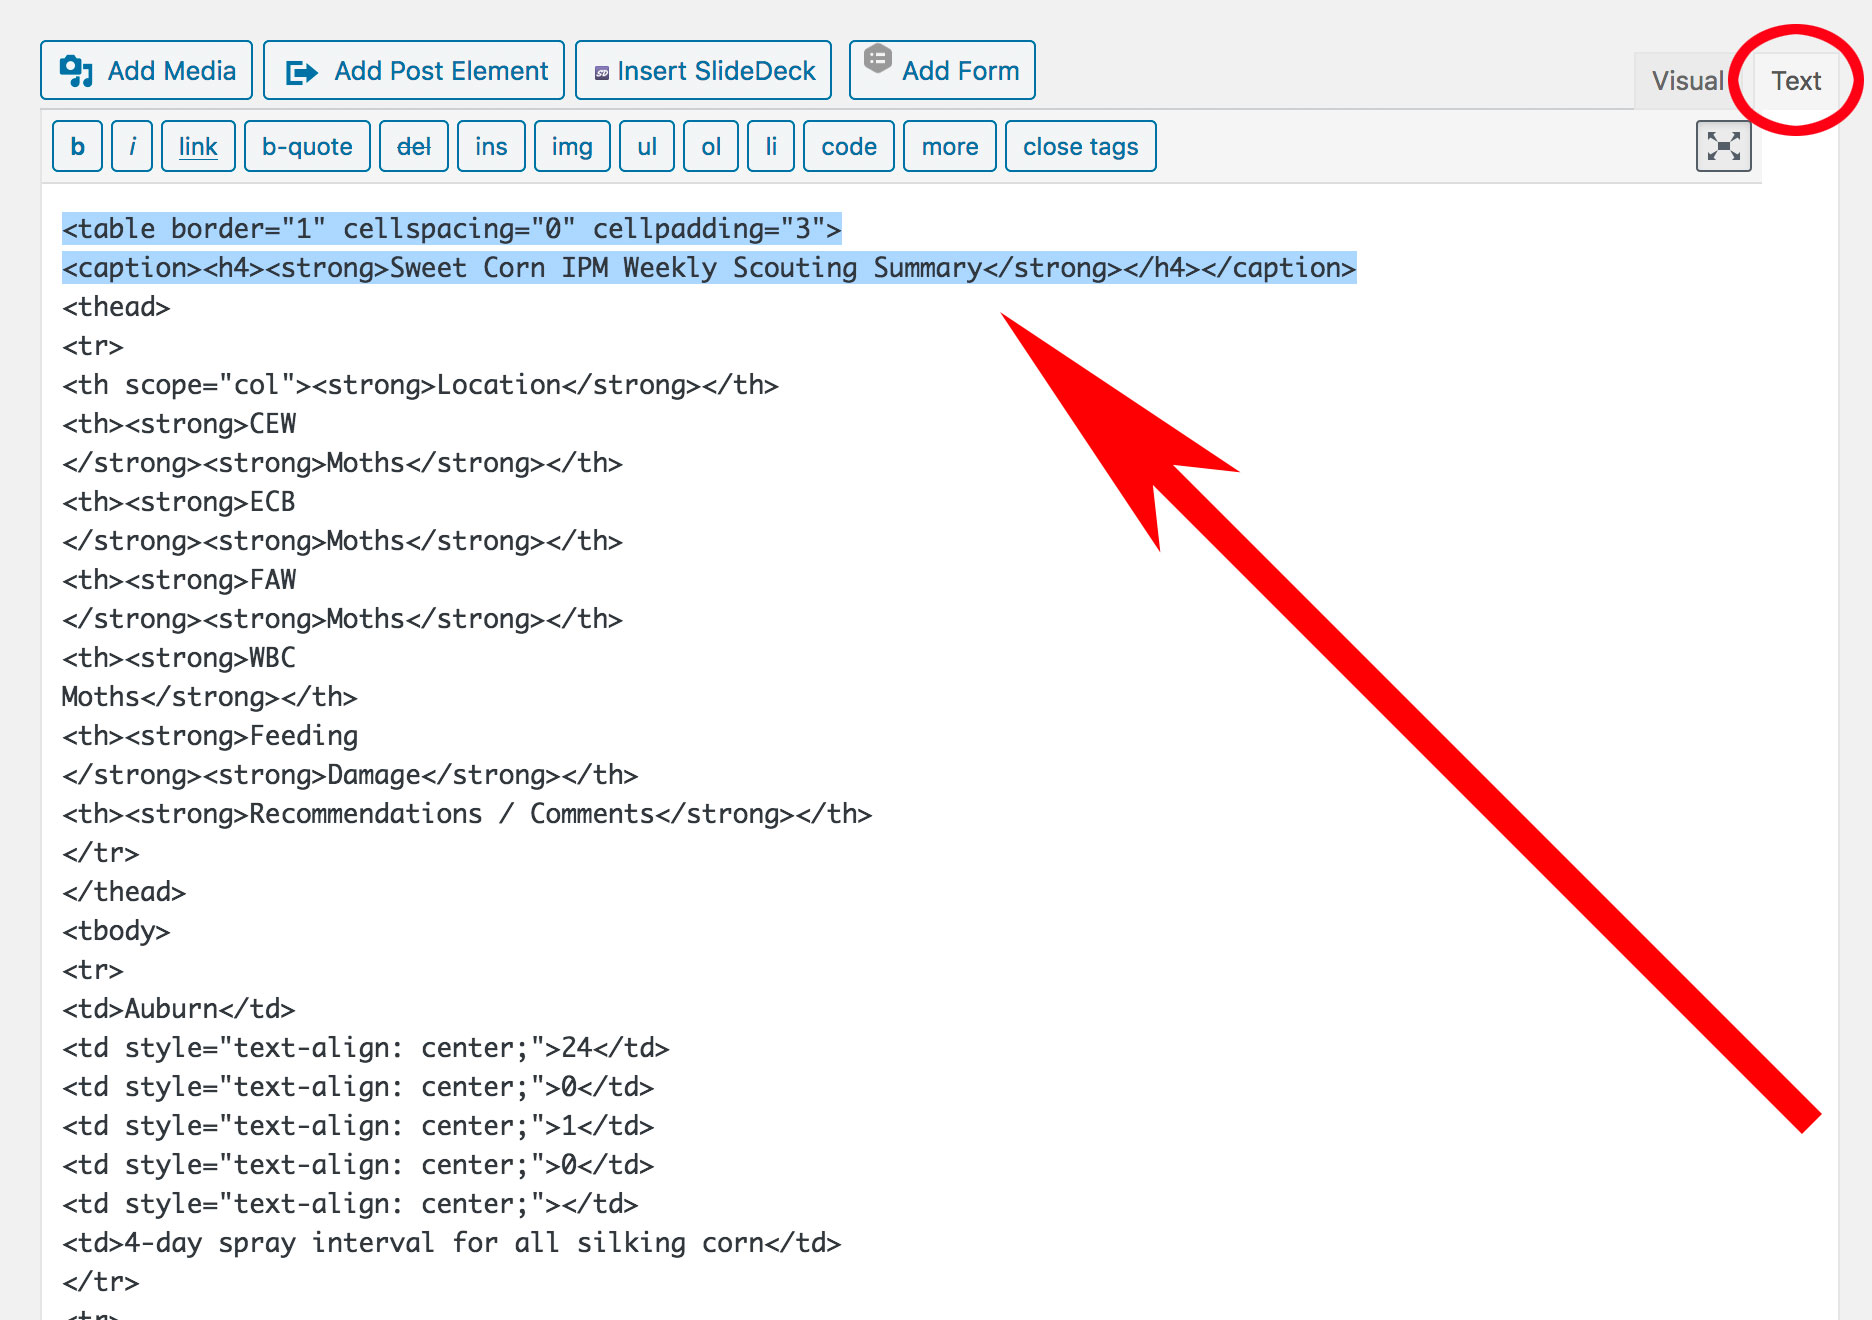
1. Click on the Text tab in the upper right corner of the editing window to switch to the HTML view.
2. Locate the start of your table. Look for <table in the code (use Edit/Find in This Page on your browser bar if you have trouble locating the table’s start tag). After the “>” at the end of the table tag, type (or copy/paste) in the following caption code, replacing “Title of Table” with the actual title of your table. The caption code should look like this:
<caption><h4><strong>Title of Table</strong></h4></caption>
In the example pictured below:
This is the table tag:
<table border="1" cellspacing="0" cellpadding="3">
And this is the caption code for the title:
<caption><h4><strong>Sweet Corn IPM Weekly Scouting Summary</strong></h4></caption>
If you end up with two titles above your table, you can delete the original one; keep only the “caption” title.
3. Save your changes.
If you need help working with HTML code, please contact Michelle Snowden.