Bulletin #4311, Planning and Managing a Community “Giving” Garden in Maine (Section 15)

Ready to Plant: Stage 1—Earliest Sown and Transplanted Vegetables
Equipped with our soil fertility test results, we have limed our soil, formed our raised beds, and worked compost into the soil. Are we now ready to start planting? I would say almost. You need to figure out a planting schedule and how many beds you want to plant to which crops. The second thing to consider is how much to stage your plantings to have a regular supply of vegetables for your recipients. You will want to have a sense of how many people you want to supply food to, and is that clientele able to eat the food that you are preparing to grow? Nearly everyone loves tomatoes, cucumbers, and sweet corn, but it may not make sense to grow a lot of greens if your recipients are told by their doctor not to eat them. Many seniors are on blood thinners and are required to limit their consumption of dark leafy greens because this can thin the blood too much. But greens can be healthy foods, and recipients should be encouraged to try to consume greens. Providing them with tasty easy recipes (like those supplied in this guide) can encourage it. But if they won’t or can’t eat them, you are wasting your time. An important thing to communicate to your recipients is that you can supply them with leafy greens early in the season, while waiting for the spreading summer vegetables (squash, cucumbers, and tomatoes) to grow.
Most of our beds run from 18 to 25 feet long and are 4 feet wide with a 1-foot alley around each bed. Typically, two 80-square foot beds would produce enough spinach to supply 40 people (particularly senior citizens) with enough spinach to make a couple of spinach salads in a week. The same could be said for a bed of baby kale. Each of these can be among your first beds to sow. You can also transplant onions, cabbage, brussels sprouts, and broccoli in early May.
Stage 1 plants are those that you can plant 4–6 weeks before the last killing frost of the year. In an era of a changing climate, don’t be confused and think that since things are warming slowly that you can plant ridiculously early. Generally, consider the last freeze date in the Central Maine area to be the last week of May. So, count back from Memorial Day and you could potentially get away with planting Stage 1 plants in mid- to late April, although most of the time the soil is too wet to work that early. But the following plants should be planted first in a garden season.
Key Lesson #2
Always apply water to seeds and seedlings transplanted in your garden at the time of sowing or transplanting. You never want to rely on rain, even if it is forecast. Early water stress will set back your plants, and they will likely not recover. It doesn’t take to much time to water, and you will sleep well knowing your plants are off to a good start.
Sowing Leafy Greens: Spinach, Kale, and Arugula
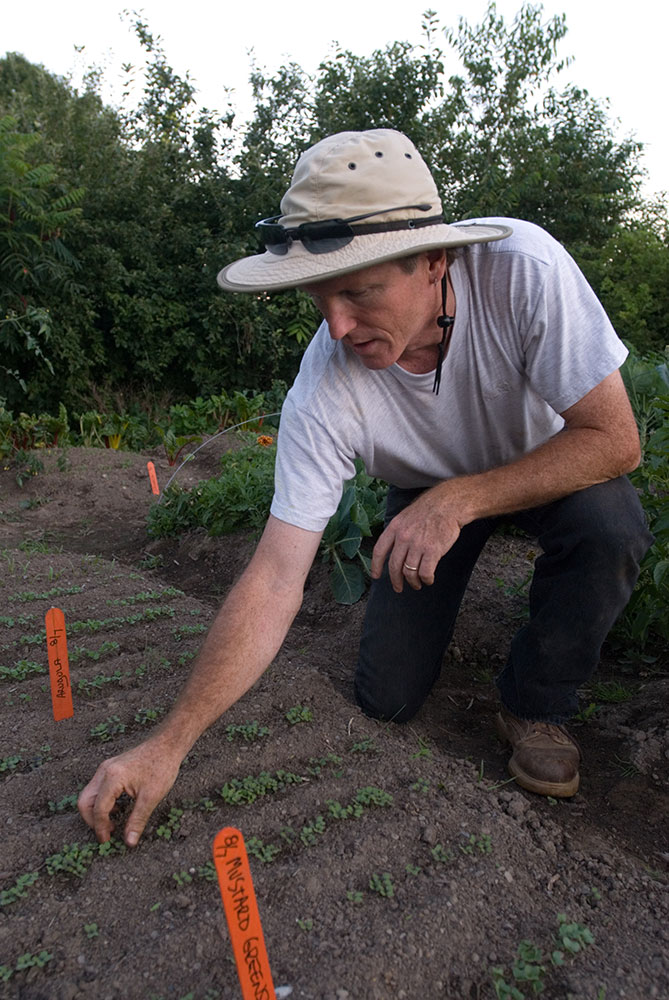
I try to achieve the maximum production possible. I think having a row marker to run across the width of a bed, not lengthwise, tends to create the best system to space your seeds. If I had unlimited space, I would follow the sowing and spacing recommendations that are on seed packets, but we never have enough space. So, I use the sowing rate recommendations that are provided on the seed package—so many seeds per foot, but I almost never follow the row spacing recommendations. If a packet recommended 12 seeds per foot in rows 18 inches apart, I would do 12 seeds per foot sown in rows 8 inches apart. To do this, you need to stay on top of your thinning, watering, plant feeding, and weeding.
Also, check the germination percentages they provide for you on the seed package. If the germination is 90% or more, you won’t really factor that in your calculations of how many seeds to sow per foot. But if the seed package says germination percentage is 75%, you will want to plant 15 seeds per foot where 12 was the number recommended. If I know the specific seed is slow or difficult to germinate and emerge anyway, I’ll likely plant an additional 10% above the recommended amounts.
We at the Orono Community Garden have a special row-marking tool that was made by an excellent volunteer. Other row-marking tools are available for purchase from gardening companies, and I think they are helpful. With the row marker, I form rows that are a couple inches deep and a couple inches wide across the bed instead of lengthwise. Our marker has sticks that scratch the soil surface and are about an inch wide on an 8-inch spacing. This forms a small band in which I sow seeds in the bottom of each little trench made by the row marker. The trench holds water better than simply broadcasting the seed across the surface of the bed. Then, after sowing the recommended density, I cover the seeds with soil, generally with an amount that is about three times the diameter of the seed. I then gently pat or firm that added soil over the seed to effect good seed-to-soil contact. I maintain the trench and ridges because of the desire to maintain moisture in the trenches for germination.

Greens must be thinned regularly, or they will become overcrowded and bolt (a term for a plant going to flower and seed). I usually start to thin as soon as there is enough plant material to take home and enjoy in a salad. I remove the entire plant and pinch off the root. I like each plant to have enough room to grow and thrive, but I also want to there be a solid green canopy within a few weeks of planting.
Leafy greens planted in early- to mid-May will be the first plants to harvest, generally around the end of June or early July.
Spinach comes in many varieties, and some are more resistant to bolting than others. I really like the Red Kitten variety if you can plant it early and harvest for volunteer workers, but it likely won’t make it to late June without bolting. The variety Space is productive, disease-resistant, and very tasty. Again, most of the time spinach does not need row covers, but you might experience leaf miner damage. We don’t see bad leaf miner activity every year.

Kale also comes in many varieties. I like the Tuscan kale variety more than most of the others but Russian red kale has performed well for us too. You will need row covers, but you do not have to support these. As the kale grows, it will simply lift up the row cover. Kale is a large plant, often growing to 2.5–3 feet tall. It will be helpful eventually if not at the beginning to use supports with the row cover on kale simply because it is easier to manage the row cover on such a large plant.
Lastly, I love arugula, but it is best grown early for volunteers as it too has a tendency to bolt and may be too bitter for some recipients. That has been our experience. Because it’s a brassica, it will also need row covers.

For information about nutrition, selection, preparation, and storage of leafy greens, along with healthy recipes, see Bulletin #4180, Vegetables and Fruits for Health: Greens.
Turnips (Hakurei)
We have tried for years to grow purple-top stew turnips, rutabagas, and salad turnips (hakurei). Some years we do well, but other times, not so much. I have found that we have three major issues: the seed size of all turnips is very small and is therefore very easy to sow too densely; insects (particularly wireworms) will bore into the turnip, leaving an unusable product; and it is easy to be late on the harvest, and they become woody (same problem I have with radishes). If you sow seeds heavily thinking you’ll come back and thin, you may be overwhelmed when you return. I have done that a few too many times. The seed is black and difficult to see when you are sowing in bands in the row. But last year we grew some salad turnips, and they were beautiful. What did we do right in 2018? I am not sure, but we thinned them to one plant per 3 inches early when the plants were small, and the harvested lovely white globes were insect-free (good luck, probably). Wireworms are common, particularly in freshly turned gardens where turf or sod was growing, but they can also affect plantings later. Look for them when you turn the soil and pull them out of the bed. You will have to cover all turnips with row covers as they are brassicas, but you won’t need to have supports for the row covers for hakurei turnips. Hakurei turnips seem to do better planted only in the Stage 1 plantings (mid- to late April). The purple-top stew turnips can be planted with the Stage 1 or 2 plantings. But where the purple-top turnips are best cooked, the Hakurei turnips are sweet, crunchy, and delicious sliced or diced into salads and also gently cooked. The purple-top stew turnips have many of the same issues (oversowing, insects, and appropriate harvest time) for the same reasons. It also seems that if a brassica is sown too densely, there is a short thinning window. If you miss this window, the plants will grow but the bulb doesn’t form on the base of the plant. I have seen this with radishes, turnips, and rutabagas. So thin to the appropriate spacing early in the season when the plants are no more than an inch tall, and maybe even sooner.
Watch for: Early thinning; wireworms.
Onions
Aside from garlic planting, transplanting onions is probably my favorite garden task. There are several key components to the spacing. What type of onion are you growing? Does your group want to sauté garden-fresh, sweet white onions, such as Ailsa Craig onions, or have more storage onions, such as Copra or red onions? I use similar spacing for most onions, but I stretch the super sweet onions between each onion just a bit more than reds or storage onions.
Onions are easy to transplant as seedlings. Of course, following bed preparation (which can be a fairly rough soil surface for transplanted onions), mark the bed with the row marker, and then begin to remove the onions from the flat. You will want to tease apart each of the onions in the transplant cell. I always use a trowel to transplant onions. It helps me ensure that the hole is sufficiently deep so all the onion roots have enough room, and then I fill in the hole. You also want to make sure you don’t plant the onion too deeply. The seedling has a root system, a slightly swollen bulb, and stem to the first leaf. Make sure that the top of the soil surface following transplanting is below that first leaf and that the bulb part is buried. When you start to weed these transplants, make sure you don’t push soil over the first leaf. That would set back the onion and possibly kill it.
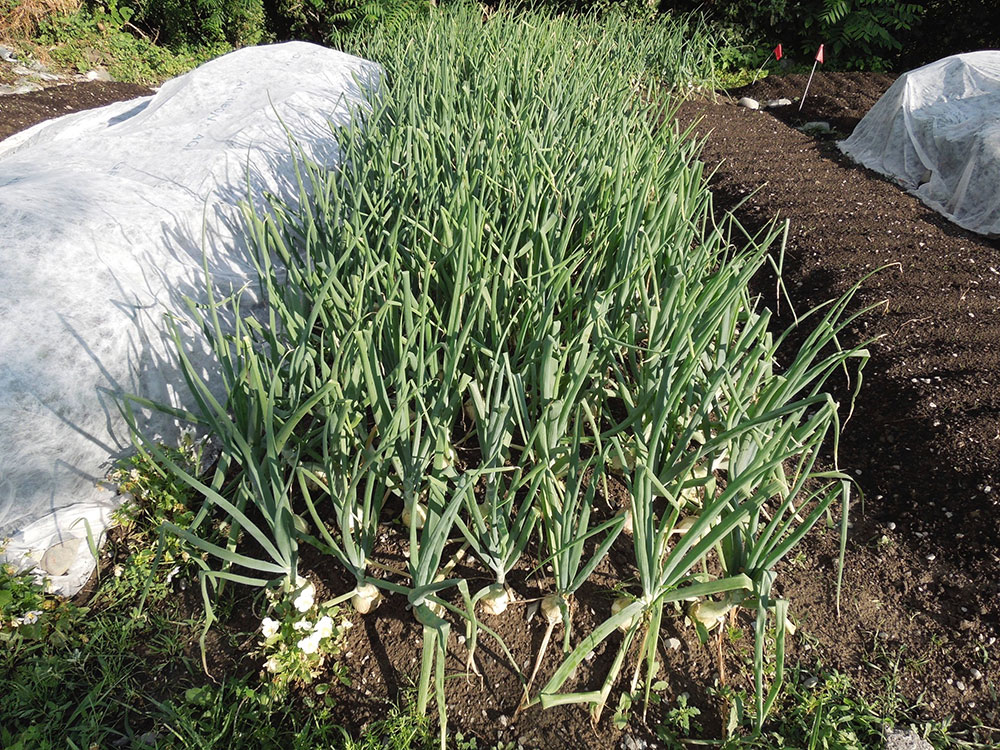
How far should you space each individual seedling transplant from others? I usually think of each super sweet onion as if it were a softball. As you plant them, study the bed and look at the center of the onion transplant, making sure that there is room for a softball to fit between each onion transplant. For red onions, I generally follow the same routine. For storage onions, I want to see a hardball baseball spacing between them. My hand with thumb to little finger stretched out as far as possible is about 6 inches or about the size of a softball. That works for me as a guide. You can also use a trowel to guide your spacing. If the bed is 4 feet wide, I’ll generally have 6 or 7 sweet onions planted across the bed row with an 8-inch spacing between rows. This spacing, as a rough rule of thumb, generally works well. I like to give our seniors an onion a week for several weeks.
I know that the onion is done growing when its top green growth flops over. When you see the first plants do this, at that point, that onion is ready to be harvested. The other onions in the bed will not grow much more, so it you think your recipe needs an onion, it is fine to harvest enough to meet your recipient’s needs. Snip off the roots, brush off the bulb, and bag it for your recipients.
If you happen to be bed-limited and you end up with extra onion seedlings at the time you are transplanting, you can plant a whole transplant cell into the side of the raised bed. The onions will grow and push out from each other as the onion starts to swell. Spring onions are wonderful, and this is a good way to provide your recipients with an early spring onion to chop into foods without having to wait for most of the summer to pass before being able to start an onion harvest.
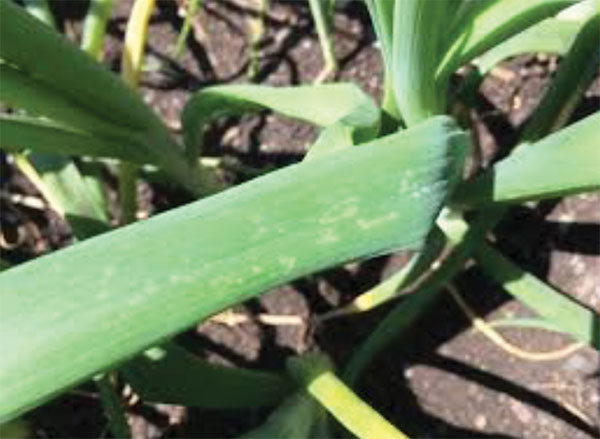
Watch for: Thrips is a tiny flying insect that can suck plant fluids and scar the outside of onion leaves. Watch closely for damage. PyGanic is an organic pesticide labeled for thrips control.
Leeks
Another member of the allium family, leeks are similar to onions but they’re treated quite differently in planting. In a 20- x 4-foot bed, I would plant across the bed in rows at least 8 inches apart, but with this crop, row spacing could and maybe should be stretched to a foot between rows. Much like potatoes, you need to form a trench in which to plant the leek. Leeks can grow 2–3 feet tall, but you only want to eat the white and lightest green portion of the leek. Form a 4–6-inch-deep trench and plant the leeks in the bottom of the trench. Plant similarly to onions and make sure that the roots are tucked into a 2–3-inch hole. You’ll fill in the rest of the trench after the plants start to grow. One key reminder: When burying the bottom of the plant, make sure you do not bury the plant above the first leaf. A trench is likely to have some soil slough into the trench and bury that first leaf. If that happens the plant will be stressed or die. That is why planting on a wider row spacing likely makes sense. After they have become established and start to grow, fill in the trench that the leeks are growing in to prevent light from greening the bottom of the leek plant. Over time your 6-inch-deep trench will become a 2–3-inch hill around the bottom of the plant. The part of the leek that is buried will stay white. That will allow you to be able to eat at least 6 inches of the bottom of the plant.
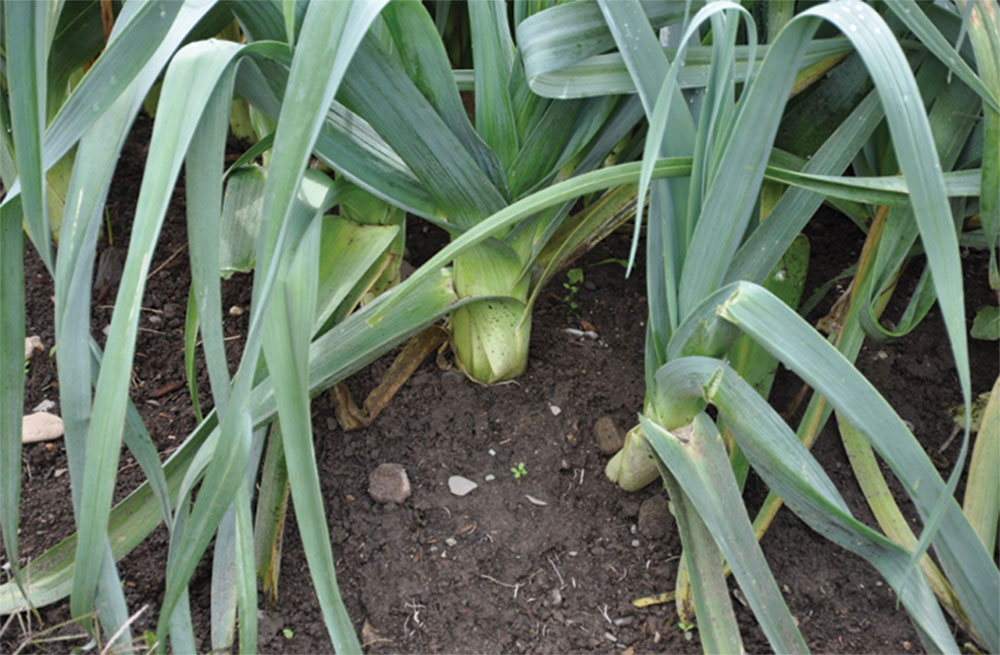
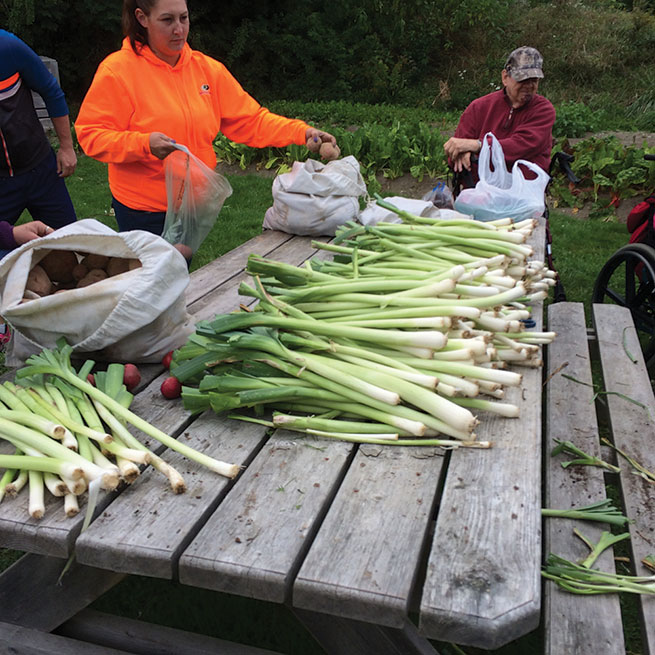
A wider row spacing will also allow your leeks to achieve a fuller potential. A leek can potentially form a stalk that is 2–3 inches in diameter and 30 inches tall. As such, you will want to plant about 12 leeks across a 4-foot-wide bed. Leeks require a full season to grow. Often you will think they are shutting down in the hot part of the summer. But when cooler temperatures return, leeks begin to bulk and grow. So, give them the full summer to grow. You will want to provide your recipients with 2–3 leeks in a delivery, and leeks should be in one of the last deliveries made to your participants. Directions for how to use the leeks should include information encouraging very aggressive washing. Dirt always seems to find its way into the plant between the leaves, and they can be quite gritty without this washing. I usually recommend rinsing the leek, putting it on a cutting board, and cutting cross-wise across the stem into 1/2-inch chunks. I push out the core of the cut leek, and place in a colander for thorough cleaning.
Watch for: Soil sloughing onto leeks from trench, burying them too deeply. Check for thrips damage as well.
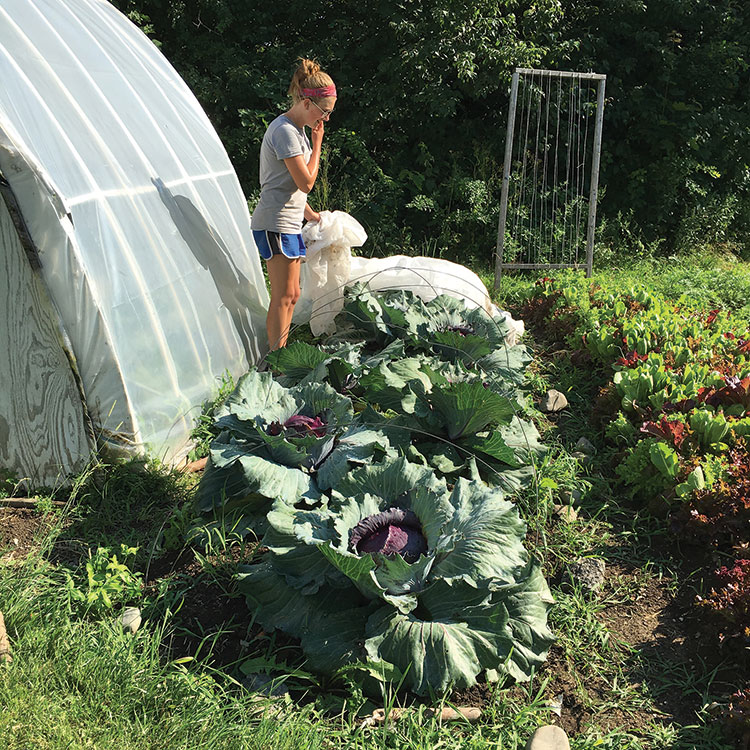
Cabbage
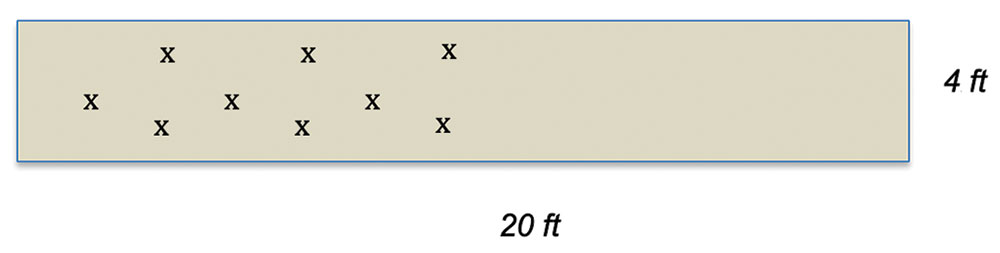
Quite possibly the hardest thing to do in a garden bed is believe that a tiny 2- x 2-inch cell of soil holding a seedling cabbage plant that is maybe 4 inches tall will become a plant that is easily 3 feet wide and 2–3 feet tall. Broccoli is similar. We all, me included, want to plant too many plants in a bed. It’s a very natural response. Your goal is to produce a lot of food for yourself or to give away, but if you plant too closely the plants can’t express their full capacity and may be stressed. So, try to achieve optimum spacing. Imagine your full-size plants when you are laying out your garden bed. If you have a 4-foot bed that is 20 feet long, how many plants do you think you can transplant? The answer could be “it depends.” When laying out beds, some beds are not quite 4 feet wide. If the bed is closer to 3 feet wide, I would likely plant no more than seven plants in the bed. This spacing is ideal for large red cabbage. I would put the first one in a foot from the end, and plant each 30 inches apart. If the cabbage is a smaller size “Napa”-type cabbage, you may be able to do plant more densely. Sometimes I use what I call a 1:2 planting pattern. I would start by planting one cabbage plant in the middle of the bed about a foot from the end of the bed (again, to allow for row covers). Then, I would plant two cabbages across from each other about 8–10 inches from each side edge of the bed. Then I would plant a single cabbage 24 inches from the center of the two plants. I would repeat this planting pattern down the bed in a 1:2 transplant planting pattern. I could conceivably get around 20 plants in a bed this size, based on the 1:2 planting method. Always leave a foot at the end of the bed for effective use of row cover to fend off flea beetles.
One other important consideration is that unlike onions, you cannot tease apart two cabbages in a given transplant cell. You will have to snip off one if there are two in a cell, and then transplant into the bed. If the plant roots are tightly bound in the cell container, you can gently tease those roots before transplanting to help the plant effectively expand its roots.
You will want to use row cover supports for cabbages, broccoli, or other larger brassicas. We use straight wire supports, which we put in the ground in the side of the bed, and then lay the row cover over the supports. The Agribond row cover has a stripe down the middle of the material. Place that over the center of the bed and leave extra to bury in the soft soil on the sides and ends of the bed.
Some people plant radishes in between growing cabbages. If you remember to pull off the covers and weed regularly, then your radishes won’t grow too long and be too woody. I tend to forget about them, and the end product isn’t pretty. But because both are brassicas, it makes sense to plant them together and use row covers.
Watch for: Flea beetles; slugs.
For information about nutrition, selection, preparation, and storage of cabbage, along with healthy recipes, see Bulletin #4182, Vegetables and Fruits for Health: Brussels Sprouts and Cabbage.
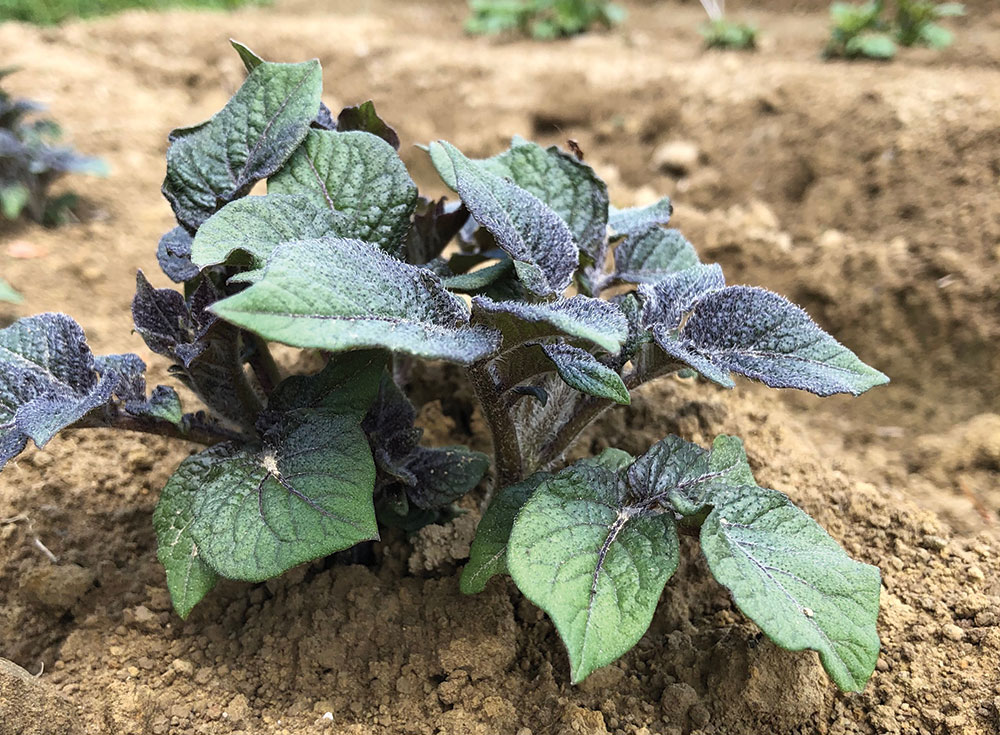
Potatoes
We have not grown potatoes in our community garden project because we get potatoes for our seniors from research conducted on the farm where we have our second spreading garden.
If you choose to grow potatoes, it is important to determine how many beds you want to devote to potato production and plan to devote two additional beds to rotate potatoes into in subsequent years. So, if you think you want to plant two beds of potatoes for your project, I would have a total of six beds in an area dedicated to potato planting and rotation beds to move potatoes into over the next 2 years. It is important not to lime those six beds because when you use a lot of compost, common scab can become a problem if soil pH is elevated to the level used in the rest of the garden. If you want pretty potato skins, and since skins have the highest concentration of nutrients, I would keep six beds and not lime them. I would grow two beds of potatoes, two beds of a soil-building legume cover crop (such as crimson clover), and two beds for leafy greens followed by a cover crop such as crimson clover. After the first year, move the potatoes into the beds that had the soil-building legume cover crop, and put leafy greens and a cover crop in the two beds where your potatoes were. In year 3, move the potatoes to the two beds that have not yet produced potatoes and plant a cover crop where the leafy greens were grown. In doing so, you will have healthy potatoes, and the other beds are being improved with the intensive cover crop.
If you plant potatoes, consider buying only high-quality seed potatoes from a reputable source. In this case, I would plant my potatoes in trenches lengthwise down the bed. I would form each trench to be about 8–10 inches deep, and each trench in the bed would be a foot apart. I would likely choose a specialty variety, such as fingerlings, that are easy to roast or put into a stew or soup.
About 5 pounds of seed potatoes should produce about 40–45 seed pieces. A typical seed piece should be approximately 1.5–2 ounces, and each piece must have an eye. I typically plant reds and specialty potatoes with 9 inches between each seed piece. So, if your bed is 20 feet x 4 feet, and you have two trenches down the bed, you would need about 53 seed pieces. A 10-pound bag of quality seed would meet your needs. If you have leftover seed, you can cook it up! If I were planting fingerlings, I would likely cut each one in half, assuming there are at least two eyes on each seed piece. Place each seed piece in the bottom of the trench at about a 9-inch spacing between each piece. Then cover the seed piece with about 2–3 inches of soil and tamp the soil down over the piece to ensure good seed-to-soil contact. As the potatoes sprout and the plant begins to approach the top of the trench, add more soil to almost bury the plant. As the plant grows more, you will completely fill in the trench and then you will begin to form a hill around the base of the plant (similar to what you do with leeks). That should sufficiently cover the potato from sunlight, and you should get 7 or 8 potatoes per individual plant or hill. This again fits my economic model: plant 1 and get 7 or 8 back … pretty good deal!
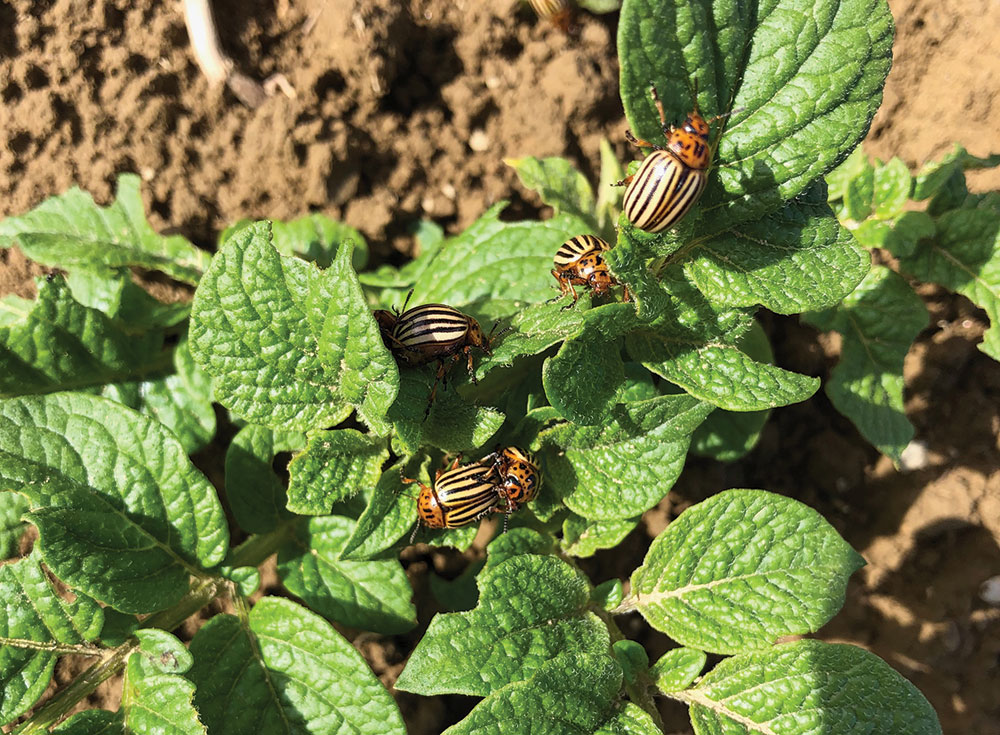
Watch for: Colorado potato beetles; fungal diseases (early and late blight).
For information about nutrition, selection, preparation, and storage of potatoes, along with healthy recipes, see Bulletin #4179, Vegetables and Fruits for Health: Potatoes.
Peas
Peas are another plant that we do not traditionally plant in our Orono Community Garden, but they are an excellent plant for any garden. We have too many deer that wander through the garden to ever expect to grow peas. But if you have fewer problems with deer, then peas can be a useful crop. Peas come in edible pod and shelling pea varieties. I prefer shelling peas over edible pod, but both are useful and delicious. Just make sure you tell your recipients which type they are receiving.
Peas require fencing. This can be established the year before or at the time of planting. Peas like to climb up a trellis or fence, and if your bed gets both morning and afternoon light, you can plant on both sides of the fence to increase production. Realize that the peas might shade out vegetables growing on either side of the pea bed. I would plant leafy greens on either side of the peas because they grow well in reduced light.
You will want your peas in near neutral pH soil. After amending with compost and lime (if needed) and preparing your soil, place your fence lengthwise down the bed in the middle of the bed. Form a long shallow trench an inch or two from the bottom of the pea fence on both sides of the bed (if sun shines on both sides of the fence). In a 20-foot-long bed, you might consider planting edible pod peas on half the row and shell peas on the other half, but make sure you remember which one is which. If you plant both sides of the fence, make sure to plant both sides of the fence to the same type of pea.
You can sow the peas at a 1-inch spacing and at about 1–1.5 inches deep. You can sow more if you want to harvest pea shoots for volunteers. Your final plant density in a 20-foot bed should be about 15 plants on each side of the fence. You can also plant in front of the peas. If you like pea shoots, plant a couple additional rows of peas for pea shoots in front of the shelling or edible pod peas. You could also plant a little extra spinach in front of the peas.
Watch for: Sowing density: Remember to harvest pea shoots to the final stand density desired.
For information about nutrition, selection, preparation, and storage of peas, along with healthy recipes, see Bulletin #4256, Vegetables and Fruits for Health: Peas.
University of Maine Cooperative Extension is an equal opportunity institution and provider committed to nondiscrimination. For more information, visit extension.umaine.edu/nondiscrimination.