Bulletin #4311, Planning and Managing a Community “Giving” Garden in Maine (Section 23)

Ready to Plant: Stage 4—Late Planting
Collard Greens
One of my favorite vegetables is collard greens. These should be planted after a bed of baby kale is harvested. This crop germinates well, and the plants will get up to 3 feet tall. They taste better after a heavy frost, as they tend to lose bitterness and add sweetness after a frost. You can harvest collards until temperatures drop into the midteens. We have been able to harvest collards until early December in the past. This is a nice plant to ask volunteers to continue to harvest after your deliveries have been completed. Collards are a vegetable that may be better as a leftover. They are full of healthy chemical compounds (folate, vitamin K) … great stuff!
Garlic
Garlic is probably my favorite vegetable from planting to eating. It fits my model of economics—you plant one clove and you get four or five back. Seems fair! In most years, I can find a beautiful Saturday with temperatures in the 60s to plant garlic. We plant garlic anytime from the middle to the end of October.

If you are starting out, you need to buy seed that is disease free from a reputable source. Call your county Extension educator to find the best garlic seed source. There are many different garlic varieties with different taste profiles. My favorite garlic variety and the one that we have grown consistently for more than a decade is called German extra hardy. Some people prefer Russian red or others. I like the German extra hardy for a number of reasons: the cloves are large so there is less peeling involved, it stores well, and we get excellent germination. Some garlic can get diseases, and you want to remain free of such problems. Good crop rotation is essential. (See Crop Rotation for Home Gardeners for more information.) We reserve 20% of our garlic harvest from one year to be the seed for the next. In the harvesting process, we save middle- to large-size bulbs that are from healthy plants. We store the seed on upside-down plastic vegetable flats in a cool dry area after harvest until planting time.
If you harvest in late July, and you have stored your garlic for 2 months, cut off the stalk and just keep the heads on the flats. Your seed should be well stored and healthy.
You will also need to have something to mulch your garlic beds. I recommend barley straw. If there is barley seed in it, it will usually germinate after you have planted your garlic, and it will winter kill.
You will want to have your to-be garlic beds ready to plant. I have typically tried to select four large beds at the beginning of the year that have not been in an allium crop (leek, garlic, onion, shallot) for at least 2 years (3 or more would be ideal). In the spring, I like to plant those beds to a nitrogen-fixing crop such as crimson clover or peas and oats. I will kill the crimson clover/cover crop bed in late September and turn under the biomass. Then, in early October we prepare the beds with some compost. On the day before planting, I take the stored bulbs and separate them into individual cloves and place them in a bucket. We rake the tops of the beds to kill any germinating weeds, and then mark the rows with our 8-inch row marker. Then with a trowel I dig a hole 3–4 inches deep and place the clove with the swollen end or butt end down and with the pointed end up in the planting hole. When I hold the clove by the tip and push the clove into the soil, I like the palm of my hand to be flat to the bed surface and the top of the clove to be 2 inches below the bed surface. I give each clove about a 6-inch plant spacing. Once completed, break apart your barley bales and place a 4-inch-thick layer of straw over the entire bed. Planting goals include making sure the bulb does not emerge from the soil until spring, the bulbs don’t get frost-heaved out of the soil, and planting healthy seed. If a clove looks off, soft, or smells funny, do not use it.
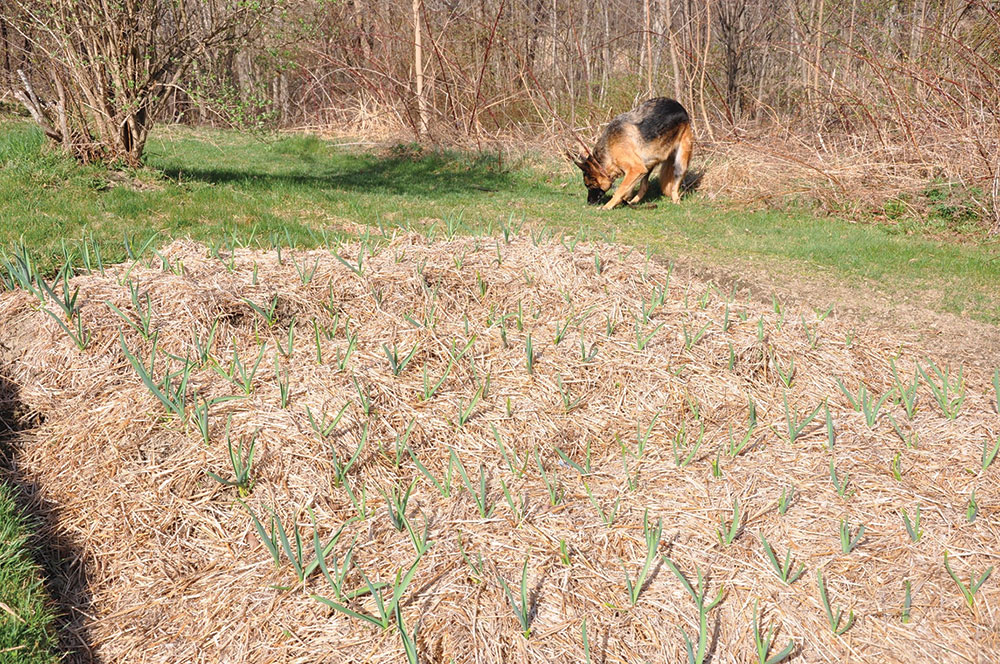
The following spring, the garlic plant will be the first plant to emerge. Make sure the garlic can get through the straw. We generally get excellent germination. So, if you see skips, dig down and find out if emergence is affected by the straw mulch. We have been known to miss a spot or sometimes an entire row, so careful methodical planting is worthwhile. The photo of early-emerging garlic shows appropriate plant spacing and effective mulching. Once the plants emerge from the straw, it is time to do the first feeding with fish emulsion. This will occur usually by late April or early May.
You will want to feed the plants again in late-May, and one last time in late-June. This is the time that the bulb begins to bulk up. So, don’t forget to feed in late-June.
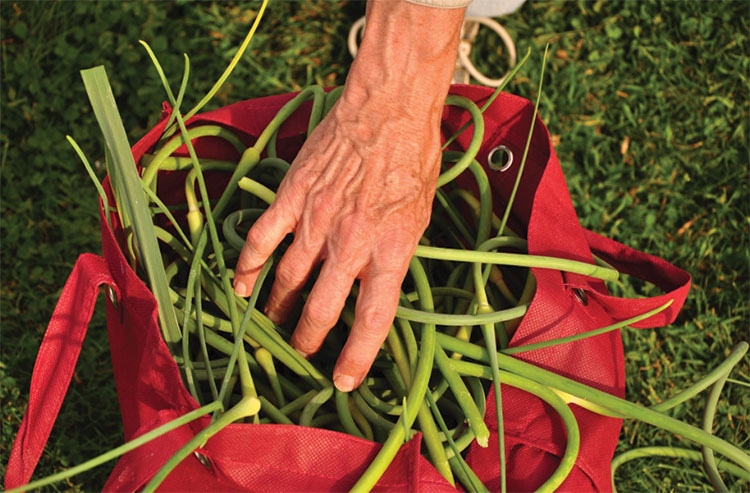
Scape management is one more interesting consideration. Many people love the garlic flower and stalk called the scape. Around early to mid-June, the plant will develop and push out its flower. The flower stalk comes out in a pigtail curly way and at this time it is soft. Over time it will straighten and get stiff (less edible). I like to snap off the scape at the top of the plant very early after emergence.
There are many options to use scapes. You can sauté them with eggs, make pesto, or substitute them for garlic in recipes if you have consumed all your garlic from previous years. See recipes above for possible uses. Probably more importantly, if you remove the scape early, the plant will devote more energy to the bulb and yields will improve by 20–30%, according to research done in Guelph, Canada. So, you have something interesting to give to food recipients and the garlic bulb yield is improved. I say that is a win-win.

Harvest timing for garlic is important. If you harvest too soon, your garlic will not have had adequate time to bulk. If you harvest too late, it’s possible that the garlic head will split and the cloves will separate. It is not a drag to have that happen if you want to eat the garlic quickly, but it can be avoided by knowing the opportune time to harvest. You should count down the number of green leaves from the top of the plant to the bottom. If you have seven green leaves from the top and one or two yellow leaves at the bottom, you are ready to harvest. For us, this happens in the third to fourth week in July. In mid-July, start watching leaf senescence from the bottom of the plant.
Try to harvest on a nice dry day, and brush off the soil into the bed. If we are going to deliver it, we snip off the roots and the stalk and give our recipients the head plus a couple inches of stalk.
Select the 20% of seed garlic to store for planting in the fall. The remainder should be stored intact in a cool dry space. Plan to give your recipients a couple of heads a week for several weeks.
For information about cultivation, harvesting, curing, and storing garlic, see Bulletin #2063, Growing Hardneck Garlic in Your Maine Garden.
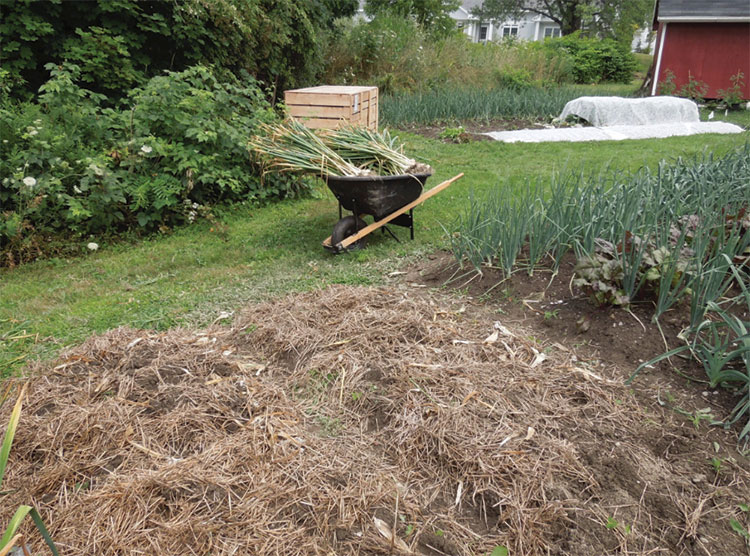
What to do with the barley mulch on the surface after harvest? Even though it has been slowly breaking down over time, the high carbon-to-nitrogen nature of the material means that if you turn it under, it will likely still be there the following year. It could also tie up nitrogen your plants need. I like to remove the straw from the surface and use it to line the alley ways between the garden beds. This may reduce weeds in the pathways.
University of Maine Cooperative Extension is an equal opportunity institution and provider committed to nondiscrimination. For more information, visit extension.umaine.edu/nondiscrimination.