Bulletin #4311, Planning and Managing a Community “Giving” Garden in Maine (Sections 3-5)

Breaking Ground
Initially, you will likely want to hire someone to come in and rototill the garden area. I don’t recommend rototilling as a regular practice, but it is an excellent way to initiate a garden. If the ground is in sod, you can incorporate that sod, and it will break down over the course of the first year or two of production and help supply nutrients to your garden. This will save you a lot of unnecessary work, and make the next steps to develop beds much easier!
This is also the best time to apply lime. Lime and nutrient recommendations usually are provided on soil test reports to be added in pounds per 1,000 ft2. You can estimate your garden area, and determine the amount of lime to add to each area or bed accordingly. Lime is best mixed into the upper root zone at this time; then, you can add it as needed over time to the surface and incorporate it into the upper soil as you work the bed.
It is also advisable to start with a small project and grow over time. Gardens can often be added to over time if you feel you need more food, want more diversity of garden beds, or have enough gardeners who want to participate to warrant this. Over time we have developed 52 beds in our Orono Community Garden site. This, combined with food from my university research projects, and an additional 1/4-acre spreading garden at the university farm has allowed us to distribute a total of more than a ton of fresh vegetables to more than 40 low-income seniors each year.
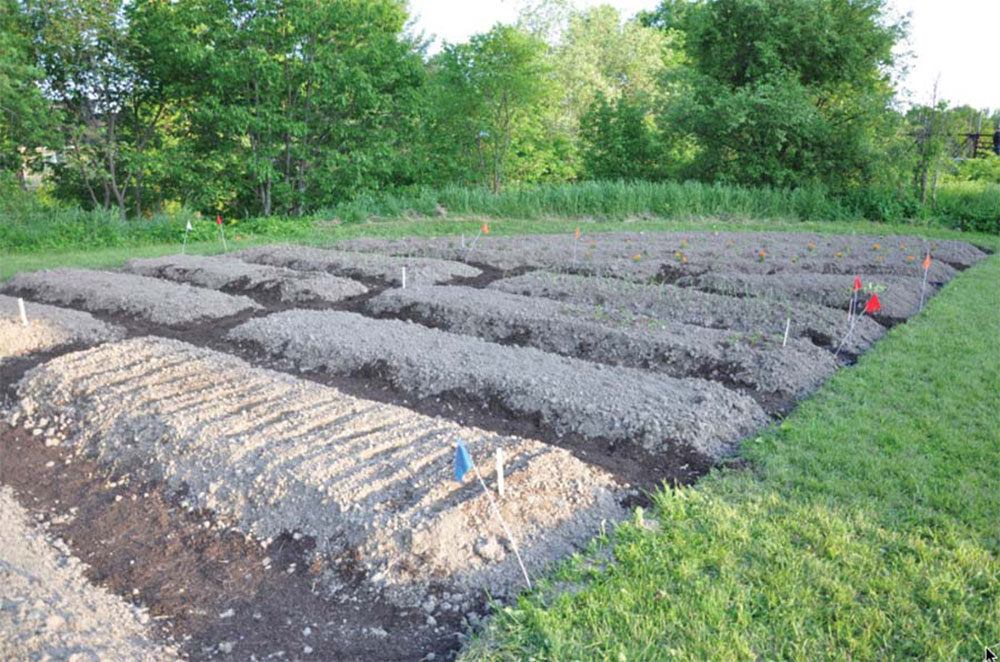
Why Raised Beds
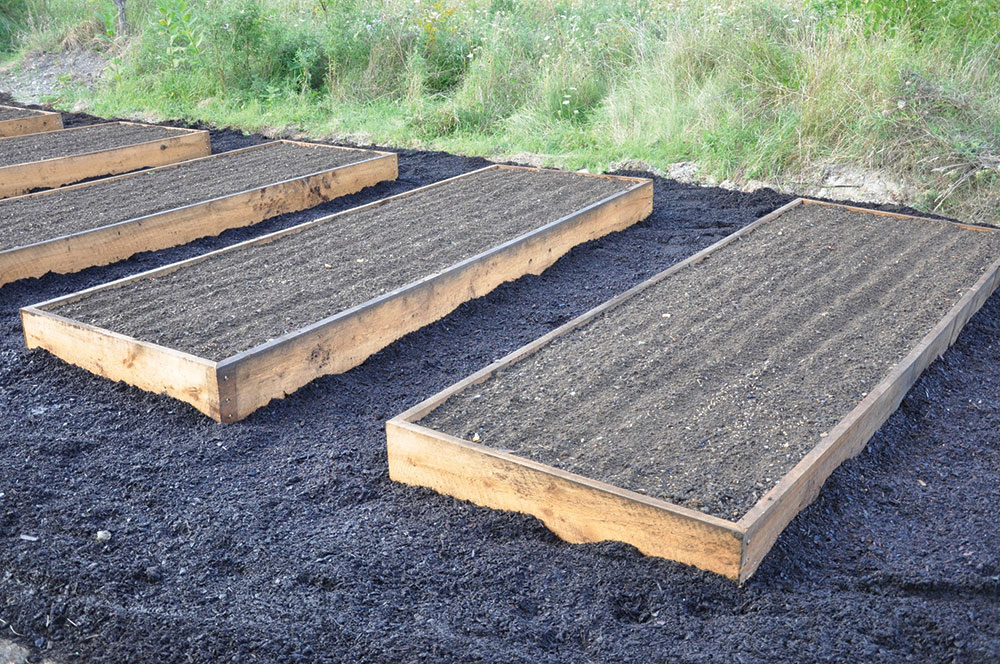
Many people will rototill a garden area each year and plant their seeds or transplant vegetable in rows. The biggest issue with this method is that it is not easy to tell where you planted which vegetables the previous year(s). If you can’t tell that, it makes it very difficult to rotate your crops, and this greatly increases your chances of disease buildup in your garden project. The alternative is to plant in semi-permanent raised beds. These do not have to have permanent wooden frames, and you can be flexible in your work with them. But the best thing about raised beds is that you have semi-permanent paths to walk through to access the beds, and these paths can be mulched with straw or other materials to keep weeds down. You won’t compact your soil by walking in the rows. You can also make a map of the plot area, and then you can rotate the vegetables in each bed by family or by plant type (leafy crop, root crop, soil-building crop, or fruit crop). You can use wooden-framed beds and bring in a soil/compost garden soil. We did this in one area with very poor soils, and we recently have adopted some other wooden-framed beds from another children’s garden educational project. These can be helpful, particularly to volunteers or project leaders with back issues.
Double Digging
Many people employ a practice called double digging garden beds (also see Double Digging, at the Community Crops website). This entails digging out soil in a bed to about 8–10 inches deep, and then adding lime, fertilizers, and compost in the bottom of the trench you just created, and working the amendments in using a fork to an additional depth of 6–8 inches. Specifically, the process involves removing about a shovel-width of soil down to 8–10 inches across the width of your bed, and you put that excavated soil into a couple of buckets and take them to the end of the bed. You apply the materials you want to work into the subsoil at the bottom of the trench, and fork them in well so that the materials are well mixed in the bottom of the trench. You then take the next shovel-width of soil and place it on top of the loosened soil, the area you just dug up and amended. You can at that point add lime and compost to that soil and mix that well in the upper part of the bed. You then add amendments to the bottom of the second trench and repeat this process until you get to the end of the bed. You finish by filling the last of the bed trenches with the soil in the buckets that you started with. Add lime and compost to that soil, work in, and then rake the bed. If you do this practice once, your bed will be a tall raised bed at this point, likely higher than it will be again, but it will settle some over time.
This is very hard work, but it is worthwhile. I would only try this one time in a home or community garden. But there is no better way to improve soil quality with depth than through this process. It is, however, physically demanding. If you are a lot younger and have a better back than I do, you could do it every 5 or 10 years to ensure highest soil quality. In a community gardening project, it may be possible to recruit young volunteers to make faster work of this physically demanding double digging process.
University of Maine Cooperative Extension is an equal opportunity institution and provider committed to nondiscrimination. For more information, visit extension.umaine.edu/nondiscrimination.