Bulletin #4311, Planning and Managing a Community “Giving” Garden in Maine (Section 17)

Ready to Plant: Stage 3—After the Last Frost
Now, summer is upon us. Chances are good that we won’t lose any more plants to a freeze, but know that in case a late freeze happens, wise use of row covers will help protect the established plants growing at that time.
This next set of plants to produce loves warm soil, warm days, and ideally, warm nights. These are not common in May and June in Maine. Plants in this list include beans, peppers, tomatoes, sweet corn, basil, cucumbers, and squash.
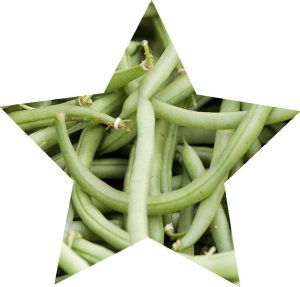
Bush Green Beans
This is a crop that takes up a fair amount of room, is a favorite of deer, and requires time to harvest. We have traditionally grown these at our research farm in a field that no one uses for research. I generally do two sets of plantings 3 weeks apart: the first planting around the first of June and the second planting 3 weeks later. In my home garden I do three plantings about 3 weeks apart. One of the plantings is a pole bean for diversity.
Beans can be inoculated to help them create their own nitrogen, or you can fertilize them with fish emulsion. We use a measuring tape to measure off three rows, each 100 feet long and 48 inches apart. We then sow seeds down the tape at six seeds per foot. We usually leave enough room between the rows at the farm to run a rototiller to weed between the rows, because the plot that we use has unprecedented weed pressure. In the second row, we plant a different variety of bush green bean. We typically plant “Provider” in one row, “Burgundy” in the second row, and a “Roma” flat green bean in the third row. We then wait 3 weeks, and we repeat the process. We can usually get another two or three harvests with the second planting if we don’t get an early frost. With this approach, we can provide beans to recipients for as many as six deliveries.
If you don’t have this kind of area, you can sow green beans in raised beds. I would sow bean seeds 2 inches apart, 2 inches deep, but in rows no less than a foot apart. Bean plants get large enough that 8-inch row spacing is insufficient.

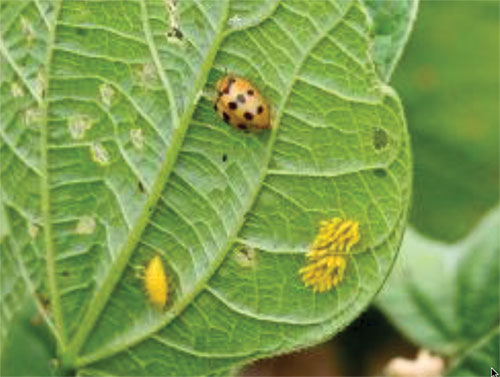
Watch for: Mexican bean beetles will eat the leaves of the bean plant. A cold snap can hurt bean production. Don’t push your planting date too early.
For information about nutrition, selection, preparation, and storage of green beans, along with healthy recipes, see Bulletin #4255, Vegetables and Fruits for Health: Green Beans and Wax Beans.
Peppers
We generally grow bell peppers only as transplants in our program. Peppers are in the Solanum family, so take care to have abundant soil phosphorus and do not over apply nitrogen or you will get large plants with little fruit. Most seniors do not appreciate hot, spicy food, but there may be a few exceptions. We have a couple of seniors who always ask for jalapeño peppers, so we will plant a couple of hot pepper plants at the end of a row. We grow most of our peppers at the same place we grow our beans, and we generally lay three large rows of black plastic and plant into the plastic. If you do not have that capacity, you can still grow really nice peppers. There are lots of sweet bell pepper varieties, including Carmen and Ace, that are quite productive and delicious.
Culture is fairly simple. Plant two peppers in a bed side by side with a foot between each pepper. Skip 2 feet down the bed, and plant two more side by side. Peppers seem to like to touch another pepper plant. The 2-foot spacing allows light to hit the pepper plant, and allows you access to harvest peppers.
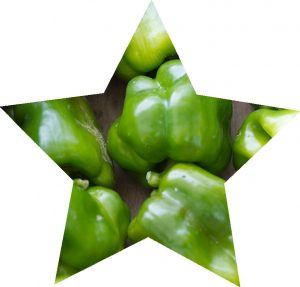
Red, purple, or yellow peppers are ripe peppers. Green bell peppers are immature. Some recipes call for green peppers, but I try to give the peppers the full season to mature. These are generally harvested for the second to last or last delivery. If I didn’t have a black plastic bed, I would plant three peppers across from each other in a 4-foot-wide bed, and I would plant them in rows 2 feet apart.
Watch for: Sun scald on the side of the peppers; bird damage.
We never have enough peppers to give out to do more than be a component of a recipe.
For information about nutrition, selection, preparation, and storage of peppers, along with healthy recipes, see Bulletin #4181, Vegetables and Fruits for Health: Bell Peppers.
Tomatoes
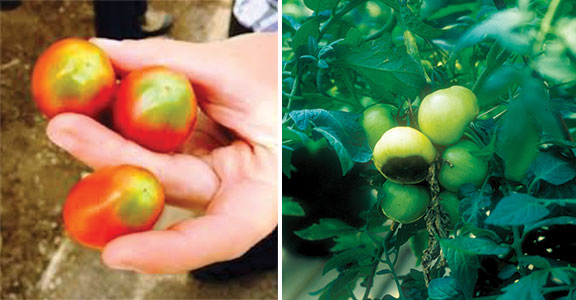
I have a love-hate relationship with tomatoes. I love them in recipes, and I love to walk out to a garden and harvest a vine-ripened warm tomato and eat it like an apple or slice it up for a sandwich. But getting to that point, or trying to get vine-ripened tomatoes to recipients, is not an easy task.
Tomato is another member of the Solanum family, so watch your nitrogen applications for the same reason as given above in the pepper family. Tomatoes are difficult to grow well. They suffer from two physiological problems: yellow shoulder syndrome and blossom end rot. Tomatoes need very fertile soil with rich levels of potassium and calcium. They also need water to the tomato root to get calcium and potassium into the plant. Crows can also play hell on the fruit.
Yellow shoulder is a phenomenon in which the fruit turns yellow to almost white on the shoulder of the tomato. Longer hang or ripening times won’t affect this or improve the situation. It is a physiological developmental issue that appears to be exacerbated in some varieties more than others. Keeping high levels of potassium in your soils can help prevent/reduce this.
Blossom end rot is the other common physiological problem. The bottom of a tomato fruit develops a water-soaked black spot (rot) on the blossom end of the fruit. Calcium is important in cell membrane stability, and it is often difficult to get enough calcium into the plant and moved to the fruit. This can happen even in reasonably moist soils. Regular moisture for tomatoes is particularly important.
Because calcium is highly immobile in soils, roots have to encounter the ion to absorb it. You can have abundant calcium in soil but have insufficient water to take calcium up into the plant and move it within the plant. So, two things are important to consider: add lime to beds receiving tomatoes with soil pH below 6.5, and ensure that there is enough water during flowering and fruit bulking to make sure those cell walls are stable in the fruit. If your soil pH is adequate, you can enhance your chances of avoiding end rot by applying gypsum (CaSO4) to the soil, which will not change the soil pH, but will give you abundant calcium and sulfur.
If blossom end rot is affecting your production of tomatoes or peppers, focus your energy on calcium, soil moisture, and variety selection. Some varieties are less prone to this problem. I have taken to growing cherry tomatoes for our project. They produce early and abundantly, they can be put into containers and not get crushed in the delivery process, and they are popular.
Tomato variety selection is important. If you are using this guide for a home garden, I’d suggest you consider growing several types of tomatoes based on your preferences. I really enjoy large slicing tomatoes. I would grow one or two of these in a back- or front-yard garden, but in a delivery program they will split in the delivery process and make a mess. Roma tomatoes are excellent for cooking and cooked side dishes. These can still split and make a mess, but if harvested not quite vine-ripe, you can do better with these. Cherry tomatoes are likely the best option for the community giving garden approach because they can be put into containers and delivered in the bag. They are very likely to arrive intact.
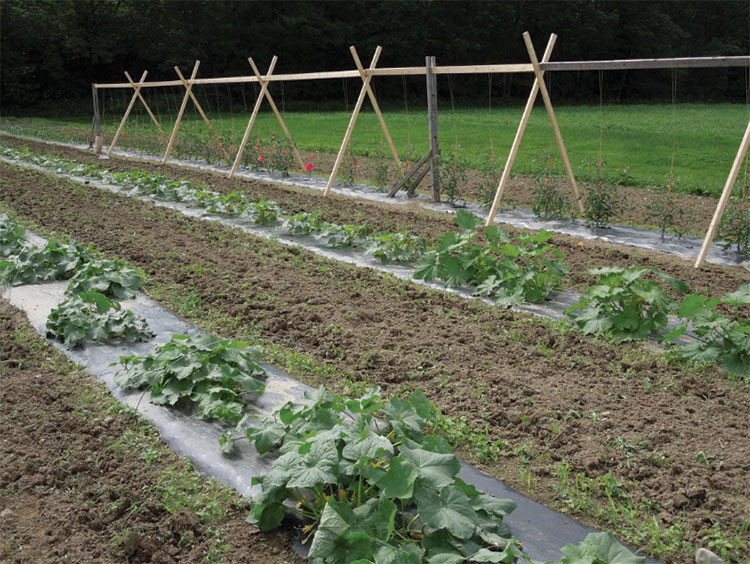
Culture of tomatoes begins with transplanting seedlings at 3-foot spacing with some form of a trellis structure/system to hold up the plant (Figure 32). If your tomato transplants have gotten lanky, you can bury the plant and roots will grow out of the lower stem. Feel free to plant these deeply as a result. If you have black plastic-covered rows, transplant a tomato plant every 3 feet. You can install a 6–8 foot bamboo cane to hold the plant up, cage it, or build an A-frame-style wooden trellis structure. From the top of the structure, a string can be tied to the top and dropped down to support the growing tomato plant. My complaint with wooden A-frame structures is that birds rest on them and poop on your fruit, which is not very appetizing. Some sort of bird repellent may be needed.
Watch for: Carefully water tomatoes to avoid soil splashing on lower leaves, which encourages early blight. Also watch for late blight. Don’t over fertilize with nitrogen.

For information about nutrition, selection, preparation, and storage of tomatoes, along with healthy recipes, see Bulletin #4178, Vegetables and Fruits for Health: Tomatoes.
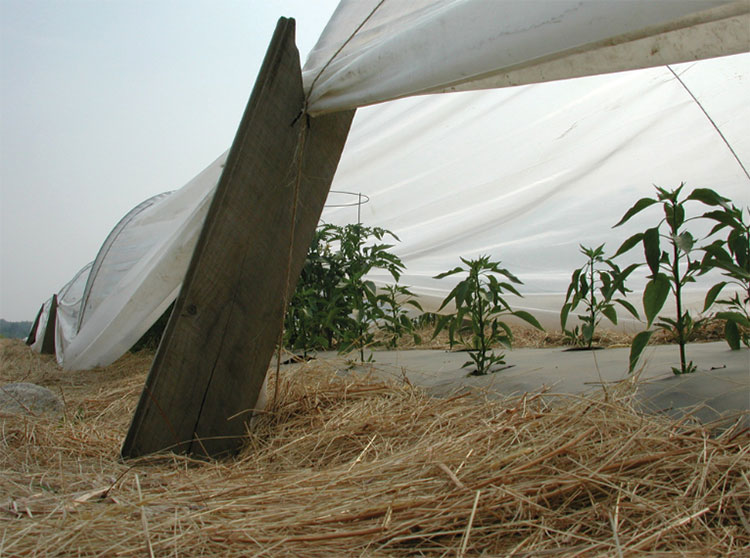
Row Covers with Tomatoes and Peppers
These plants like to be warm. That is why we plant them late and frequently use black plastic mulch to heat up the ground. We could use a row cover over peppers to add to the insulation and heat holding, but given that the growing point is at the top of the plant, you must use supports for peppers. Otherwise, the fabric will rub the growing point and destroy it when the wind blows. If the growing point would touch the row cover fabric, you must use supports.
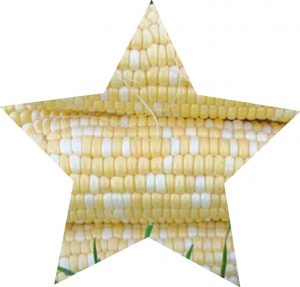
Sweet Corn
We make one or two deliveries of sweet corn to our recipients a year. Some people love it, but it is not my favorite plant to grow. Many things can happen to sweet corn before it arrives at the home of a food recipient that should make you think twice about growing it: space requirements, insects, and critter pressure.
Sweet corn seed should be sown at a 1-inch depth with 7 inches between seeds down the length of the row. Most people grow three rows of sweet corn to effect adequate pollination, but there must be at least two rows. If you can’t plant a long set of rows like we described for growing green beans, then you could potentially grow two 20-foot-long rows of corn in a 4-foot-wide bed and have about 60–70 corn ears to harvest. If you were supplying food to 40 people, you would need to have two big beds devoted to this, because most people would want 2–3 ears minimum in a delivery. That is a commitment of bed space that I would question supporting.
Then, there are the insect and critter issues. Corn earworms infest the tips and sides of the ears, and there is no effective organic treatment except to cut off the ear tip. You could tell your food recipients to do this, blanch the corn, and cut the kernels off the ear, but my guess is that they would take offense to seeing worms in the ear tips and throw away the ears. Then, there is the raccoon issue. They adore sweet corn, and most likely you will devote two beds to their happiness unless you can fence off the area with electric fencing. They typically attack the corn just when it is ready to harvest.
My suggestion is to see if a vegetable grower would let you glean a field for your single delivery. I bet they would let you do this. Harvest the day of the delivery, and your recipients will be happy.
Watch for: Pull the silks when you harvest. If they give way, earworms are present.
For information about nutrition, selection, preparation, and storage of sweet corn, along with healthy recipes, see Bulletin #4253, Vegetables and Fruits for Health: Sweet Corn.
Squash: Zucchini, Summer Squash, and Winter Squash
This is another plant with which I have a love-hate relationship. I love squash because it is productive and moderately easy to grow, provides bulk in the delivery bag, and has many uses. The production issues involve the room required to grow them, insect pressure, spiny leaves that can irritate your skin, and many food recipients’ lack of interest in eating squash. Some varieties of squash have less spiny habit.
Culture of squash is relatively easy. You can grow from seed or transplant. That flexibility is helpful in keeping a supply of all squashes into the fall. If you have black plastic–covered beds, transplant your squash on 3-foot centers. Use a similar spacing if you don’t have plastic, but you’ll have to weed more often. Your next row can be sown to seed (either at the same time or a week or 2 later). I sow three seeds per hill, and I tend to keep the strongest seedling of the three to continue to produce.
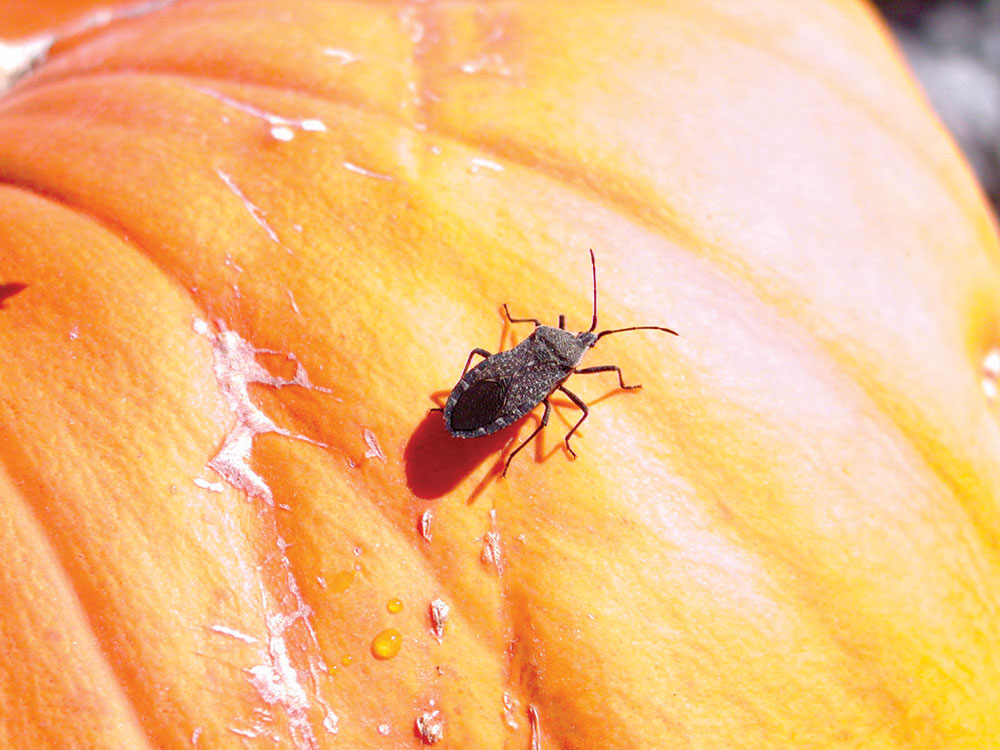
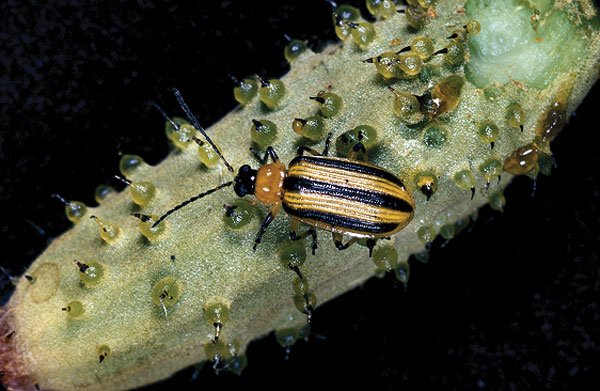
We have had lots of issues with cucumber beetles and squash bugs. If you cover the squash with row covers, that will effectively control the beetles and bugs until you must remove the covers so insects can pollinate the flowers. When you see blossoms, pull the row covers, and hopefully the plants are strong enough to be on their own against the insects. Continue to watch for these two insects. Squash bugs are “true” bugs that suck the juice out of your plant. They can transmit a bacterial disease that can make the plant turn yellow and die. Cucumber beetles just eat the plant.
Squash bugs lay bright shiny greyish brown eggs on the bottom side of leaves, so scouting is a good idea. I highly recommended that you kill the eggs. If cucumber beetle and/or squash bug populations get sufficiently high, you can treat the plants with the organic insecticide PyGanic, but it is annoying and difficult to kill the bugs because they tend to fly away when sprayed.
I prefer yellow zucchini to the standard green variety because they are easier to see. If you miss a green zucchini, the next time you harvest, you have a zucchini log, which is not ideal unless you want to make brownies or stuffed zucchini. A typical plant produces three, sometimes four, harvestable zucchini per delivery, so that will give you a sense of how many plants you need. Select varieties resistant to as many diseases as possible.
Culture of winter squash is like summer squash. The biggest thing to remember is that winter squash produces runners, which can take up a lot of room. They will run into another bed 4 feet away. Harvest is different because you generally harvest winter squash only one time when the fruit is ripe.
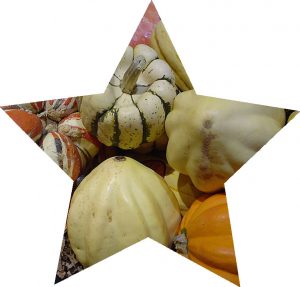
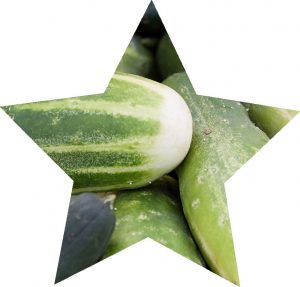
Cultivar types include acorn, butternut, and delicata. Each of these varieties produces 3–5 fruit per plant. You can determine ripeness of acorn squash by the patch on the bottom of the fruit. If the patch is orange, the fruit is done growing and is likely ripe. Delicata are long yellow squash that have green stripes. They are ripe when they turn from light tan to deeper yellow with bright deep green stripes. Butternut squash should be well-sized and deep tan in color, and the peduncle (the stem that holds the squash fruit to the plant) should be hard and dry and snap when you harvest them. The dry peduncle is the best measure for ripeness.
Watch for: Squash bugs and cucumber beetles will be your biggest concerns.
For information about nutrition, selection, preparation, and storage of squash, along with healthy recipes, see Bulletin #4257, Vegetables and Fruits for Health: Zucchini and Summer Squash and Bulletin #4176, Vegetables and Fruits for Health: Winter Squash and Pumpkins.
Cucumbers
Cucumbers are the number one favorite vegetable for senior food recipients of our program. They start asking for cucumbers when we deliver early harvested spring greens. So, this is one vegetable to transplant in a few varieties that come in at different times, and plan to sow some seeds to stretch out the harvest.
Culture is very similar to that of zucchini or summer squash. Cucumber beetle is the number one pest, so covering the plants with row covers is essential. I recommend that you select varieties resistant to powdery mildew and as many other diseases as possible. Most plants produce about 10 cucumbers per plant. So, if you plan to give a cucumber or two per delivery and if you have, say, 40 recipients, I’d plan on having 20 producing plants at a time. Make sure to spread those producing cucumbers over as much of the summer as possible.
Cucumbers can climb well. Growing some in small garden greenhouses can be a way to get some cucumbers early in the year.
Watch for: Cucumber beetles and powdery mildew on leaves.
For information about nutrition, selection, preparation, and storage of cucumbers, along with healthy recipes, see Bulletin #4254, Vegetables and Fruits for Health: Cucumbers.
University of Maine Cooperative Extension is an equal opportunity institution and provider committed to nondiscrimination. For more information, visit extension.umaine.edu/nondiscrimination.