Building an Accessible V-Bed Garden
Building an Accessible V-Bed Garden (Bulletin #2754)
By Richard J. Brzozowski, Food System Program Administrator University of Maine Cooperative Extension; reviewed by Kate Garland, Horticulturist University of Maine Cooperative Extension
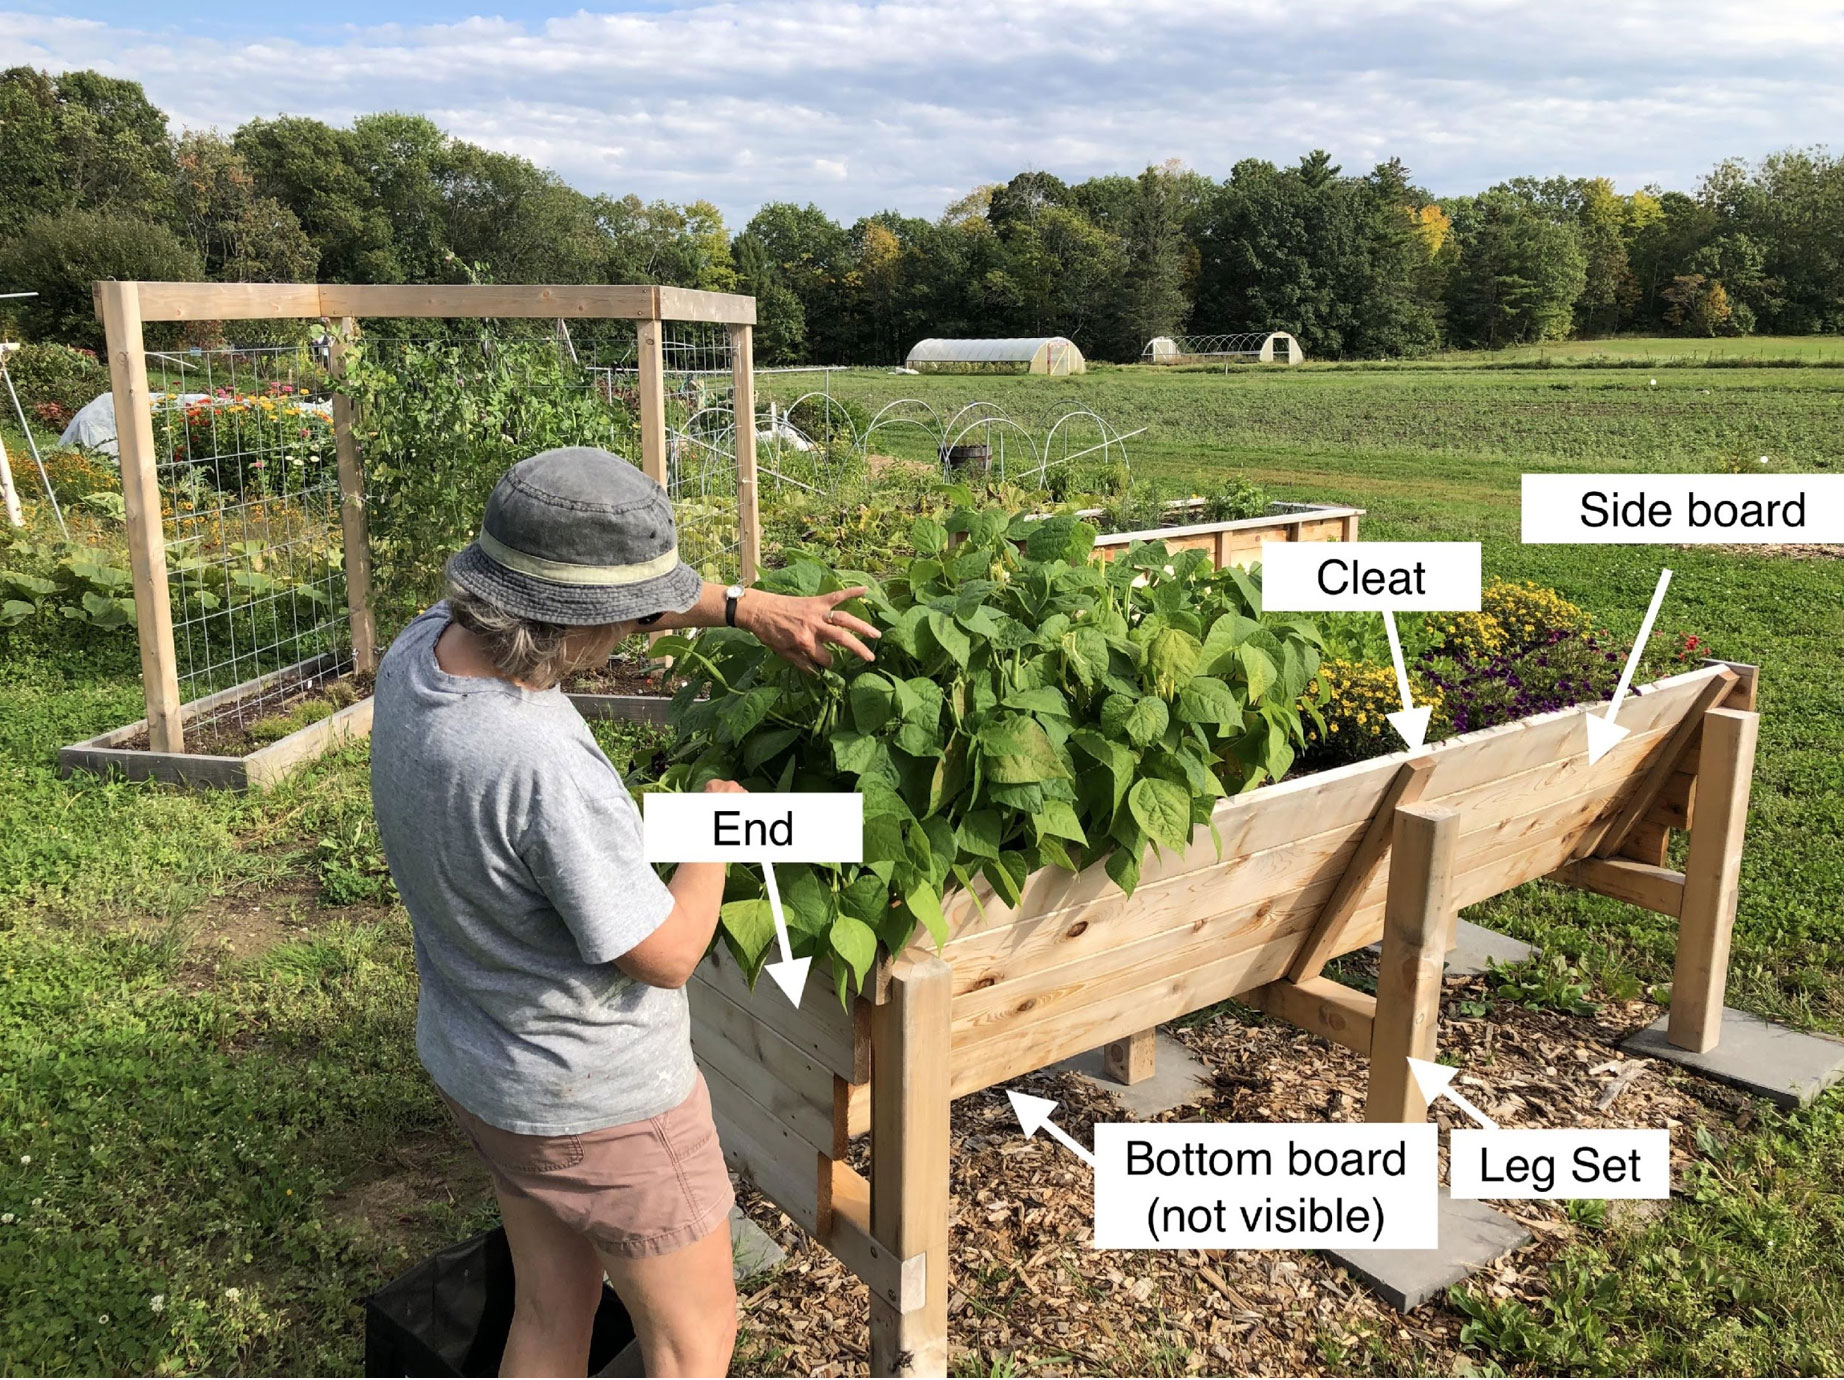
An accessible garden is designed for individuals in wheelchairs or others who may have limited ability to kneel, squat, bend or work at the ground level. Once constructed, the bed should be placed on a site that is fairly level and conveniently accessible. The garden may be lowered by cutting the legs to a suitable length or heightened by placing bricks or blocks under each leg.
Cedar is suggested for the wood to construct this garden bed, as cedar is naturally self-preserving. The life of this accessible garden bed is estimated to be about 10 years. The life of the garden could be extended by placing a concrete paver, brick or a slate piece under each leg.
The cost of the materials for this garden is estimated to be about $200.
Materials
- 12 pieces: 5/4 cedar decking 5 ½” x 8’
- 3 pieces: cedar posts 8’ x 4” x 4”
- Exterior-grade fasteners
- 21 (count) GRK 3” screws (or lag screws)
- 80 (count) 1 ¾” screws (or lag screws)
- 12 (count) 4” screws
Tools needed
- Portable circular saw, chop saw or crosscut handsaw
- Table saw
- Power screwdriver and a bit (or screwdriver)
- Power drill with the appropriate size drill bit and screwdriver bit
- Hammer
- Chisel
- Carpenter square
- Measuring tape
- Safety glasses
Construction Steps
Leg set construction
- Cut each of the three 8’ x 4” x 4” posts in 3 equal pieces. This will give you 9 pieces about 32” in length. Select 3 pieces for each leg assembly set.
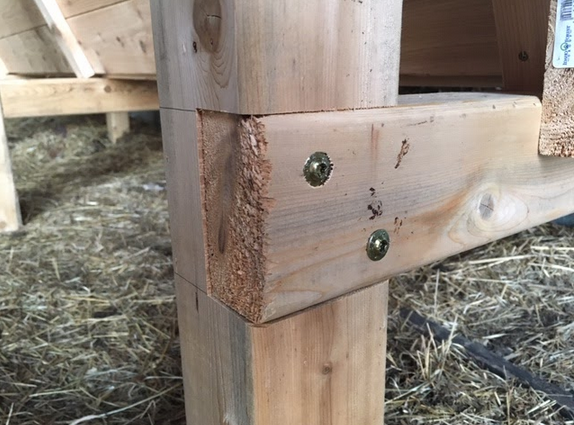
- For each set of 3 post pieces, measure to cut a dado joint (PDF) on two of the pieces at the 14” mark (these will be the vertical part of your leg sets). The third piece will have lap joints (PDF) cut on each end. The three pieces should fit together to form an “H.” Use the saw, chisel, and hammer to make the joints for a tight fit.
- Fasten the leg sets together using two GRK 3” screws (or lag screws) at each joint. A pilot hole for each screw will reduce the chance of splitting wood when screwing.
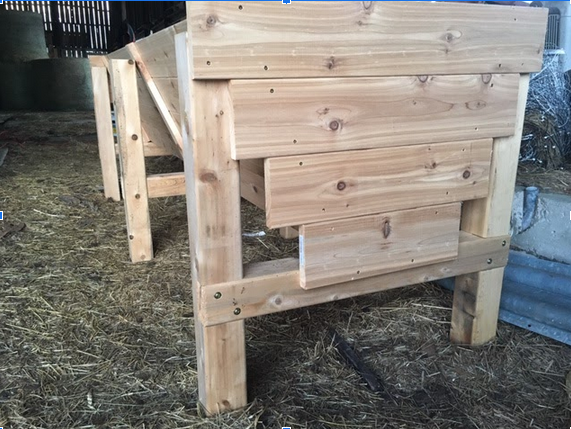
Create 6 cleats
- Rip one of the 8’ decking pieces in half lengthwise. Cut these narrow pieces to 22” in length. These 6 pieces will be the cleats for the sideboards of your garden bed (3 on each side of the V-bed).
Fastening of bottom board
- Make sure that nine pieces of the 5/4” decking are 8’ in length
- On a flat floor surface, place the assembled legs evenly apart. The two outer leg sets should be 8’ apart. The middle leg set should be set halfway between the two outer leg sets. With a pencil, mark the center of the horizontal piece on each leg set. Lay one 8’ decking across the leg sets. Make sure each leg set is square to the bottom board. Fasten the bottom board to each leg set using two or three 3” exterior screws or lag screws.
Sideboard assembly
- Lay out 4 pieces of the decking on a flat surface, making sure all ends are flush with each other. With appropriate fasteners (no longer than 2” in length) assemble 4 sideboards of the garden using three pieces 2 ¾” x 22” cleats. One cleat on each end of the assembly and one cleat in the middle. Repeat this for what is to be the other side of the V-bed
- With the cleats on the outside, place each sideboard onto the leg sets forming a “V”. Check again to make sure that the legs are square. Drill pilot holes at the top and base of the sideboard and through cleats at each of the three leg sets (both sides). See red lines indicating pilot hole location in photo. Fasten the sideboards to each leg set using 4” exterior screws (or lag screws) at each pilot hole drilled (at the top and base of the sideboard).
Assembling ends
- Cut each of the remaining two pieces of decking into four pieces: 32”, 26.25”, 21.25”, and 16.5”. Fasten each piece horizontally to the leg sets at each end to enclose the bed.
Filing the garden bed
- Once the garden is located at the selected site (level, receiving full sun, and close to a water source), fill the garden with a mixture of topsoil and compost (50/50).