Vacuum Sealing Safely at Home
— By Tom Loder, UMaine Extension Master Food Preserver Volunteer
Have you been looking for an easy way to pack and store your items in your freezer? Want to avoid bulky plastic containers and aluminum foil that never seems to prevent that pesky freezer burn? Then vacuum sealing might be the option for you!
Vacuum sealing is a food storage method that works by removing the oxygen from food packaging using vacuum suction. Forming a tight seal around the food prevents additional oxygen from entering the package, creating a Reduced Oxygen Package or ROP. While you may be familiar with commercially-vacuum sealed items such as meats and fish, a home vacuum sealer can help you prepare many items for either short-term shelf or refrigerator storage or for longer-term storage in the freezer.
Some of the major benefits to choosing vacuum sealing over other methods of freezing are:
- Reduced dehydration and freezer burn.
- Better preservation of color, texture and flavor for longer and also reduces the risk of bacteria survival during the freezing process.
- Personalized portioning of bulk items, increasing convenience and reducing food waste.
Along with canning and dehydrating, vacuum sealing is a huge part of my family’s food preservation and storage planning, as we buy lots of foods in bulk, especially meat and fish, and this helps us portion out large packages into meal-sized portions that can be easily stored in our chest freezer. However, it is important to note that vacuum sealing is not without risks and does not work well for all foods.
- Vacuum sealing alone is not a method of food preservation and, unlike canning, does not make foods shelf stable. Once products are vacuum sealed, they must still be properly stored, whether on the shelf, in your refrigerator, or in your freezer.
- While vacuum sealing removes oxygen and creates a barrier against additional pathogens, vacuum sealing does not kill pathogens that may already be present in the food you are sealing. Additionally, anaerobic pathogens, such as botulism, can still be present in a reduced oxygen packaged environment.
- Special care must be taken with vacuum-sealed fish to reduce the risks associated with botulism spores. When thawing vacuum-sealed, first remove the frozen fish from the vacuum-sealed packaging before allowing it to thaw.
- Fragile items such as breads and soft fruits, vegetables, and shellfish can be vacuum sealed, but care must be taken as these items can often be damaged by the pressure from the machine.
- Sealing wet items such as meats or fish or liquid items such as soups takes extra effort, and lower-quality vacuum sealer models may not be equipped to handle this. Using the appropriate setting on your vacuum sealer for the liquid content of your item is important both to ensure proper oxygen removal and to ensure that the vacuum bags seal tightly as excess moisture prevents sealing.
Step-by-Step Guide to Vacuum Sealing Bulk Chicken
Choosing a good vacuum sealer is important, as not all models are able to handle all types of foods. A low-cost vacuum sealer, often made of plastic, can be obtained for under $50. However, these models may not have settings for different moisture levels and may be of questionable quality (my initial plastic model cost $35, could not handle any amount of moisture, and lasted less than 2 years). Fancier models with more settings and larger models designed for vacuum sealing commercial meat cuts or deer cuts are also available, but can cost from several hundred to several thousand dollars.
Food safety and hygiene is paramount. Before beginning, it’s important to make sure all of your tools and your workspace is clean and sanitized. Additionally, wear a clean apron and wash your hands thoroughly before beginning and any time throughout the process after handling raw meat.
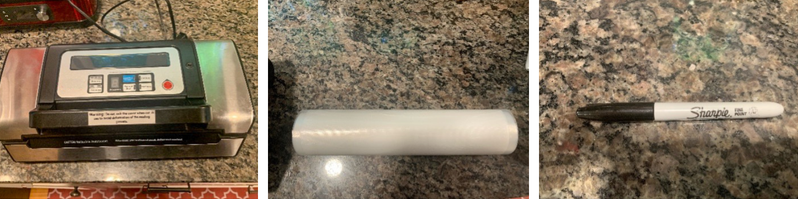
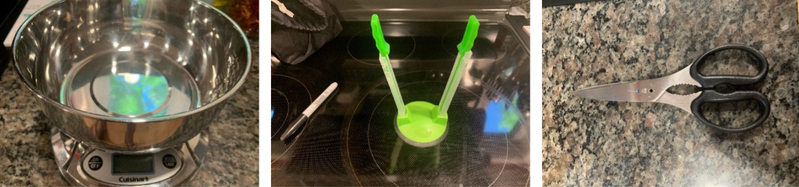
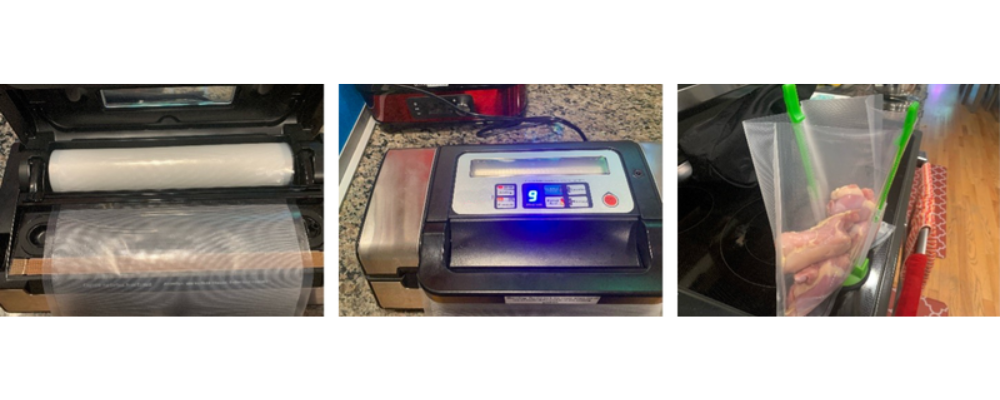
First, it’s important to gather all of the tools you will need for your sealing project. I have my vacuum sealer, vacuum seal bag roll, permanent marker for labeling and dating sealed bags, kitchen scale (I did not use this this time, as these items were already pre-cut and did not need weighing), bag holder (allows for easy bag filling and cuts down on foodborne contamination) and, scissors which can be used both to cut vacuum seal bags and to cut open food packaging.

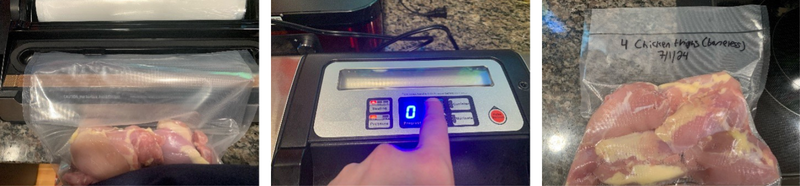
My model of vacuum sealer has an attached cutter that allows me to cut individual bags off of my roll. If your model does not have an attached cutter, you will need a pair of scissors to cut this item manually. Using this manual seal setting, I am able to seal one end of each bag to create a bag to hold each portion of chicken. I then attach a bag to my bag holder and add my chicken, taking care not to allow either the chicken or my hands to touch the outside of the bag. After washing my hands thoroughly, I remove the bag from the holder, I bring the bag of chicken back over to the vacuum sealer and place the unsealed end into the vacuum seal chamber and make sure the lid firmly closes and holds the bag in place (this is key to ensure both that the vacuum can suction and that the heat strip can seal). As this chicken is relatively dry, I can keep my sealer on the dry setting. However, for more moist cuts of meat or cuts of meat with more blood, I will use the moist setting to ensure good vacuuming and sealing. I will then make sure to choose “Vacuum and Seal”. Once complete, it’s important to properly label and date your item. This chicken will now go in my chest freezer. After all of my meat is sealed and in the freezer, it is important to clean and sanitize all tools, including the vacuum sealer, especially if any meat comes in contact with the machine.